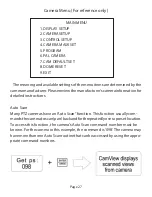
re-initialized. To initialize the Address Search feature, select the Device set-
ting menu, and use the arrow keys to select Address search and change its
status from off to on. After pressing ENTER to apply the change, return to the
main menu by pressing MODE. The Address search feature has now been
added to the main menu, and in a few seconds, the product will select this
feature.
The product settings for Protocol, Port, Baud, and Address will be displayed.
If the Protocol, Port, or Baud settings are not correct for the system being
tested, press the SET key and use the arrow keys to select the proper values.
Press SET again to lock these settings. The present Address is displayed. Press
the arrow keys to see if the camera responds.
Connecting the video output of the camera to the CamView PTZ will allow
the user to easily determine if the camera position moves. The video image
is displayed as a background to the Address search screen. If no response
is obtained, the Address can be manually incremented (or decremented),
or automatically incremented (or decremented). A message at the bottom
of the screen is a reminder of how to access these functions. ‘Far Near- Start
search’ means that pressing the FAR or NEAR keys will start the automatic Ad-
dress Search. Pressing the NEAR key causes the address setting to decrement
in value. Pressing the FAR key will cause the addressing setting to increment
in value.
As the address values are changed, a PTZ pan signal is sent to the camera
to test if the newly assigned address will control the camera. If the camera
position is seen to move as the test progresses, the camera address has been
found, and may be passed. Press any key to stop the search. The ‘Wid Tele-
Adjust addr’ message at the bottom of the screen means that pressing the
WIDE or TELE keys will manually increment or decrement the address while
simultaneously sending a PTZ pan signal to the camera. Press these keys to
find the PTZ address that controls the camera. To exit Address search, press
the MODE key.
Page 35
Summary of Contents for CamView PTZ 2
Page 1: ...REV A 10 13 CamView PTZ 2 TM Instruction Manual PN 8001 ...
Page 2: ......
Page 10: ...Page 8 2 3 Controls and Indicators 1 2 3 4 5 6 7 8 9 10 11 12 13 14 15 16 17 18 19 20 ...
Page 43: ...Notes ...
Page 44: ......

