background image

10

APS systems must be connected to a grounded, permanent wiring system. For most installations,
the negative battery conductor must be bonded to the grounding system at one (and only one)
point in the system. All installations must comply with national and local codes and ordinances.

When figuring the power requirements of your equipment, do not confuse “continuous” power 
ratings with “peak” power ratings. Electric motors require more power to turn on (“peak power”) 
than they require to run continuously. “Peak” power ratings are usually 2 to 5 times “Continuous”
ratings. Most electric motors require “peak power” only when they are first turned on. The electric
motors in equipment such as refrigerators and sump pumps, however, constantly turn on and off
according to demand. These motors require “peak power” at multiple, unpredictable times during
their operation.

You must use GFCI protection (user-supplied) on output circuits; use the Leviton Type 6599.

You must use branch circuit protection (user-supplied) on input circuits: 15 amp protection on the
APS1012UL and 40 amp protection on the APS2012UL.

Consult a qualified electrician and follow all applicable electrical codes and requirements.

HARDWIRE PROCEDURE

1. Remove screws and cover plate from your APS’s Hardwire AC electrical box. Remove the

knockout covers closest to the desired electrical source and to your equipment. 

2. Attach .5 in. dia. conduits (user-supplied) to the knockouts and thread your wires through.

3. Connect the conduits with the ground bond connection supplied. 

(See Diagram 4, p. 35)

4. Connect the incoming ground wire to the GROUND IN (green & yellow) terminal.

5. Connect the outgoing ground wire to the GROUND OUT (green & yellow) terminal.

6. Connect the incoming hot wire to the HOT IN (brown) terminal.

7. Connect the incoming neutral wire to the NEUTRAL IN (blue) terminal.

8. Connect the outgoing hot wire to the HOT OUT (black) terminal. 

9. Connect the outgoing neutral wire to the NEUTRAL OUT (white) terminal. 

10. Tighten and affix strain reliefs. Replace cover plate and tighten screws.

AC Connection

Before AC connection, match the power requirements of your 

equipment with the power output of your APS to avoid overload.

Hardwired Electrical Connections 

(All hardwire models)

(See Diagram 3, p. 36)

DC Ground Connection

Battery Connection

continued

200201192 UL-Listed APS Manual.qxd  5/17/02  12:41 PM  Page 10

Summary of Contents for APS 1024 INT

Page 1: ...ctions 4 Configuration Connection 5 Features 11 Maintenance and Service 14 Copyright 2002 Tripp Lite PowerVerter is a registered trademark of Tripp Lite All rights reserved APS PowerVerter Power Inverters 120V 60 Hz Voltage and Frequency Controlled Peak Power High Efficiency Warranty 14 Troubleshooting Español 18 Specifications 16 15 C US UL ...

Page 2: ...ad Protection If you overload your APS it will automatically protect itself and your valuable batteries from damage Fast Load Switching If AC power goes down your APS will switch over to providing battery backup power in 6 milliseconds or less so that your equipment will operate with no interruption Multi Function Indicator Lights Several sets of multifunction indicator lights keep you constantly ...

Page 3: ...an be set to either Wet or Gel cell Load Sharing Your APS can be set to limit its own battery charging current so it can charge its batteries at the quickest rate possible without overloading its power input circuits Frequency Controlled Inverter Output Your APS has frequency controlled inverter out put which allows devices dependent on AC line frequency such as computers VCRs CD play ers tape rec...

Page 4: ...pt well ventilated Sparks may result during final battery connection Always observe proper polarity as batteries are connected Do not allow objects to contact the two DC input terminals Do not short or bridge these terminals together Serious injury to property or person could result Equipment Connection Warnings Do not use Tripp Lite APS Systems in life support applications where a malfunction or ...

Page 5: ...t High AC Voltage Switch To Battery Point DIP Switch 2 Group A Voltage Switch Position 145V Up 135V Down Select Low AC Voltage Switch To Battery Point DIP Switches 4 Group A 3 Group A Voltage Switch Position 105V 4 Up 3 Up 95V 4 Up 3 Down 85V 4 Down 3 Up 75V 4 Down 3 Down Most loads will perform adequately when your APS s High AC Voltage Point DIP Switch 2 is set to 135V and its Low AC Voltage Poi...

Page 6: ...charger output to keep the sum of their AC load and charger power within their circuit breakers rating This charger limiting function has four settings allowing you to choose less charger limiting for APS configurations with higher rated breakers The figures below show how to set your DIP Switches to select how heavy a load can be placed on your APS before charger limiting begins Configuration con...

Page 7: ...fault setting Limit Battery Charger DIP Switch 4 Group B Your APS has a high powered charger To prevent it from overheating smaller batteries its charg er is initially set to deliver only a fraction of its maximum power rating to connected batteries If you are using it with a larger battery or battery system over 100 amp hours you may switch your charger to full power without overheating your batt...

Page 8: ... Amp Hour ratings of batteries are usually given for a 20 hour discharge rate Actual Amp Hour capacities are less when batteries are discharged at faster rates batteries discharged in 55 minutes provide only about 50 of their listed Amp Hour ratings while batteries discharged in 9 minutes provide as little as 30 of their Amp Hour ratings The wattage rating is usually stated in the equipment s manu...

Page 9: ...Using longer cables or cables of a smaller gauge could result in dangerous overheating or fire APS models are capable of delivering a much higher wattage output for brief periods of time Wiring should be configured to handle this brief high current draw Though your APS is a high efficiency converter of electricity its rated output capacity is limited by the length and gauge of the wires running fr...

Page 10: ...012UL and 40 amp protection on the APS2012UL Consult a qualified electrician and follow all applicable electrical codes and requirements HARDWIRE PROCEDURE 1 Remove screws and cover plate from your APS s Hardwire AC electrical box Remove the knockout covers closest to the desired electrical source and to your equipment 2 Attach 5 in dia conduits user supplied to the knockouts and thread your wires...

Page 11: ... completely turn off the APS and connected equipment or to reset the APS after it has shut down due to overload or overheating See Diagrams 10a and 10b p 38 39 to locate the following switches indicator lights and other features 1 Operating Mode Switch This switch selects the APS operating mode either AUTO REMOTE OFF or CHARGE ONLY See Set Operating Mode Switch p 11 to select the optimum setting f...

Page 12: ...sh intermittently after the APS s inverter shuts down due to a severe overload or overheating If this happens turn Operating Mode Switch OFF Remove the overload and let the unit cool You may then turn the APS ON after it cools 7 BATTERY HI MED LO These three lights will turn ON in several sequences to show the approximate charge level and voltage of your connected battery bank and alert you to sev...

Page 13: ...t panel has an RJ45 receptacle for use with the option al remote module See the installation instructions packed with the remote module 14 Load Sense Potentiometer In order to save battery power the APS s inverter automatically shuts off when no load is connected When the unit detects a load it automatically turns the inverter on Users may choose the minimum load the APS will detect by adjusting t...

Page 14: ...a brief description of the problem encountered and proof of date and place of purchase This warranty does not apply to equipment which has been damaged by accident negligence or misapplication or has been altered or modified in any way This warranty applies only to the original purchaser who must have properly registered the product within 10 days of purchase EXCEPT AS PROVIDED HEREIN TRIPP LITE M...

Page 15: ...attery fuse is blown Check and replace fuse Battery cabling is loose or degraded Check and tighten or replace cabling APS charger failure Turn APS OFF Wait 1 minute and switch to AUTO REMOTE If automatic shutdown occurs call Tripp Lite Customer Service All APS Indicator Lights are This is normal if the APS is set OFF AC input absent to CHARGE ONLY All APS Indicator Lights are Excessive battery dis...

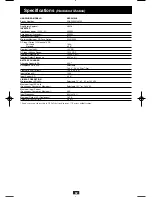
Page 16: ...acity DC 10 A Acceptance Volts VDC Selectable 14 4 V 14 2 V Wet Gel Float Volts VDC w gel 13 3 V 13 6 V Input Voltage AC 120 V Input Current AC 1 4 A LINE VAC OPERATION Minimum Input AC Volts Selectable 75 85 95 or 105 VAC Maximum Input AC Volts Continuous Charger at Maximum Selectable 135 or 145 VAC Maximum Input Current Continuous Charger at Maximum 12 A Input Frequency 60 Hz 10 Maximum Output A...

Page 17: ...ency 60 Hz 3 BATTERY CHARGER Charging Capacity DC 20 A Acceptance Volts VDC Selectable 14 4 V 14 2 V Wet Gel Float Volts VDC w gel 13 3 V 13 6 V Input Voltage AC 120 V Input Current AC 4 2 A LINE VAC OPERATION Minimum Input AC Volts Selectable 75 85 95 or 105 VAC Maximum Input AC Volts Continuous Charger at Maximum Selectable 135 or 145 VAC Maximum Input Current Continuous Charger at Maximum 29 A ...

Page 18: ...d importantes 21 Configuración y conexión 22 Características 28 Mantenimiento y servicio 31 2002 Tripp Lite PowerVerter es una marca registrada de Tripp Lite Todos los derechos reservados APS PowerVerter Inversores de energía 120V 60 Hz Voltaje y frecuencia controlada Energía pico Alta efectividad Garantía 31 Solución de problemas Ficha técnica 33 32 C US UL ...

Page 19: ... sobrecargas Si sobrecarga el APS éste se protegerá automáticamente de daños a sí mismo y a sus valiosas baterías Conmutación de carga rápida Si la energía de CA se corta su APS conmutará para proporcionar energía de respaldo de batería en 6 milisegundos o menos de modo que su equipo operará sin interrupciones Luces indicadoras de múltiples funciones Varios juegos de luces indicadores de múltiples...

Page 20: ...s propias funciones de carga de modo que puedan cargar sus baterías a la velocidad más rápida posible sin sobrecargar sus circuitos de salida de energía Salida del inversor de frecuencia controlada Todos los modelos de APS están provistos de una salida de inversor de frecuencia controlada lo cual permite que los dispositivos que dependen de una frecuencia de línea AC como las computadoras videogra...

Page 21: ...xión definitiva de la batería se produzcan chispas Siempre observe la polaridad adecuada al momento de conectar las baterías No permita que diferentes objetos hagan contacto con las dos terminales de salida de CC No permita que estos terminales hagan corto circuito o hagan puente juntos Podrían producirse serios daños a la propiedad o lesiones personales Advertencias sobre la conexión de equipos N...

Page 22: ...uptor de voltaje de CA Alto al punto de batería Interruptor DIP 2 Grupo A Voltaje Posición del interruptor 145V Arriba 135V Abajo Seleccione el interruptor de voltaje de CA Bajo al punto de batería Interruptores DIP 4 Grupo A y 3 Grupo A Voltaje Posición del interruptor 105V 4 Arriba y 3 Arriba 95V 4 Arriba y 3 Abajo 85V 4 Abajo y 3 Arriba 75V 4 Abajo y 3 Abajo La mayoría de las cargas tendrán un ...

Page 23: ...ben posicionarse con una pequeña herramienta de acuerdo a las pautas que se señalan a continuación El Interruptor DIP 3 Grupo B debe conservarse en posición UP cuando usted no iguale las cargas de las baterías El Interruptor DIP 4 Grupo B tiene diferentes funciones o ninguna función dependiendo del modelo del APS Carga Compartida Interruptores DIP 1 Grupo B y 2 Grupo B El APS incluye un cargador d...

Page 24: ...tor DIP 4 Grupo B Para impedir el sobrecalentamiento de las baterías más pequeñas el cargador de estos inversores se posiciona inicialmente para suministrar sólo una fracción de la potencia máxima nominal a las baterías conectadas Si usted está usando cualquiera de estos sistemas APS con una batería más grande o sistema de baterías más de 100 amperios hora podrá cambiar el cargador a potencia comp...

Page 25: ...r lo general a un régimen de descarga de 20 horas Las capacidades reales de amperios hora son menores cuando las baterías se descargan a mayor velocidad las baterías que se descargan en 55 minutos proporcionan sólo alrededor de 50 de los índices de amperios hora listados mientras que las baterías cuya descarga se realiza en 9 minutos sólo proporcionan el 30 de los índices de amperios hora Por lo g...

Page 26: ... cable calibrador 2 0 para conectar la batería El cable de conexión de la batería debe ser lo más corto posible y nunca medir más de 6 5 m 20 pies Si se utilizan cables más largos o cables de un calibre más pequeño puede provocarse un sobrecalentamiento peligroso o un incendio Los modelos del APS tienen la capacidad de producir un vataje de salida mucho más alto por breves periodos de tiempo El ca...

Page 27: ...uitos de salida debiendo usarse el Tipo Leviton 6599 Se deberá usar la protección de circuito derivado no incluido en los circuitos de entrada Protección de 15 amperios en el APS1012UL y protección de 40 amperios en el APS2012UL Consulte a un electricista calificado y siga los siguientes códigos y requisitos eléctricos aplicables PROCEDIMIENTOS DE CONEXIÓN DIRECTA AL CIRCUITO 1 Retire los tornillo...

Page 28: ...e haya apagado como consecuencia de una sobrecarga o una interrupción en el suministro de energía eléctrica Refiérase a los Diagramas 10a y 10b en las páginas 38 39 para ubicar los siguientes interruptores luces del indicador y otras características 1 Interruptor de modo de operación Este interruptor selecciona el modo de operación del APS ya sea AUTO REMOTE OFF o CHARGE ONLY Refiérase a la secció...

Page 29: ... se apague como consecuencia de una sobrecarga o sobrecalentamiento severos Si esto sucede APAGUE el interruptor de modo de operación Retire la sobrecarga y deje que la unidad se enfríe Puede ENCENDER el APS después que se haya enfriado 7 BATTERY HI MED LO BATERÍA HI MED LO Estas tres luces se encenderán en varias secuencias para mostrar el nivel de carga y el voltaje aproximados del banco de bate...

Page 30: ...remoto El panel frontal cuenta con un receptáculo RJ45 que se usa con el módulo remoto opcional Refiérase a las instrucciones de instalación incluidas con el módulo remoto 14 Potenciómetro sensor de carga Con el fin de ahorrar energía de la batería el inversor del APS se apaga automáticamente cuando no se encuentra conectada ninguna carga Cuando la unidad detecta una carga se enciende automáticame...

Page 31: ...roblema encontrado así como los documentos que prueben la fecha y lugar de compra Esta garantía no se aplica a equipo que haya sido dañado por accidentes negligencia o uso inapropiado o que haya sido alterado o modificado de cualquier forma Esta garantía se aplica solamente al comprador original quien debe haber registrado adecuadamente el producto dentro de los 10 días posteriores a la compra CON...

Page 32: ...r del APS Apague el APS Espere un minuto y cambie a AUTO REMOTE Si se apaga automáticamente llame al Departamento de Servicio al cliente de Tripp Lite Todas las luces del indicador Esto es normal si el APS se APS están apagadas encuentra en CHARGE ONLY entrada de CA no disponible Todas las luces indicadoras Descarga excesiva de batería Use un cargador auxiliar para elevar del APS están apagadas la...

Page 33: ...ceptación de voltios VCC Seleccionable 14 4V 14 2 Húmedo Gel Voltios flotantes VCC c gel 13 3 V 13 6 V Voltaje de entrada CA 120 V Corriente de entrada CA 1 4 A OPERACIÓN DE LÍNEA VCA Voltios de CA mínimo de entrada Seleccionable 75 85 95 ó 105 VCA Voltaje de CA máximo de entrada Continuo cargador al máximo Seleccionable 135 ó 145 VCA Voltaje máximo de corriente de entrada Continuo cargador al máx...

Page 34: ...CARGADOR DE BATERÍA Capacidad de carga de CC 20 A Aceptación de voltios VCC Seleccionable 14 4V 14 2 Húmedo Gel Voltaje flotante VCC c gel 13 3 V 13 6 V Voltaje de entrada CA 120 V Potencia de entrada CA 4 2 A OPERACIÓN DE LÍNEA VCA Voltaje mínimo de entrada de CA Seleccionable 75 85 95 ó 105 VCA Voltaje máximo de entrada de CA Continuo cargador al máximo Seleccionable 135 ó 145 VCA Voltaje máximo...

Page 35: ...nal green yellow 3 5 is the GROUND OUT terminal green yellow 3 6 is the HOT OUT terminal black and 3 7 is the NEUTRAL OUT terminal white Refiérase a la sección Conexiones eléctricas directas al circuito pg 27 3 1 representa la placa de cobertura 3 2 representa el conector de entrada de CC 3 3 representa el terminal HOT IN marrón 3 4 representa el terminal NEUTRAL IN azul 3 5 representa el terminal...

Page 36: ...Inverter s Nominal Input Voltage See specs Refiérase a la sección Conexión de baterías Pág 26 6 1 representa el fusible X Voltaje nominal de entrada del inversor del APS Refiérase a la ficha técnica See Battery Connection Pg 9 7 1 is the fuse X Your APS s Inverter s Nominal Input Voltage See specs Refiérase a la sección Conexión de baterías Pág 26 7 1 representa el fusible X El voltaje nominal de ...

Page 37: ...le Advanced 12VDC Vehicular Battery Connection See Pg 9 9 1 is the alternator 9 2 is a battery isolator 9 3 is the vehicle battery ground 9 4 is an auxiliary vehicle battery 9 5 is the vehicle battery 9 6 is the fuse Conexión avanzada de batería vehicular de 12VCC Refiérase a la Pág 26 9 1 representa el alternador 9 2 representa un aislador de batería 9 3 representa la batería del vehículo con con...

Page 38: ...16 Ground Connector Block 1 Interruptor de modo de operación 2 Interruptor DIP Grupo A 3 Interruptor DIP Grupo B 4 LINE 5 INV Inversión 6 LOAD 7 BATTERY HI MED LO 8 Terminales de entrada de CC 9 Receptáculos de CA sólo modelos con cable 10 Cable de línea de entrada de CA fijo sólo modelos con cable 12 Interruptor automático reconfigurable 13 Conector de módulo remoto 14 Potenciómetro sensor de car...

Page 39: ...s only 16 Ground Connector Block Rear panel not shown 1 Interruptor de modo de operación 2 Interruptor DIP Grupo A 3 Interruptor DIP Grupo B 4 LINE 5 INV Invierte 6 LOAD 7 BATTERY HI MED LO 8 Conector de entrada de CC 11 Bloque de terminales de entrada salida de CA sólo los modelos con conexión directa al circuito 12 Interruptor automático reconfigurable 13 Conector de módulo remoto 14 Potenciómet...

Page 40: ...93 2035 200201192 40 ...

Reviews: