4
RAID Mode
Setting the RAID Mode
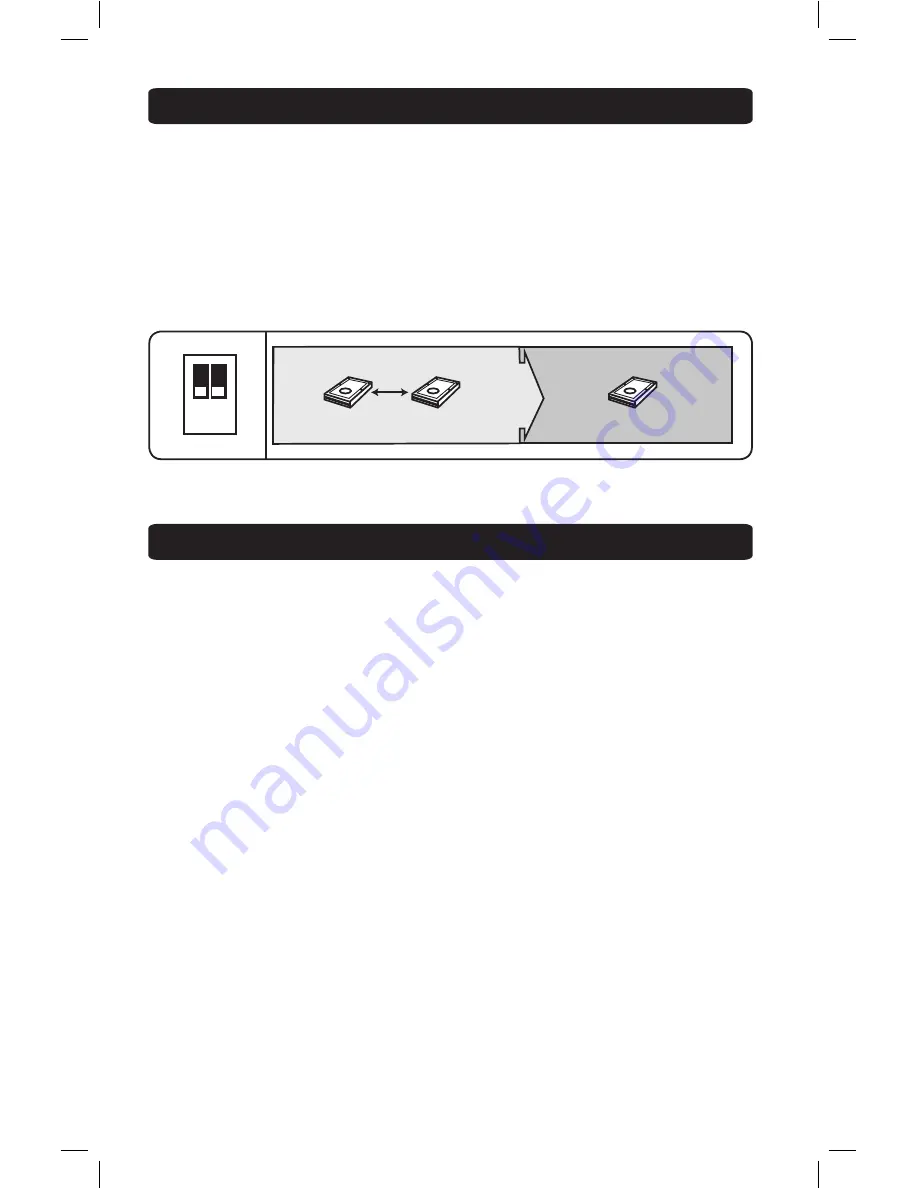
RAID 1 Mode –
This mode creates two mirror disk drives for the purpose of data
redundancy. If one drive fails, the other drive serves as a back-up. When using this
mode, it is recommended that you use hard drives with the same capacities. If hard
drives of different capacities are used, the storage capacity will be limited to that of
the smaller drive, with the remaining space on the larger drive going unused.
Note:
In RAID1 mode, if one of the drives fails, the Red LED to the right of the hard drive tray will
blink. Replacing the drive will cause the enclosure to automatically enter rebuild mode, in which
the Red LED will continue to blink to indicate that the RAID1 array is being rebuilt. Depending on
the size of the drives, this may take several hours to a full day.
ON
1 2
2 Disk Volume
SATA1 1000G
MIRROR
SATA2 750G
750G
1 Disk Volume
Note:
Make sure that you back up any important data prior to changing the enclosure’s RAID
mode. Initializing the RAID mode will erase all data on your hard drives.
When Powered On:
1. Install the hard drives in the enclosure according to the Installation Instructions
section in this manual, powering on the unit.
2. By default, the dip switches on the back of the unit are both set to the OFF (Up)
position, which will display the hard drives in
Normal
mode.
3. Set the dip switches on the back of the unit according to the desired mode. See
the RAID Mode section in this manual for each mode’s dip switch configuration.
Note:
When changing from RAID 1 mode to another mode, you must first switch to RAID 0
mode. Once set to RAID 0 mode, you can change to any other mode.
4. After setting the dip switches accordingly, press and release the Reset button on
the back of the unit.
5. After a couple of seconds, your drives will be configured according to the mode you
have selected. The new drive will not be formatted, and will need to be formatted
using your computer’s Disk Management utility.
13-10-121-9332DF.indd 4
10/25/2013 2:43:04 PM


