background image

Assembly Instruction - Triton Vuoksa 2 advanced 

Touring kayak 


QR-Code assembly video: 


Summary of Contents for Vuoksa 2 advanced

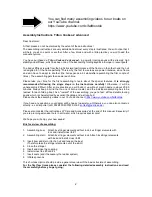
Page 1: ...Assembly Instruction Triton Vuoksa 2 advanced Touring kayak QR Code assembly video...

Page 2: ...20 30 minutes Always keep in mind that no one is born a master and the individual assembling has to be learned for each folding boat As a reward of the assembling you get a fast stiff and stable touri...

Page 3: ...Sleeves small 4 2x Sleeves big 5 2x Bent coaming rod wider diameter 6 4x Coaming rod wider diameter 7 Keel ladder with riveted half tube 8 Keel ladder with hemispherical ends 9 2x Keel fork identical...

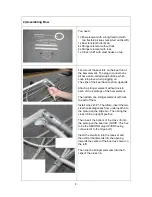
Page 4: ...a stringer element without lock to each of the 4 pickups of the bow element Then attach one stringer element with lock to each of them Install cross rib 1 Therefore insert the two steel hooks diagonal...

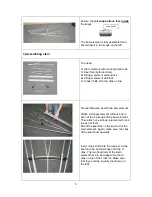
Page 5: ...wise as with the bow element Attach a stringer element without lock to each of the 4 pickups of the bow element Then attach one stringer element with lock to each of them Mount the keel fork on the ke...

Page 6: ...pread out the hull Then insert the bow element into the hull Make sure to place the frame centered Now push the frame flatly into the bow It is best to kneel inside the boat and take the frame at the...

Page 7: ...e frame flat into the bow and as far as you can Make sure to take the filling tubes for the sponsons between the stringer elements Again make sure to insert the stern element centrally Orientate at th...

Page 8: ...e the keel and will avoid any blockage You can pull up bow and stern without any problem The skin can flex and the frame won t jam You see this very clearly on the pictures on the left If the stringer...

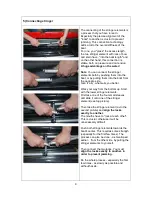
Page 9: ...it a try what suits you better Work your way from the bottom up Start with the lower stringer elements First take one of the four small sleeves and slide it onto one of the stringer element see top p...

Page 10: ...at the process with the remaining 3 stringer elements from bottom to top Especially at the beginning you have to practice a bit until you find the right way But then it is surprisingly easy The gratit...

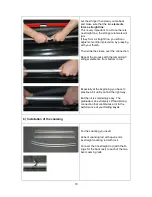
Page 11: ...rather than from above This creates a straight line and prevents jamming inside the channel Thus the rods are much easier to push into the channel Then connect the coaming rod with the pickup element...

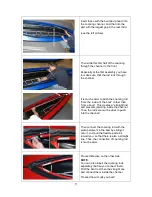
Page 12: ...nger NOTE On the pictures you see the same procedure done on a Ladoga 2 advanced where the seat cloths are already installed Align both locks exactly on another Then press the rods slightly downward o...

Page 13: ...it suits you best 7 Installation of the cockpit cross ribs and installation of the seats Now you will need the two remaining cross ribs Cross rib 2 narrower the upper one in the picture on the left Cr...

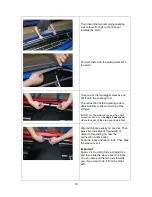
Page 14: ...Ladoga 1 advanced Now open the closure on the cross ribs Therefore push the little security ring upwards otherwise the lock won t open Push it upwards and let it stay open Then clip the stringer eleme...

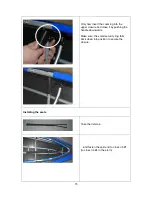
Page 15: ...closure and close it by pushing the handle downwards Make sure the small security ring falls back down into position to secure the closure Installing the seats Take the Velcros and fasten the split e...

Page 16: ...e desired position The elastic straps are fixed on the cross rib behind the seat Now inflate the sponsons by using the filling tubes These are then connected with the connecting pipe By connecting the...

Page 17: ...on the water Instructions for disassembling For the disassembling proceed in the same way as for assembling but in reverse order At first Deflate the sponsons 9 Folding the hull Before folding the ski...

Page 18: ...exposing it to salt water e g after the tour with sufficient fresh water Important If the boat is to be stored for a longer time take the air out of the sponsons A folding boat should be built up and...

Page 19: ...o be repaired If you can make the repairing at home Let the glue dry for an hour place the patch on the spot and gently warm both with a hot air dryer Then push the patch firmly onto the hull On tour...

Page 20: ...20 For more information about your and other products sources of supply and downloads at any time...

Reviews: