background image

Forte

COMMISSIONING

The first operation of the shower is intended to 
flush out any remaining unit debris, and to make 
sure the heater unit contains water before the 
elements are switched on. This operation must 
be carried out with the flexible hose screwed to 
the outlet but without the showerhead attached. 
Make sure the outlet of the flexible hose is 
directed to waste.
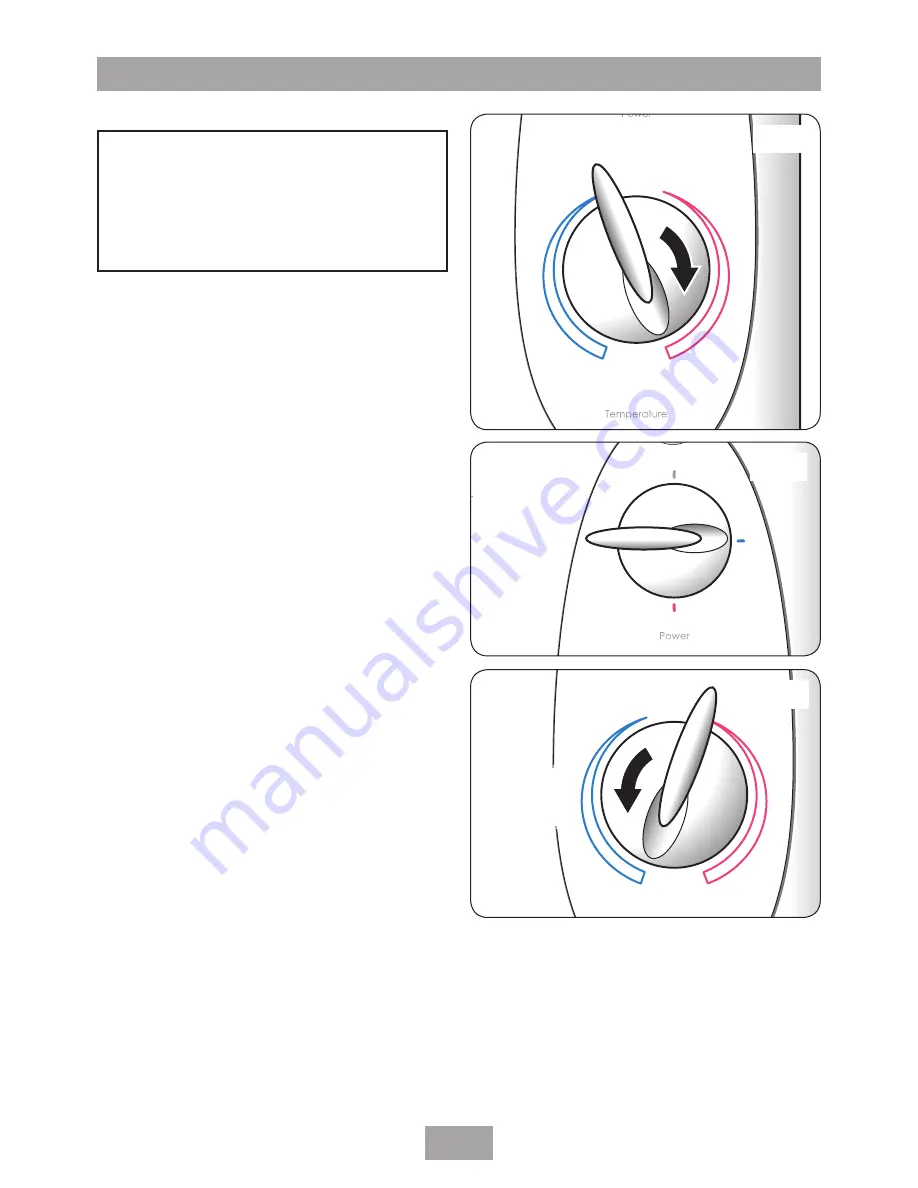
Before turning on the electric and mains water 
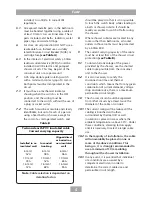
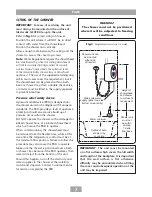
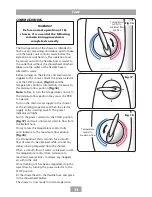
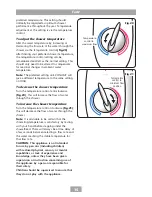
supplies to the shower, check the power selector 
is at the STOP position 

(fig.)

 and the 

temperature control is rotated fully clockwise to 
the minimum flow position 

(fig.)

.

Note:

 Failure to turn the temperature control to 

the minimum flow position may cause the PRD 
to operate.
Turn on the mains water supply to the shower 
at the isolating stopvalve and then the electric 
supply at the isolating switch. The power 
indicator will light.
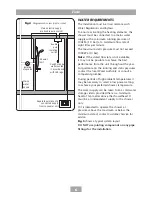
Switch the power selector to the COLD position 

(fig.)

 and wait until water starts to flow from 

the flexible hose.
Slowly rotate the temperature control fully 
anti-clockwise to the maximum flow position 

(fig.)

.

It will take about thirty seconds for a smooth 
flow of water to be obtained while air and any 
debris is being dispersed from the shower.
When a smooth flow of water is obtained, rotate 
the temperature control from minimum to 
maximum several times to release any trapped 
air within the unit.
Once flushing out has been completed, stop the 
water flow by turning the power selector to the  
STOP position.
Fit the showerhead to the flexible hose and place 
in the showerhead holder.
The shower is now ready for normal operation.

WArNING!

Before normal operation of the 

shower, it is essential the following 

commissioning procedure is 

completed correctly.

Temperature

control to 

minimum flow

position

7HPSHUDWXUH

FRQWUROWR

PD[LPXPIORZ

7HPSHUDWXUH

FRQWUROWR

PD[LPXPIORZ

Fig.

Fig.

Fig.

Summary of Contents for Forte

Page 1: ...Installers please note these instructions are to be left with the user 2180686A February 2008 Installation and operating instructions Forte electric shower ...

Page 2: ... the cover 12 Commissioning 13 Operating the shower 14 Operating functions 16 Cleaning 17 Instructions for installers and service engineers only 18 Spare parts 19 Fault finding 20 Guarantee service policy etc rear cover CONTENTS Page To check the product suitability for commercial and multiple installations please contact Triton s specification advisory service before installation Telephone 0870 0...

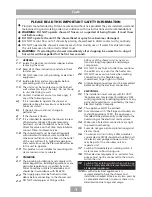
Page 3: ...er temperatures and could also cause the Pressure Relief Device in the unit to operate This product is not suitable for mounting into steam rooms or steam cubicles PLUMBING The plumbing installation must comply with Water Regulations Building Regulations or any particular regulations as specified by Local Water Company or Water Undertakers and should be in accordance with BS 6700 The supply pipe m...

Page 4: ...g It is the flow rate of the water passing through the heater unit which determines the shower temperature at any given setting the slower the flow the hotter the water becomes and the faster the flow the cooler the water b During winter mains water supply will be cooler than in summer Therefore the temperature of the shower will vary between seasons on any one setting of the temperature control e...

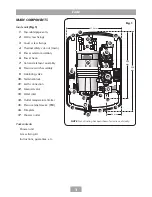
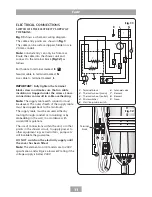
Page 5: ...switch assembly 9 Stabilising valve 10 Terminal block 11 Earth connection 12 Solenoid valve 13 Water inlet 14 Outlet temperature limiter 15 Pressure relief device PRD 16 Trimplate 17 Shower outlet Pack contents Shower unit Screw fixing kit Instructions guarantee etc 255 mm 305 mm 210 mm 59 mm Fig 1 NOTE Not all wiring has been shown for reasons of clarity 1 2 3 4 6 7 8 9 10 11 12 13 14 15 16 3 17 ...

Page 6: ... area These parts include metal baths radiators water pipes taps and waste fittings For close circuit protection DO NOT use a rewireable fuse Instead use a suitably rated Miniature Circuit Breaker MCB or cartridge fuse see Table A In the interest of electrical safety a 30mA residual current device RCD should be installed in all UK electric and pumped shower circuits This may be part of the consume...

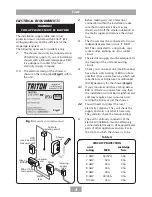
Page 7: ...that of the shower circuit protection see Table B To obtain full advantage of the power provided by the shower use the shortest cable route possible from the consumer unit to the shower It is also necessary to satisfy the disconnection time and thermal constraints which means that for any given combination of current demand voltage drop and cable size there is a maximum permissible circuit length ...

Page 8: ...10 bar Note If the stated flow rate is not available it may not be possible to achieve the best performance from the unit throughout the year For guidance on the running and static pressures contact the local Water Authority or consult a competent plumber During periods of high ambient temperatures it may be necessary to select a low power setting to achieve your preferred shower temperature The w...

Page 9: ...Do not operate the shower with a damaged or kinked shower hose or a blocked showerhead which can cause the PRD to operate When commissioning the showerhead must be removed from the flexible hose while at the same time the temperature control must be at the minimum flow position Failure to follow this procedure may also cause the PRD to operate Make sure the shower is positioned over a bath or show...

Page 10: ...rarily place the trimplate into position then mark the pipe entry on the side of the trimplate Carefully remove the appropriate area using a junior hacksaw If installing a feed pipe from the back or bottom the centre of the inlet valve to the wall surface is 20 mm fig 9 Note If entry is from the back the nut of the compression fitting will be partially behind the surface of the wall This area must...

Page 11: ...position leaving the base of the screw head protruding 6 mm out from the wall Hook the backplate over the top screw and fit the bottom fixing screw into position Do not fully tighten the screws at this stage as the fixing holes are elongated to allow for out of square adjustment after the plumbing connections have been completed Fig 10 20 mm Fig 9 ...

Page 12: ... and turning on the mains water supply long enough to clear the debris to waste Procedure Turn off the water supply either at the mains stopvalve or the isolating stopvalve Connect the mains water supply to the inlet of the shower via 15 mm copper stainless steel or plastic pipe using a 15 mm x 15 mm brass compression fitting Note The inlet fitting is designed to enter a compression fitting only D...

Page 13: ...to terminal marked L Important Fully tighten the terminal block screws and make sure that no cable insulation is trapped under the screws Loose connections can result in cable overheating Note The supply cable earth conductor must be sleeved The outer sheath of the supply cable must be stripped back to the minimum The supply cable must be secured either by routing through conduit or in trunking or...

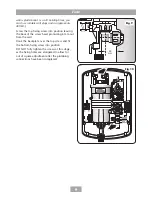
Page 14: ...e the temperature control fully anti clockwise Remove the cover and position the temperature control knob so that it points to the maximum flow position fig 14 Position the power selector to the stop position fig 15 Replace the cover squarely to the backplate and guide into position so that the knobs locate correctly into the splined spindles Should any difficulty arise recheck the points above Se...

Page 15: ... The power indicator will light Switch the power selector to the COLD position fig 17 and wait until water starts to flow from the flexible hose Slowly rotate the temperature control fully anti clockwise to the maximum flow position fig 18 It will take about thirty seconds for a smooth flow of water to be obtained while air and any debris is being dispersed from the shower When a smooth flow of wa...

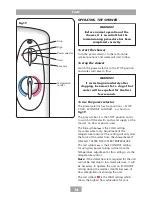
Page 16: ... the water temperature The red symbol is the economy setting for using less power during warmer months Temperature adjustment at this setting is via the temperature control Note If the stated flow rate required for the unit cannot be met due to low water pressure it will be necessary to operate the unit on economy setting during the warmer months because of flow rate limitations entering the unit ...

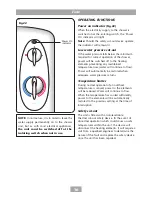
Page 17: ...kwise fig 20 this will increase the flow of water through the shower To increase the shower temperature Turn the temperature control clockwise fig 21 this will decrease the flow of water through the shower Note It is advisable to be certain that the showering temperature is satisfactory by testing with your hand before stepping under the showerhead There will always be a time delay of a few second...

Page 18: ...n overheat temperature is sensed power to the elements will be reduced Water will continue to flow When the temperature has cooled sufficiently power to the elements will be automatically restored to the previous setting at the time of interruption Safety cut out The unit is fitted with a non resettable thermal cut out safety device In the event of abnormal operation which could cause unsafe tempe...

Page 19: ... It is important to keep the showerhead clean to maintain the performance of the shower The hardness of the water will determine the frequency of cleaning For example if the shower is used every day in a very hard water area it may be necessary to clean the showerhead on a weekly basis WARNING Do not use abrasive or aggressive cleaning products when cleaning the shower as they may damage the unit ...

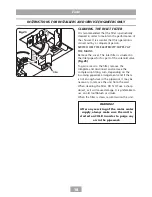
Page 20: ...ect and remove the compression fitting Also depending on the incoming pipework arrangements and if there is not enough slack in the pipework it may be necessary to remove the unit from the wall When cleaning the filter do not use a sharp object as it will cause damage It is preferable to use an old toothbrush or similar When the filter is clean recommission the unit Filter Fig 23 Instructions for ...

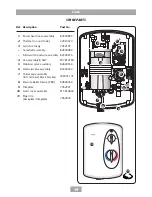
Page 21: ...nd wire assembly 82300970 4 Can assembly 8 5kW P07810700 5 Stabiliser valve assembly 82600550 6 Solenoid valve assembly 83300450 7 Outlet pipe assembly incl terminal block wires S09201101 8 Pressure Relief Device PRD 82800450 9 Trimplate 7052921 10 Front cover assembly P15930602 11 Pipe trim backplate trimplate 7052920 Spare parts SPARE PARTS 10 11 1 2 3 4 5 6 7 8 9 ...

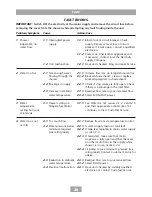
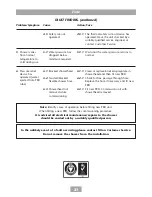
Page 22: ...pliances and if necessary contact local the Electricity Supply Company 1 2 1 Have unit checked Ring Customer Service 2 1 1 Increase flow rate via temperature control 2 1 2 Blocked showerhead clean or replace blocked sprayplate in showerhead 2 2 1 Check if stop valves are fully open Check if there is a blockage in the inlet filter 2 3 1 Readjust flow rate to give increased flow 2 3 2 Select economy...

Page 23: ...service engineer or contact Customer Service 5 1 1 Wait until the water pressure returns to normal 6 1 1 Clean or replace blocked sprayplate in showerhead and then fit new PRD 6 2 1 Check for free passage through hose Replace the hose if necessary and fit new PRD 6 3 1 Fit new PRD Commission unit with showerhead removed Note Identify cause of operation before fitting new PRD unit When fitting a ne...

Page 24: ... uk Triton Showers Triton Road Nuneaton Warwickshire CV11 4NR Triton is a division of Norcros Group Holdings Limited Triton Standard Guarantee Triton guarantee this product against all mechanical and electrical defects arising from faulty workmanship or materials for a period of two years for domestic use only from the date of purchase provided that it has been installed by a competent person in f...

Page 25: ...Pdf Supplied By http www plumbworld co uk ...

Reviews: