background image

TRITON RiskVision Setup Guide 

 15

Initial Setup

2.

If updates are available, click 

Start Update

.

A warning message indicates that the update will include a system restart.

3.

Click 

OK

 to start the update.

4.

When the system has restarted, log back in to the Local Manager to finish setting 
up the system.

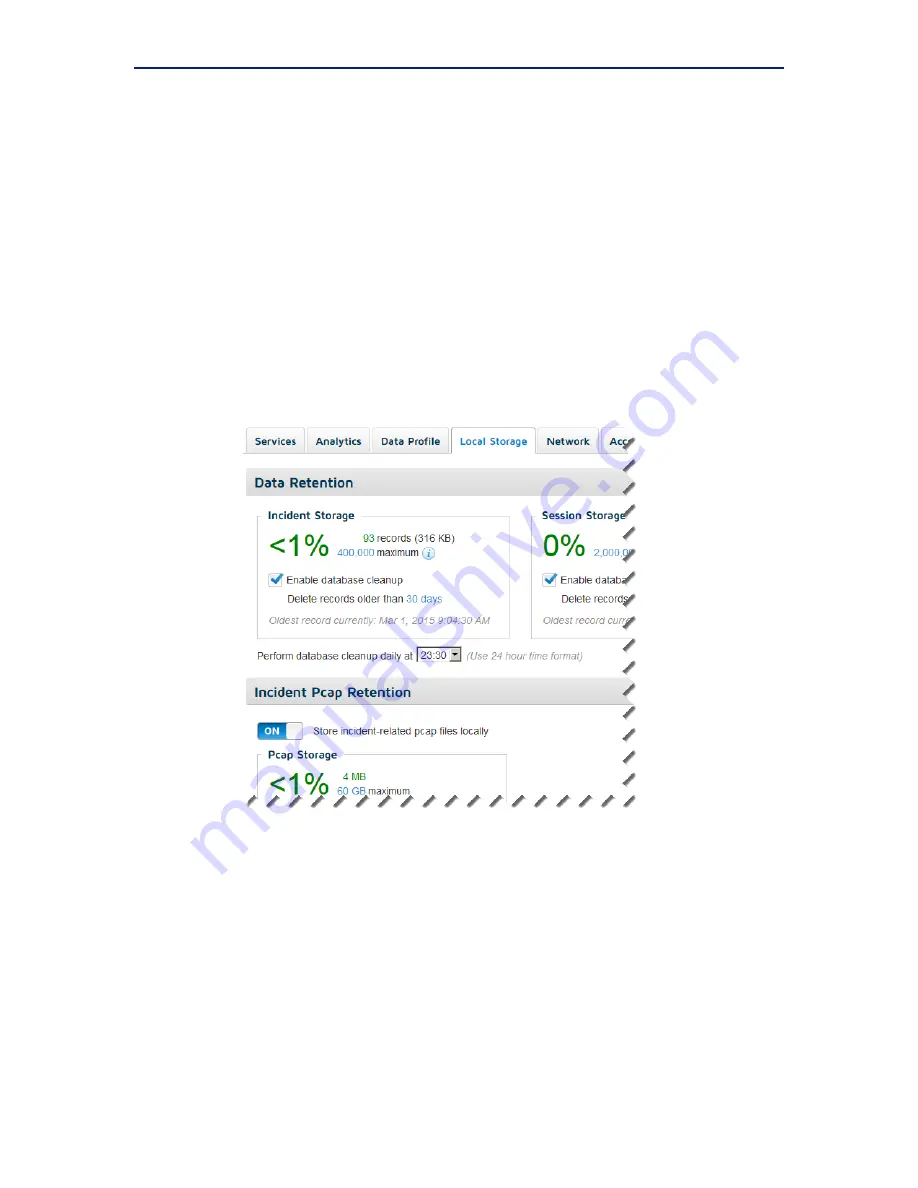
Configure data storage

By default, RiskVision is configured to store up to 400,000 incident records and up to 
2 million sessions in its database. RiskVision is also configured not to store pcap files 
for captured traffic.

To customize data storage settings:

1.

Select the 

System > Local Storage

 tab in the Local Manager.

2.

Use the 

Incident Storage

 box to configure:

The maximum number of threat or data loss incident records to store in the 
database

Whether database cleanup occurs automatically
Note that if you disable database cleanup, when the database is full, new 
records will be discarded. Database cleanup deletes the oldest records to make 
room for new records.

How long to keep incident records

Summary of Contents for RiskVision

Page 1: ...v2 0 TRITON RiskVision Setup Guide...

Page 2: ...n with the furnishing performance or use of this manual or the examples herein The information in this documentation is subject to change without notice Trademarks Websense and TRITON are registered t...

Page 3: ...process overview 6 Chapter 2 Installation 7 Step 1 Set up your V Series appliance hardware 7 Step 2 Set up the RiskVision appliance software 8 Chapter 3 Initial Setup 11 Step 3 Configure the system 11...

Page 4: ...ii Websense TRITON RiskVision Contents...

Page 5: ...e using Websense Advanced Classification Engine ACE analytics on the local machine to identify suspicious and malicious software Potentially suspicious files are forwarded to the cloud based file sand...

Page 6: ...to position the RiskVision appliance between clients and the proxy This ensures that RiskVision components see Unaltered TCP traffic from clients The client IP address associated with requests Outboun...

Page 7: ...blocks outbound requests however RiskVision will not see those requests and cannot analyze or log them In this configuration because outbound traffic goes through the downstream proxy before being see...

Page 8: ...includes a product that provides SSL decryption RiskVision can be configured to monitor and analyze the decrypted traffic Deployment details vary based on the product providing the decryption In gener...

Page 9: ...s the request and response files provided by Assembler and provides them to each of the Local Analysis plugins on the appliance If any plugin identifies a transaction as malicious suspicious or violat...

Page 10: ...rd party SIEM products 6 Local Manager displays incident data to administrators to help them investigate malicious suspicious data loss and data theft activity in their network It also offers diagnost...

Page 11: ...Guide TRITON RiskVision v2 0 Step 1 Set up your V Series appliance hardware The diagram below gives a simple overview of TRITON RiskVision deployment All local RiskVision components including managem...

Page 12: ...r and keyboard to the appliance or access the appliance via the iDRAC to complete this procedure 1 Power on the appliance The CentOS 6 6 operating system and TRITON RiskVision software are pre install...

Page 13: ...TRITON RiskVision Setup Guide 9 Installation Continue with the next chapter of this guide to activate verify and configure your RiskVision deployment...

Page 14: ...Installation 10 Websense TRITON RiskVision...

Page 15: ...d to use the C interface eth0 for communication and the N interface eth1 to monitor traffic If DHCP is enabled in your network the C interface is automatically assigned an IP address during installati...

Page 16: ...ation from Websense Security Labs To enter your key 1 Open an instance of Mozilla Firefox or Google Chrome and navigate to https C_interface_IP_address 8443 2 Log on to the Local Manager with user nam...

Page 17: ...up 6 If C interface traffic from the RiskVision appliance must go through an explicit proxy to access the Internet a Select the Proxy tab b Toggle Enable proxy settings to ON c Enter the connection de...

Page 18: ...Allow automatic database updates is set to ON 4 Use the table beneath the toggle switch to check the status of each analytic database The information updates automatically every 5 minutes Note that af...

Page 19: ...and up to 2 million sessions in its database RiskVision is also configured not to store pcap files for captured traffic To customize data storage settings 1 Select the System Local Storage tab in the...

Page 20: ...oting it is a best practice to allow the automated database cleanup process to remove data that is no longer needed How long to keep session data The default is 3 days 4 Use the Pcap Retention box to...

Page 21: ...have changed the IP address or hostname of your RiskVision appliance use the Restart All Services icon above the table to restart all RiskVision services When you use the Restart All option you are au...

Page 22: ...clients or subnets that you want to verify check the IP addresses in the Source column of the Session Details table To make it easier to verify that all expected traffic is being seen you can drag th...

Page 23: ...RiskVision file analysis Tips for using the table Click on a column header and drag it up one row into the space that says Drag a column header here and drop it to group by that column to group resul...

Page 24: ...plicate the behavior of those files when opened File sandboxing can be used to analyze Executable files PDF files Microsoft Office files like DOCX XLSX and so on 4 Both on box and cloud analytics retu...

Page 25: ...TRITON RiskVision Setup Guide 21 Initial Setup kits and call home traffic as well as more detailed information about potential data loss violations discovered by RiskVision...

Page 26: ...Initial Setup 22 Websense TRITON RiskVision...

Reviews: