7
S
eCtioN
1 - C
oNverSioN
with
“o
lDer
” S
tyle
C
abiNetS
(
w
/t-h
aNDle
)
Dispenser ground
u
PgraDe
K
it
a
SSeMbly
P
roCeDureS
/ NMD-50 a
SSeMbly
The NMD-50 dispenser does not ship preassembled. The additional parts to add are the two (2) green lift handles (identi-
cal), two (2)slide brackets (identical), ground lug, dispenser stop bracket and cable guides.
Before proceeding, remove the cassettes from the dispenser to make it more manageable. The dispenser with the cassettes
installed (empty or full) is a required TWO MAN LIFT. With the casettes removed. it can be handled by one person.
1.
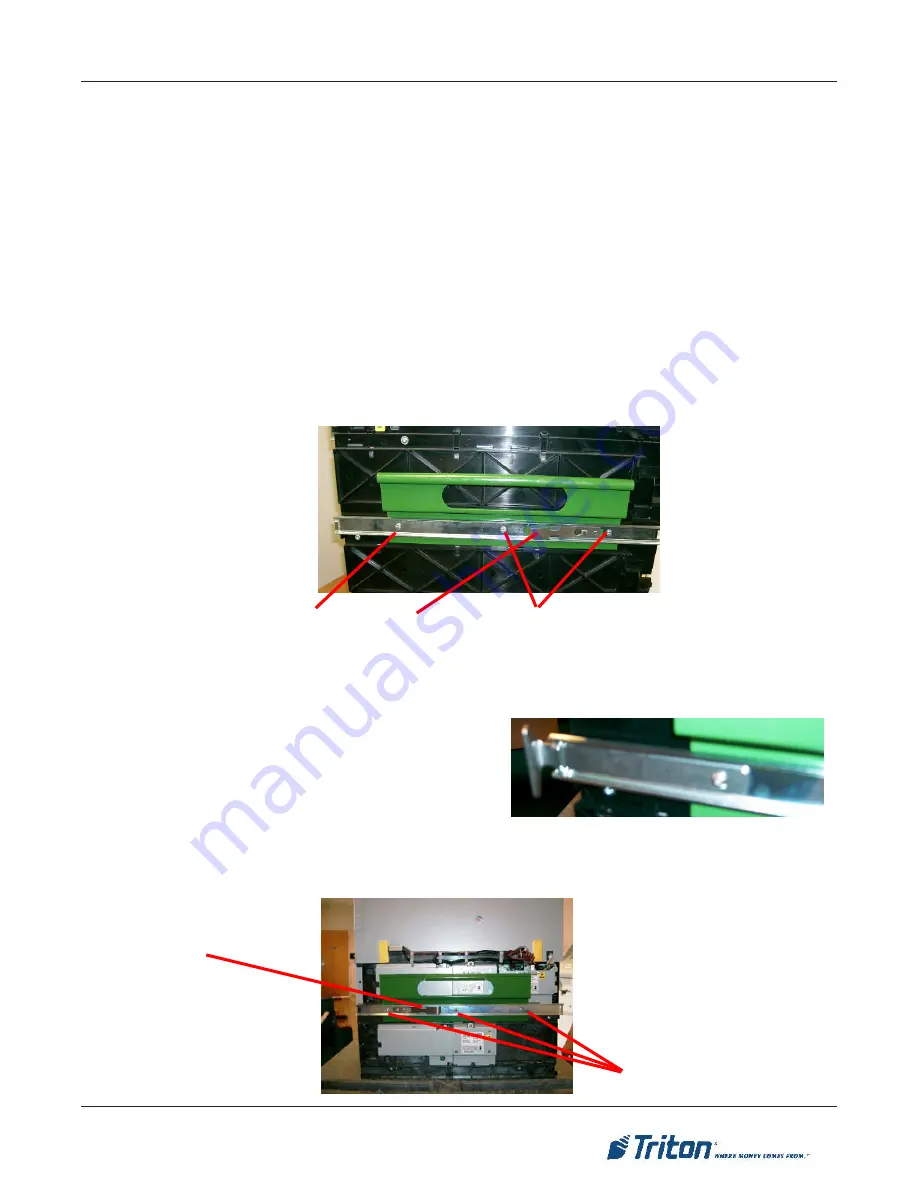
Right side Handle,Slide and Stop Bracket Assembly - Mount a green handle and slide bracket to the right side of
the cabinet with the two (2) screws provided. The mounting points are at the center and rear ends of the bracket. The
release tab faces forward.
NOTE: When attaching any hardware to the sides of the dispenser, pay particular
attention to NOT OVERTIGHTEN the screws. The dispenser mounting holes WILL
strip if too much torque is applied. Hand tighten snug, but firm, only.
Mounting screws M4x10mm
Release
tab facing
forward
2.
Right side Handle,Slide and Stop Bracket Assembly -
Slide the stop bracket through the slot in the front of the
slide bracket and attach to the dispenser in the front hole.
(M4x10mm)
3.
Left side Handle and Slide Bracket Assembly - Mount a green handle and slide bracket to the left side of the cabinet
with the three (3) screws provided. The mounting points are at the front,center and rear ends of the bracket. The release
tab faces forward.
Mounting screws M4x10mm
Do not install this screw
Rear
Front
Release
tab facing
forward


