


A-7
Installing the Memory Modules
IMPORTANT
Remove any USB memory that is attached to the
printer's USB memory slot.
1
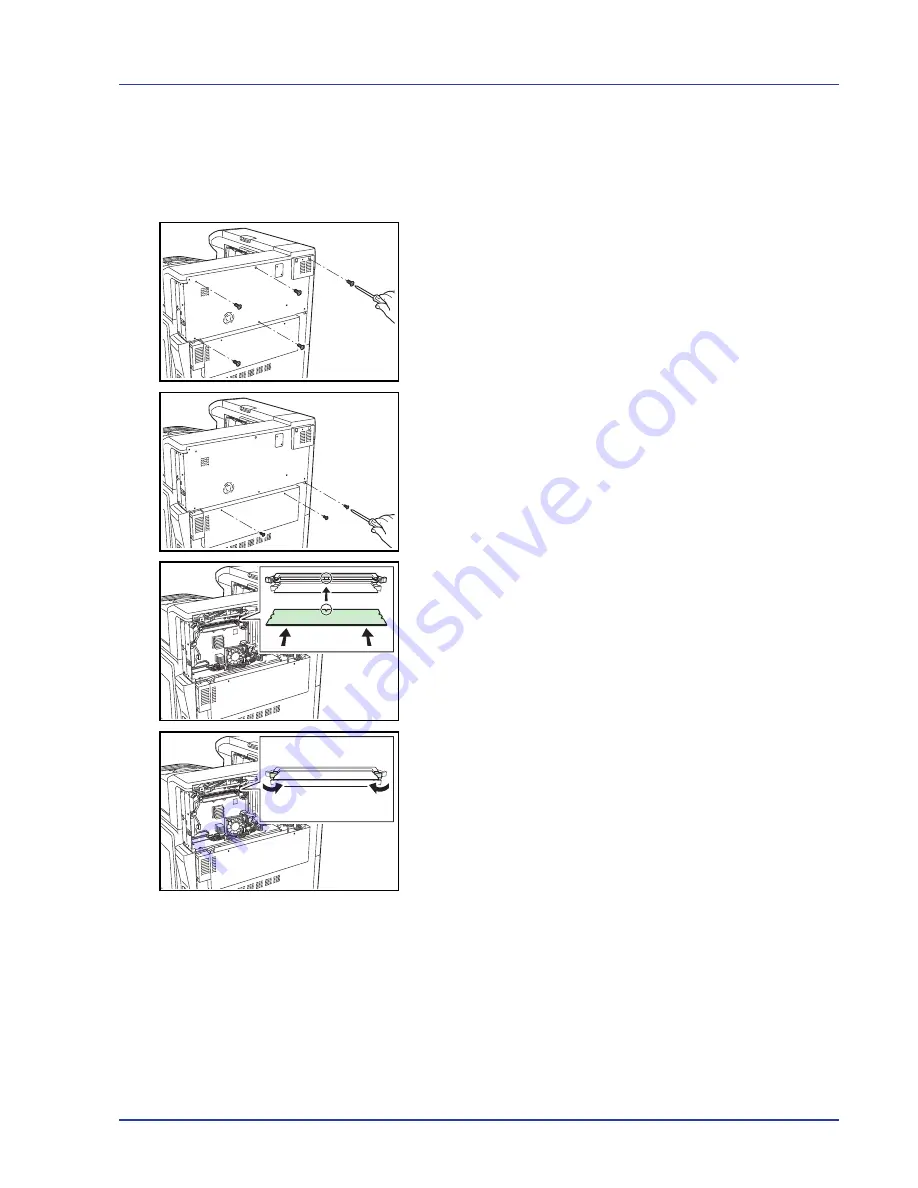
Power off the printer and unplug the printer power cord.
2
Remove the five screws (large) from the cover on the back of the
printer.
3
Remove the three screws (small) and then remove the cover.
4
Remove the optional expansion memory module from its package.
With the terminals on the memory module facing away from you, align
the cutouts with the matching keys of the socket and insert the
module straight in as far as it will go.
5
Close the stopper to secure the installed expansion memory module.
6
Replace the printer back cover and secure with the screws.
Removing a Memory Module
To remove a memory module, remove the back printer cover and then
carefully open the two socket clamps. Ease the memory module out of the
socket to remove.
Summary of Contents for CLP 4550
Page 1: ...Instruction Handbook CLP 4550 Colour Printer ...
Page 26: ...1 6 MachineParts ...
Page 40: ...2 14 PrintingOperation ...
Page 68: ...4 12 Using the Operation Panel Menu Map Sample Menu Map Printer Firmware version ...
Page 174: ...4 118 Using the Operation Panel ...
Page 184: ...5 10 Maintenance 6 Press the specified position to close left cover 1 ...
Page 212: ...6 28 Troubleshooting ...
Page 226: ...A 14 ...
Page 230: ...Glossary 4 ...
Page 234: ...Index 4 ...
Page 235: ...A1 ...
Page 236: ...UTAX GmbH Ohechaussee 235 22848 Norderstedt Germany ...


