2HJ/2HK
1-2-11
1-2-8
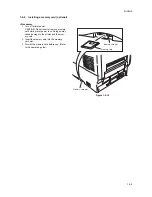
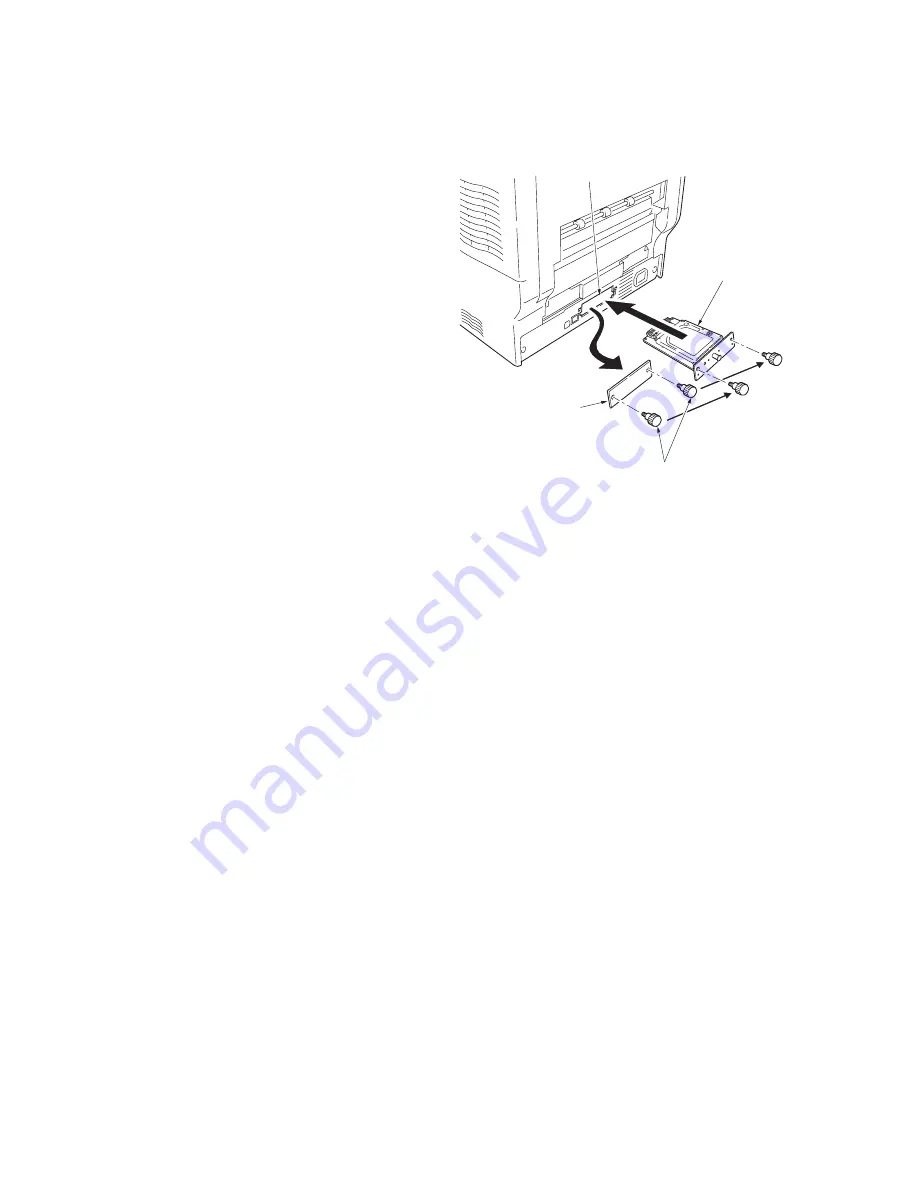
Installing the hard disk unit (optional)
<Procedure>
1. Turn off printer power.
2. Remove the two screws and remove the
optional interface slot cover.
3. Insert the hard disk unit into the optional
interface slot.
4. Use the two screws to secure the hard disk
unit.
5. Format the hard disk unit. (Refer to the
operation guide.)
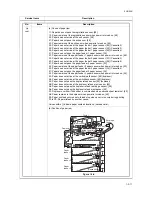
Figure 1-2-17
Cover
Optional interface slot
Screws
Hard disk unit
Summary of Contents for CLP3316
Page 1: ...Service Manual Color Printer CLP 3316 CLP 3520 X First Edition Date 24 10 2006 2HKSM060 ...
Page 2: ...Service Manual Color Printer CLP 4316 CLP 4520 X First Edition Date 24 10 2006 2HKSM060 ...
Page 6: ...This page is intentionally left blank ...
Page 12: ...This page is intentionally left blank ...
Page 20: ...2HJ 2HK 1 1 8 This page is intentionally left blank ...
Page 32: ...2HJ 2HK 1 2 12 This page is intentionally left blank ...
Page 138: ...2HJ 2HK 1 6 4 This page is intentionally left blank ...
Page 168: ...2HJ 2HK 2 1 30 This page is intentionally left blank ...
Page 172: ...2HJ 2HK 2 2 4 This page is intentionally left blank ...
Page 188: ...2HJ 2HK 2 4 6 This page is intentionally left blank ...

