Preparation before Use
2-10
Installation on a Macintosh
1
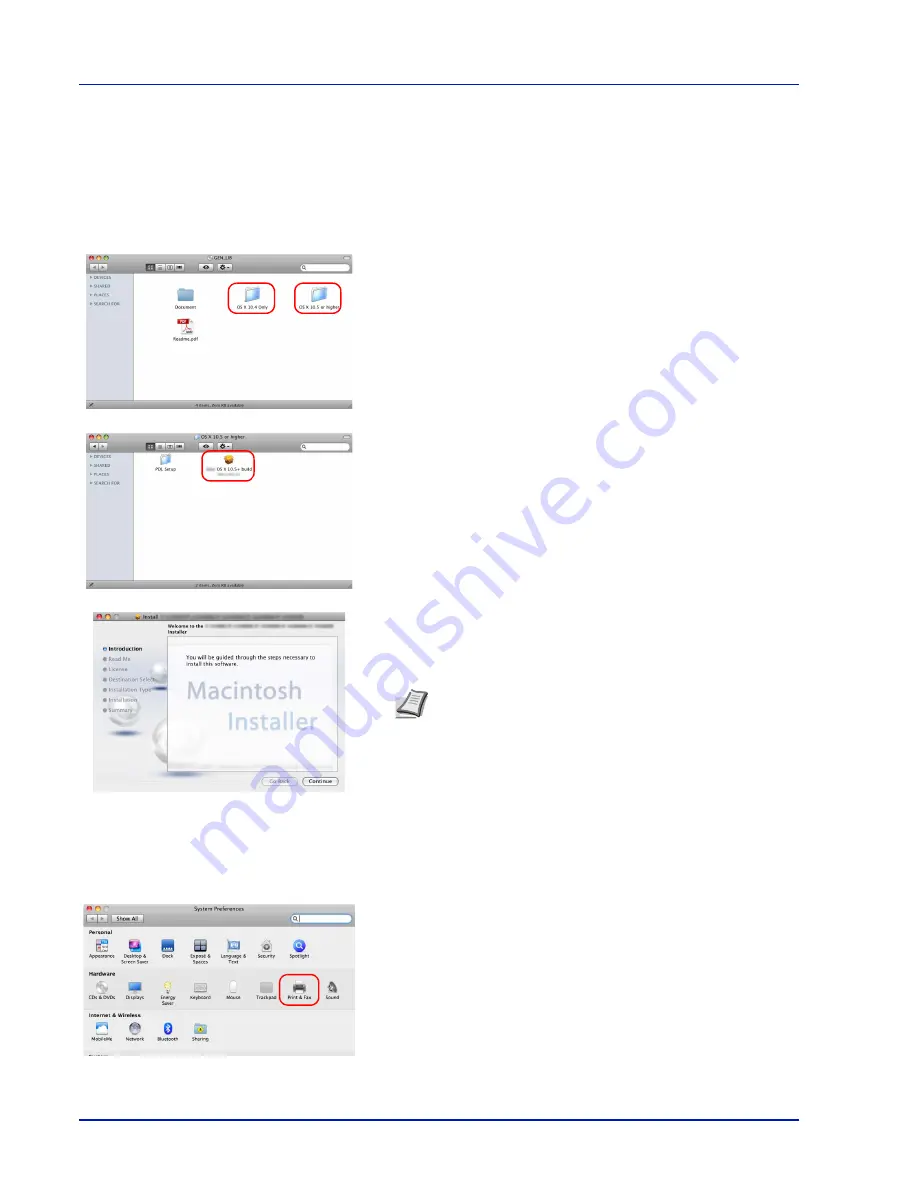
Turn on the printer and the Macintosh.
2
Insert the
Product Library
disc supplied with the printer into the optical
drive of the Macintosh.
3
Double click the
Product Library
disc icon displayed on the desktop.
4
Double-click either
OS X 10.4 Only
or
OS X 10.5 or higher
depending on your Mac OS version.
5
Double-click
(Brand Name) OS X 10.x
.
6
The printer driver installation program starts up.
7
Choose
Destination Select
,
Installation Type
and then install the
printer driver as directed by the instructions in the installation
software.
IMPORTANT
In the Authentication screen, enter the name and
password used to log in to the operating system.
This completes the printer driver installation. Next, specify the print
settings.
If an IP or AppleTalk connection is used, the settings below are
required. If a USB connection is used, the printer is automatically
recognized and connected.
8
Open
System Preferences
and click
Print & Fax
.
Note
In addition to
Standard Install
, the
Installation Type
options include
Custom Install
, which allows you to specify
the components to be installed.
Summary of Contents for P-4030D
Page 22: ...Machine Parts 1 6 ...
Page 60: ...Printing 3 8 ...
Page 71: ...4 11 Operation Panel Menu Map Sample Menu Map Printer Firmware version ...
Page 163: ...4 103 Operation Panel 5 Press or to select whether Thin Print is enabled ...
Page 194: ...Operation Panel 4 134 ...
Page 232: ...Document Box 5 38 ...
Page 238: ...Status Menu 6 6 ...
Page 272: ...Troubleshooting 8 24 ...
Page 311: ......


