Preparation before Use
2-26
3
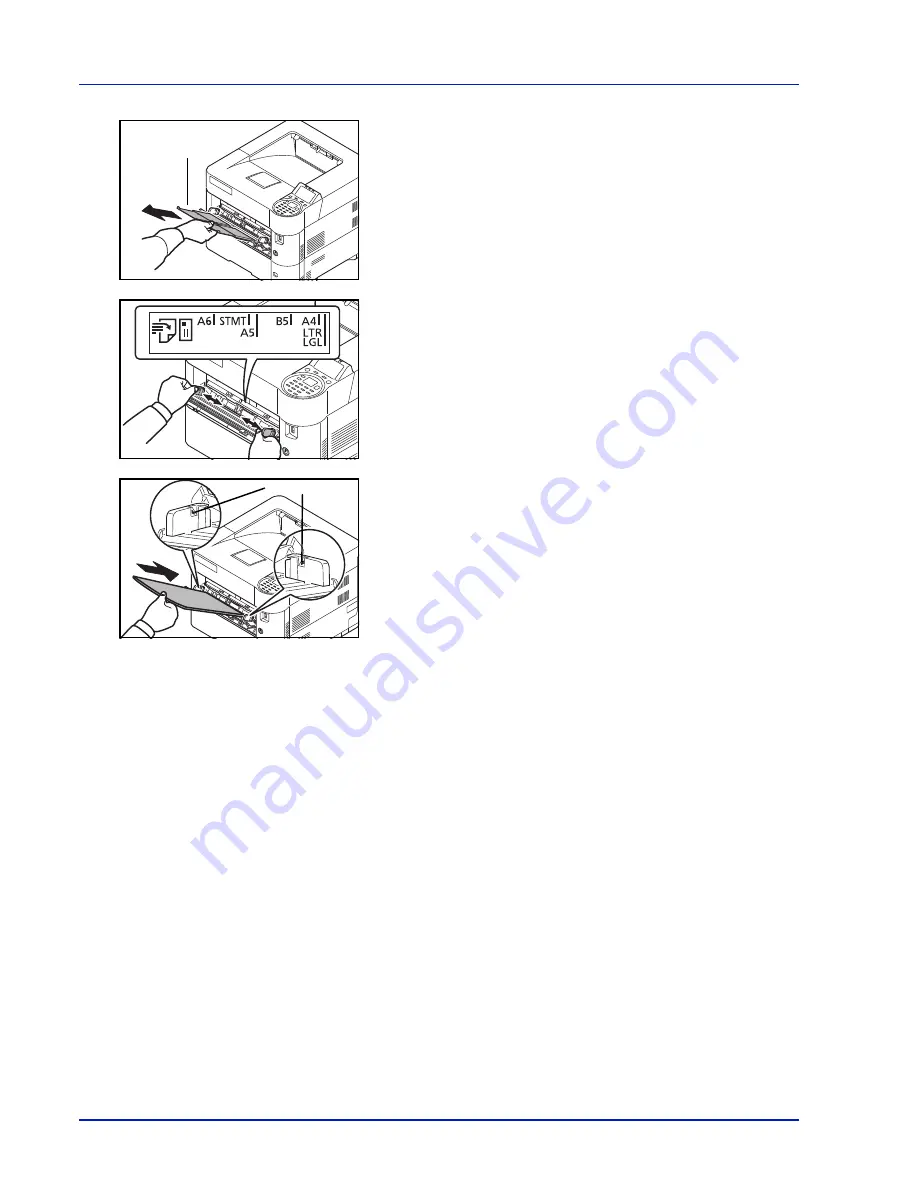
Pull out the support tray section of the MP tray.
4
Adjust the position of the paper guides on the MP tray. Standard
paper sizes are marked on the MP tray. For standard paper sizes,
slide the paper width guides to the corresponding mark.
5
Align the paper with the paper guides and insert as far as it will go.
6
Set the MP tray paper size on the printer’s operation panel. Refer to
MP Tray Set. (MP tray settings) on page 4-26
.
Support Tray Section
of the MP Tray
Load Limit
IMPORTANT
Do not load more paper than will fit under the load
limits on the inside of the MP tray.
Keep the side that was closest the package seal facing up.
Curled paper must be uncurled before use.
Straighten the top edge if it is curled.
When loading paper into the multi purpose tray, check that there
is no paper left over in the tray from a previous job before loading
the paper. If there is just a small amount of paper left over in the
multi purpose tray and you want to add more, first remove the left-
over paper from the tray and include it with the new paper before
loading the paper back into the tray.
Summary of Contents for P-4030D
Page 22: ...Machine Parts 1 6 ...
Page 60: ...Printing 3 8 ...
Page 71: ...4 11 Operation Panel Menu Map Sample Menu Map Printer Firmware version ...
Page 163: ...4 103 Operation Panel 5 Press or to select whether Thin Print is enabled ...
Page 194: ...Operation Panel 4 134 ...
Page 232: ...Document Box 5 38 ...
Page 238: ...Status Menu 6 6 ...
Page 272: ...Troubleshooting 8 24 ...
Page 311: ......


