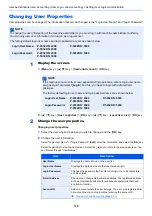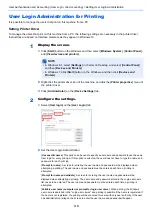
8-35
Setup and Registration (System Menu) > System Menu
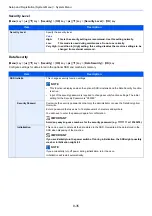
Security Level
[
Menu
] key > [
▲
] [
▼
] key > [
Security
] > [
OK
] key > [
▲
] [
▼
] key > [
Security Level
] > [
OK
] key
Data Security
[
Menu
] key > [
▲
] [
▼
] key > [
Security
] > [
OK
] key > [
▲
] [
▼
] key > [
Data Security
] > [
OK
] key
Configure settings for data stored in the optional SSD and machine's memory.
Item
Description
Security Level
Specify the security level.
Value
High:
This is the security setting we recommend. Use this setting normally.
Low:
This mode is used during maintenance. Do not use normally.
Very High: In addition to [High] setting, this setting disables the machine settings to be
changed from external command.
Item
Description
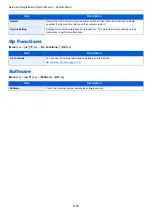
SSD Initializ.
This changes security function settings.
NOTE
•
This function is displayed when the optional SSD is installed and the Data Security Function
is active.
•
Input of the security password is required to change security function settings. The initial
setting for the Security Password is "000000".
Security Passwd
Customize the security password so that only the administrator can use the Data Encryption/
Overwrite.
Enter a password that uses six to 16 alphanumeric characters and symbols.
You will need to enter the password again for confirmation.
IMPORTANT
Avoid any easy-to-guess numbers for the security password (e.g. 11111111 or 12345678).
Initialization
This can be used to delete all the data stored in the SSD. Overwrite all the data stored in the
SSD when disposing of the machine.
IMPORTANT
If you accidentally turn the power switch off during initialization, the SSD might possibly
crash or initialization might fail.
NOTE
If you accidentally turn off power during initialization, turn it back on.
Initialization will restart automatically.
Summary of Contents for P-4532DN
Page 1: ...Operation Guide P 5532DN P 5032DN P 4532DN ...
Page 219: ...10 5 Troubleshooting Regular Maintenance Replacing the Toner Container 1 2 ...
Page 221: ...10 7 Troubleshooting Regular Maintenance 5 6 7 IMPORTANT Do not touch the points shown below ...
Page 241: ...10 27 Troubleshooting Troubleshooting Duplex Unit 1 2 3 ...
Page 243: ...10 29 Troubleshooting Troubleshooting 4 Inner Tray Inside Rear Cover 1 2 ...
Page 245: ...10 31 Troubleshooting Troubleshooting Bulk Feeder 1 2 3 ...
Page 246: ...10 32 Troubleshooting Troubleshooting 4 Duplex unit when Bulk Feeder is installed 1 2 3 ...
Page 247: ...10 33 Troubleshooting Troubleshooting 4 5 6 ...
Page 281: ......


