6
B
C
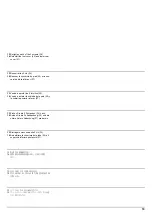
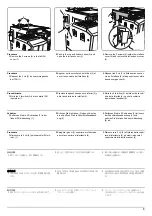
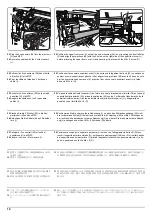
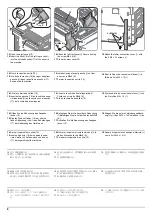
12.
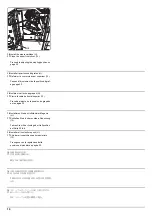
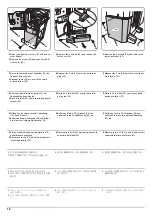
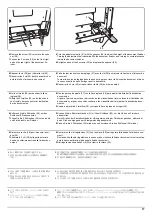
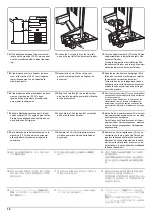
Remove the paper entry unit cover (C) from
the paper entry unit (B).
13.
Insert the projection (23) on the paper entry unit (B) into the hole (24) in the drive unit (A) and insert the
projection (25) into the hole (26) in the MFP frame to attach the paper entry unit (B).
Push the paper entry unit (B) to the right and fit the projection (25) into the hole (26) until it clicks into
place.
NOTICE
When installing the paper entry unit, take care not to dislodge the paper eject actuator (27).
After installing the unit, check the operation of the actuator.
12.
Déposer le couvercle de l'unité d'entrée du
papier (C) de l'unité d'entrée du papier (B).
13.
Insérer la projection (23) de l'unité d'entrée du papier (B) dans le trou (24) de l'unité d'entraînement (A)
et insérer la projection (25) dans le trou (26) du bâti du MFP pour fixer l'unité d'entrée du papier (B).
Pousser l'unité d'entrée du papier (B) vers la droite et insérer la projection (25) dans le trou (26)
jusqu'au clic.
AVIS
À l'installation de l'unité d'entrée du papier, attention à ne pas déplacer l'actionneur d'éjection du papier
(27). Après avoir installé l'unité, vérifier le bon fonctionnement de l'actuateur.
12.
Quite la cubierta de la unidad de ingreso de
papel (C) de la unidad de ingreso de papel
(B).
13.
Inserte el saliente (23) de la unidad de ingreso de papel (B) en el orificio (24) de la unidad de accionamiento (A)
e inserte el saliente (25) en el orificio (26) de la carcasa de la MFP para fijar la unidad de ingreso de papel (B).
Presione la unidad de ingreso de papel (B) hacia la derecha y encaje el saliente (25) en el orificio (26) hasta
escuchar un clic.
AVISO
Cuando instale la unidad de ingreso de papel tenga cuidado de no desplazar el actuador de expulsión de papel
(27). Después de instalar la unidad, compruebe el funcionamiento del actuador.
12.
Nehmen Sie die Abdeckung der Papierein-
zugseinheit (C) von der Papiereinzugs-
einheit (B) ab.
13.
Setzen Sie den Vorsprung (23) an der Papiereinzugseinheit (B) in die Öffnung (24) der Antriebseinheit (A)
ein und setzen Sie den Vorsprung (25) in die Öffnung (26) im MFP-Rahmen ein, um die Papiereinzugsein-
heit (B) anzubringen.
Drücken Sie die Papiereinzugseinheit (B) nach rechts und drücken Sie den Vorsprung (25) in die Öffnung
(26), bis er einrastet.
HINWEIS
Achten Sie beim Anbringen der Papiereinzugseinheit darauf, dass der Papierauswerfaktuator (27) nicht
abspringt. Überprüfen Sie nach dem Montieren der Einheit die Funktionsfähigkeit des Aktuators.
12.
Rimuovere il coperchio unità di ingresso
carta (C) dell'unità di ingresso carta (B).
13.
Inserire la parte sporgente (23) sull'unità di ingresso carta (B) nel foro (24) dell'unità guida (A), ed
inserire la parte sporgente (25) nel foro (26) del telaio dell'MFP per fissare l'unità di ingresso carta (B).
Spingere l'unità di ingresso carta (B) alla destra ed inserire la parte sporgente (25) nel foro (26) finché
non scatta in posizione con un clic.
NOTIFICA
Quando si installa l'unità di ingresso carta, fare attenzione a non rimuovere l'attuatore (27) di espulsione
carta. Dopo l'installazione dell'unità, controllare il funzionamento dell'attuatore.
12.
搬入ユニット (B) から搬入ユニットカバー
(C) を取り外す。
13.
搬入ユニット (B) の突起 (23) を駆動ユニット (A) の穴 (24) に入れ、
突起 (25) を本体フレーム
の穴 (26) に入れて搬入ユニット (B) を取り付ける。
搬入ユニット (B) を右側に押し、
突起 (25) を穴 (26) にカチッと音がするまではめ込むこと。
注意
搬入ユニットを取り付ける時は、
排出のアクチュエーター(27) を外さないように作業をする。
取付後、アクチュエーターの動作確認を行うこと。
12.
把搬运组件的盖板(C)从搬运组件(B)上取
下。
13.
将进纸单元 (B) 的突出部 (23) 插入驱动单元 (A) 的孔 (24) 中,将突出部 (25) 插入主机框架的孔
(26) 中以安装进纸单元 (B)。
将进纸单元 (B) 向右侧推,直到突出部 (25) 嵌入孔 (26) 中并发出咔嚓声为止。
注意
安装进纸单元时,请勿拆卸排出执行元件 (27)。
安装后,必须进行执行元件的动作确认。
12.
반입 유니트 (B) 에서 반입 유니트 커버 (C)
를 제거합니다 .
13.
반입 유니트 (B) 의 돌기 (23) 를 구동 유니트 (A) 의 구멍 (24) 에 넣고 돌기 (25) 를 본체 프레임
구멍 (26) 에 넣어 반입 유니트 (B) 를 장착합니다 .
반입 유니트 (B) 를 오른쪽으로 밀고 돌기 (25) 를 구멍 (26) 에 딸깍하고 소리가 날 때까지 끼웁니다 .
주의
반입 유니트를 부착할 때에는 배출 액츄에이터 (27) 가 빠지지 않도록 작업을 합니다 .
부착 후 액츄에이터의 동작 확인을 합니다 .
B
25
23
A
27
24
26
Summary of Contents for UTAX AK 730
Page 5: ...This page is intentionally left blank ...
Page 11: ...This page is intentionally left blank ...
Page 15: ...3NB 3ND 3N0 3NK This page is intentionally left blank ...
Page 25: ...3NB 3ND 3N0 3NK 1 1 10 This page is intentionally left blank ...
Page 43: ...3NB 3ND 3N0 3NK 1 2 18 3 Remove tape and pad Figure 1 2 23 Tape Pad ...
Page 45: ...3NB 3ND 3N0 3NK 1 2 20 This page is intentionally left blank ...
Page 81: ...3NB 3ND 3N0 3NK 1 3 36 This page is intentionally left blank ...
Page 157: ...3NB 3ND 3N0 3NK 1 4 76 This page is intentionally left blank ...
Page 169: ...3NB 3ND 3N0 3NK 1 5 12 This page is intentionally left blank ...
Page 206: ...3NB 3ND 3N0 3NK 2 2 11 This page is intentionally left blank ...
Page 246: ...1 1 INSTALLATION GUIDE INSTALLATION GUIDE FOR 4000 SHEETS FINISHER ...
Page 269: ...INSTALLATION GUIDE FOR FINISHER ATTACHMENT KIT MFP A ...
Page 283: ...INSTALLATION GUIDE FOR FINISHER ATTACHMENT KIT MFP B ...
Page 284: ...E F A H G I J B D C ...
Page 291: ...INSTALLATION GUIDE FOR FINISHER ATTACHMENT KIT PRINTER ...
Page 295: ...INSTALLATION GUIDE FOR CENTER FOLDING UNIT ...
Page 312: ...INSTALLATION GUIDE FOR MULTI TRAY ...
Page 326: ...INSTALLATION GUIDE FOR MULTI TRAY ATTACHMENT KIT PRINTER ...
Page 330: ...INSTALLATION GUIDE FOR PUNCH UNIT ...

