4
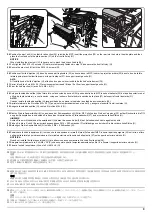
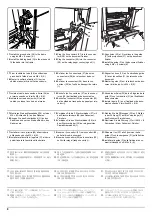
6.
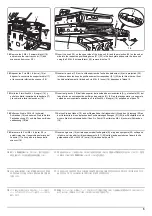
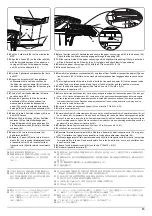
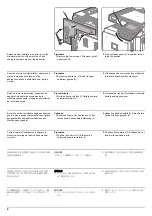
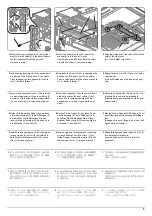
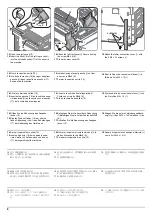
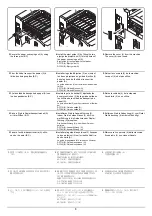
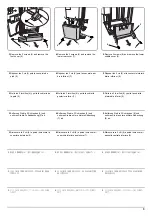
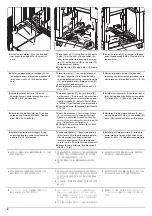
Align the AK unit(D) with the groove(8) of the
rail AK(C).Push it from the front of machine
as far as it will go.
*Both ends(9) of the AK unit(D) should be
lifted.
7.
Slide the AK unit(D) to the right.
8.
Secure the AK unit(D) with the screw(1)
removed in step 1.
9.
Run the cable from the AK unit(D) through
the two edgings(10).Plug the connector(11)
into the machine.
6.
Aligner l'unité AK (D) avec la rainure (8) du
rail AK (C).Pousser à fond depuis l'avant de
la machine.
*Les deux extrémités (9) de l'unité AK (D)
doivent être soulevées.
7.
Faire glisser l'unité AK (D) vers la droite.
8.
Fixer l'unité AK (D) avec la vis (1) retirée à
l'étape 1.
9.
Faire passer le câble depuis l'unité AK (D) à
travers les deux bords (10).Brancher le con-
necteur (11) dans la machine.
6.
Alinee la unidad AK (D) con la ranura (8) del
AK del raíl (C).Empújela desde la parte fron-
tal de la máquina hasta el máximo.
*Ambos extremos (9) de la unidad AK (D) se
deben levantar.
7.
Deslice la unidad AK (D) a la derecha.
8.
Con el tornillo (1) que quitó en el paso 1, fije
la unidad AK (D).
9.
Pase el cable de la unidad AK (D) a través
de los dos bordes (10).Enchufe el conector
(11) a la máquina.
6.
Richten Sie die AK Baugruppe (D) mit der
Nut (8) der AK Schiene (C) aus.Drücken Sie
sie von der Vorderseite des Geräts so weit
es geht hinein.
*Beide Enden (9) der AK Baugruppe (D)
sollten angehoben werden.
7.
Schwenken Sie die AK Baugruppe (D) nach
rechts.
8.
Befestigen Sie die AK Baugruppe (D).
Benutzen Sie die Schraube (1) aus Schritt 1.
9.
Legen Sie die Kabel der AK Baugruppe (D)
durch die beiden Einfassungen (10).
Stecken Sie den Stecker (11) ins Gerät.
6.
Allineare l'unità AK (D) alla scanalatura (8)
del binario AK (C).Dal fronte della macchina,
spingere per inserire a fondo.
*Entrambe le unità (9) dell'unità AK (D)
devono essere sollevate.
7.
Inserire l'unità AK (D) sulla destra.
8.
Fissare l'unità AK (D) con la vite (1) rimossa
al punto 1.
9.
Tirare il cavo dall'unità AK (D) attraverso i
due spigoli (10).Collegare il connettore (11)
sulla macchina.
6.
AK ユニット (D) を、レール AK(C) の溝 (8)
にあわせる。
機械前側から奥まで挿入する。
※AK ユニット (D) は、必ず両端部 (9) を持
つこと。
7.
AK ユニット (D) を、右側にスライドさせる。
8.
手順 1 で外したビス (1)1 本で AK ユニット
(D) を固定する。
9.
AK ユニット (D) の電線を、2 箇所のエッジン
グ (10) に通す。
コネクター(11) を機械本体
に接続する。
6.
使 AK 组件(D) 和导轨 AK(C) 的沟槽(8)对
齐。从机器前侧向内侧插入到底。
※ 必须拿在 AK 组件(D) 的两端(9)。
7.
使 AK 组件(D) 向右侧滑动。
8.
使用步骤 1 中取下的 1 颗螺丝(1)来固定 AK
组件(D)。
9.
使 AK 组件(D) 的电线穿过 2 处束线夹
(10)。把接插件(11)连接到机器本体。
6.
AK 유니트 (D) 를 레일 AK(C) 의 홈 (8) 에 맞
춥니다 . 본체 전면에서 가능한 한 멀리 밀어
넣습니다 .
※ AK 유니트 (D) 의 양 끝 (9) 을 들어 올려
야 합니다 .
7.
AK 유니트 (D) 를 오른쪽으로 밉니다 .
8.
순서 1 에서 제거한 나사 (1) 로 AK 유니트
(D) 를 고정합니다 .
9.
AK 유니트 (D) 의 전선을 2 가장자리 (10) 를
통과하도록 합니다 . 커넥터 (11) 를 본체에
연결합니다 .
D
9
9
8
C
1
D
10
11
Summary of Contents for UTAX AK 730
Page 5: ...This page is intentionally left blank ...
Page 11: ...This page is intentionally left blank ...
Page 15: ...3NB 3ND 3N0 3NK This page is intentionally left blank ...
Page 25: ...3NB 3ND 3N0 3NK 1 1 10 This page is intentionally left blank ...
Page 43: ...3NB 3ND 3N0 3NK 1 2 18 3 Remove tape and pad Figure 1 2 23 Tape Pad ...
Page 45: ...3NB 3ND 3N0 3NK 1 2 20 This page is intentionally left blank ...
Page 81: ...3NB 3ND 3N0 3NK 1 3 36 This page is intentionally left blank ...
Page 157: ...3NB 3ND 3N0 3NK 1 4 76 This page is intentionally left blank ...
Page 169: ...3NB 3ND 3N0 3NK 1 5 12 This page is intentionally left blank ...
Page 206: ...3NB 3ND 3N0 3NK 2 2 11 This page is intentionally left blank ...
Page 246: ...1 1 INSTALLATION GUIDE INSTALLATION GUIDE FOR 4000 SHEETS FINISHER ...
Page 269: ...INSTALLATION GUIDE FOR FINISHER ATTACHMENT KIT MFP A ...
Page 283: ...INSTALLATION GUIDE FOR FINISHER ATTACHMENT KIT MFP B ...
Page 284: ...E F A H G I J B D C ...
Page 291: ...INSTALLATION GUIDE FOR FINISHER ATTACHMENT KIT PRINTER ...
Page 295: ...INSTALLATION GUIDE FOR CENTER FOLDING UNIT ...
Page 312: ...INSTALLATION GUIDE FOR MULTI TRAY ...
Page 326: ...INSTALLATION GUIDE FOR MULTI TRAY ATTACHMENT KIT PRINTER ...
Page 330: ...INSTALLATION GUIDE FOR PUNCH UNIT ...

