2
2
1
3
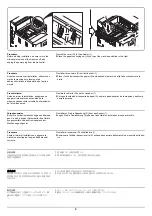
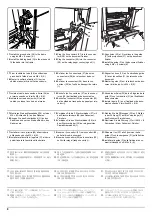
Be sure to remove any tape and/or cushioning
material from supplied parts.
Procedure
Before installing the center-folding unit, turn the
MFP’s main power switch off and unplug the
power cable from the power supply.
Install the document finisher, and then install the
center-folding unit.
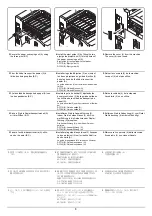
1.
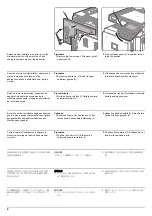
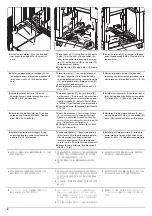
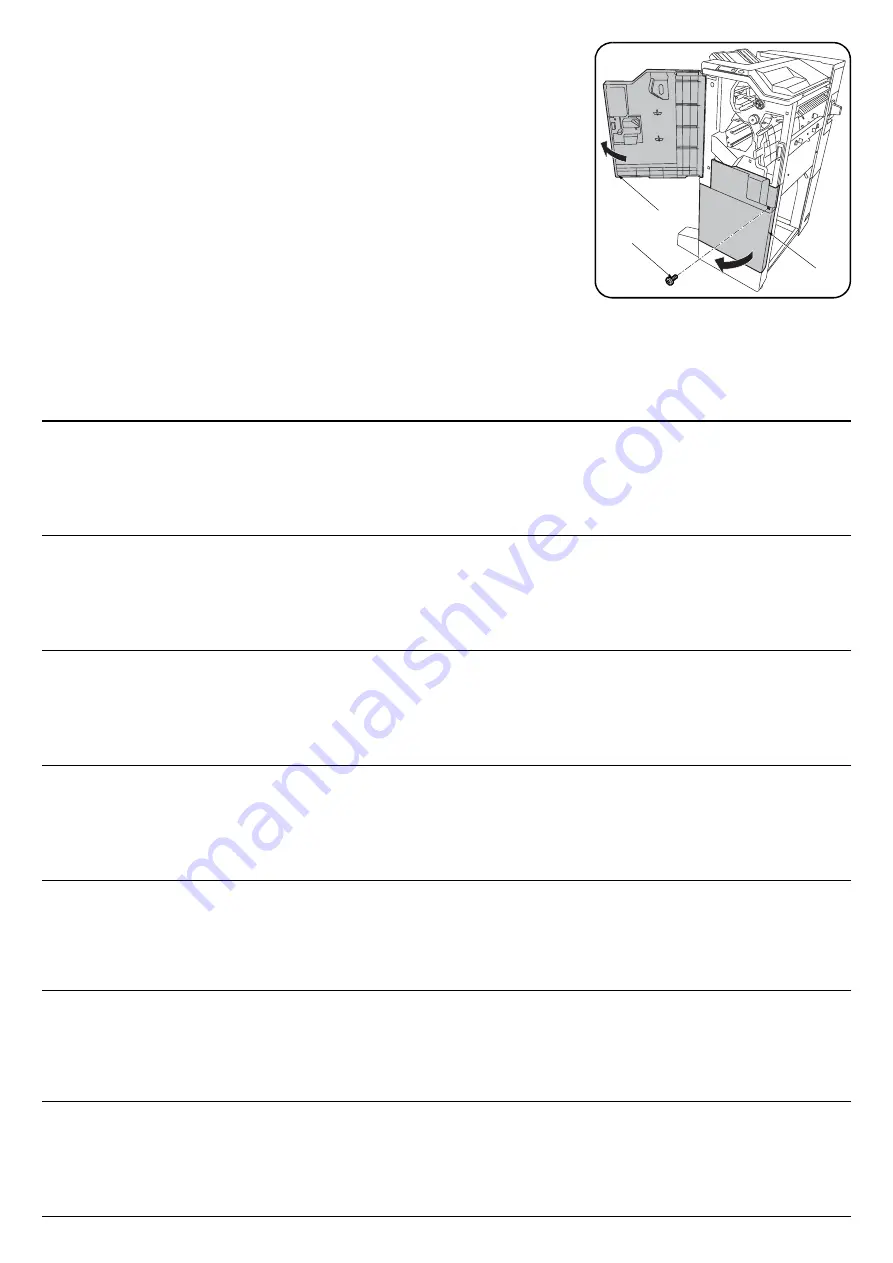
Open the upper front cover (1) of the docu-
ment finisher.
2.
Remove the screw (2) and open the lower
front cover (3).
(NOTICE)
Discard the screw (2) and do not fasten the
lower front cover (3).
Veillez à retirer les morceaux de bande adhé-
sive et/ou les matériaux de rembourrage des
pièces fournies.
Procédure
Avant d’installer la plieuse mettre l’interrupteur
d’alimentation principal du MFP hors tension et
débrancher le câble d’alimentation de la prise
de courant.
Installer le finisseur de document, puis installer
la plieuse.
1.
Ouvrir le couvercle avant supérieur (1) du
retoucheur de document.
2.
Déposer la vis (2) et ouvrir le couvercle
avant inférieur (3).
(AVIS)
Jeter la vis (2) et ne pas fixer le capot inféri-
eur avant (3).
Asegúrese de despegar todas las cintas y/o
material amortiguador de las partes suministra-
das.
Procedimiento
Antes de instalar la unidad de plegado, desco-
necte el interruptor de alimentación principal de
la MFP y desenchufe el cable de alimentación
de la toma de corriente.
Instale primero el finalizador de documentos y
luego instale la unidad de plegado.
1.
Abra la cubierta frontal superior (1) del final-
izador de documentos.
2.
Quite el tornillo (2) y abra la cubierta frontal
inferior (3).
(AVISO)
Descarte el tornillo (2) y no ajuste la cubierta
frontal inferior (3).
Entfernen Sie Klebeband und/oder Dämpfungs-
material vollständig von den mitgelieferten
Teilen.
Verfahren
Bevor Sie mit dem Einbau der Mittenfalteinheit
beginnen, stellen Sie sicher, dass der
Hauptschalter des Kopierers ausgeschaltet und
das Netzkabel aus der Steckdose gezogen ist.
Bringen Sie den Dokument-Finisher zuerst und
dann erst die Mittenfalteinheit an.
1.
Öffnen Sie die obere vordere Abdeckung (1)
des Dokument-Finishers.
2.
Entfernen Sie die Schraube (2) und öffnen Sie
die untere vordere Abdeckung (3).
(HINWEIS)
Entsorgen Sie die Schraube (2) und befestigen
Sie nicht die untere vordere Abdeckung (3).
Accertarsi di rimuovere tutti i nastri adesivi e/o il
materiale di imbottitura dalle parti fornite.
Procedura
Prima di installare l’unità di piegatura centrale,
assicurarsi che l’interruttore principale della
fotocopiatrice sia spento e che il cavo di alimen-
tazione non sia inserito nella presa.
Installare prima la finitrice e poi procedere
all’installazione dell’unità di piegatura centrale.
1.
Aprire il coperchio superiore anteriore (1)
della finitrice di documenti.
2.
Rimuovere la vite (2) ed aprire il coperchio
inferiore anteriore (3).
(NOTIFICA)
Eliminare le viti (2) e non fissare il coperchio
inferiore anteriore (3).
同梱品に固定テープ、緩衝材がついている場合
は、
必ず取り外すこと。
取付手順
中折りユニットを設置するときは、必ず MFP 本
体の主電源スイッチを OFF にし、
電源プラグを
抜いてから作業すること。
ドキュメントフィニッシャーを設置後、中折り
ユニットを設置すること。
1.
ドキュメントフィニッシャーの前上カバー
(1) を開く。
2.
ビス (2)1 本を外し、前下カバー(3) を開く。
(注意)
ビス (2) は廃棄とし、前下カバー(3) は固定
しない。
如果附属品上带有固定胶带,缓冲材料时务必揭
下。
安装步骤
安装中缝装订 — 折页单元前,请关闭 MFP 的主电
源开关并从电源拔下电源线。
安装装订器,然后安装中缝装订 — 折页单元。
1.
打开装订器的前部上盖板(1)。
2.
拆除 1 颗螺丝(2),打开前部下盖板(3)。
( 注意 )
废除螺丝(2),前部下盖板(3)不需固定。
동봉품에 고정 테이프 , 완충재가 붙어 있는 경
우에는 반드시 제거할 것 .
장착순서
중철 유니트를 설치할 때에는 반드시 MFP 본체
의 주전원 스위치를 OFF 로 하고 전원플러그를
뺀 후 작업을 할 것 .
문서 피니셔를 설치 후 , 중철 유니트를 설치 할
것 .
1.
문서 피니셔 앞 상커버 (1) 를 엽니다 .
2.
나사 (2) 1 개를 제거하고 앞 하커버 (3) 를
엽니다 .
( 주의 )
나사 (2) 는 폐기하고 전면 아래커버 (3) 는
고정하지 않습니다 .
Summary of Contents for UTAX AK 730
Page 5: ...This page is intentionally left blank ...
Page 11: ...This page is intentionally left blank ...
Page 15: ...3NB 3ND 3N0 3NK This page is intentionally left blank ...
Page 25: ...3NB 3ND 3N0 3NK 1 1 10 This page is intentionally left blank ...
Page 43: ...3NB 3ND 3N0 3NK 1 2 18 3 Remove tape and pad Figure 1 2 23 Tape Pad ...
Page 45: ...3NB 3ND 3N0 3NK 1 2 20 This page is intentionally left blank ...
Page 81: ...3NB 3ND 3N0 3NK 1 3 36 This page is intentionally left blank ...
Page 157: ...3NB 3ND 3N0 3NK 1 4 76 This page is intentionally left blank ...
Page 169: ...3NB 3ND 3N0 3NK 1 5 12 This page is intentionally left blank ...
Page 206: ...3NB 3ND 3N0 3NK 2 2 11 This page is intentionally left blank ...
Page 246: ...1 1 INSTALLATION GUIDE INSTALLATION GUIDE FOR 4000 SHEETS FINISHER ...
Page 269: ...INSTALLATION GUIDE FOR FINISHER ATTACHMENT KIT MFP A ...
Page 283: ...INSTALLATION GUIDE FOR FINISHER ATTACHMENT KIT MFP B ...
Page 284: ...E F A H G I J B D C ...
Page 291: ...INSTALLATION GUIDE FOR FINISHER ATTACHMENT KIT PRINTER ...
Page 295: ...INSTALLATION GUIDE FOR CENTER FOLDING UNIT ...
Page 312: ...INSTALLATION GUIDE FOR MULTI TRAY ...
Page 326: ...INSTALLATION GUIDE FOR MULTI TRAY ATTACHMENT KIT PRINTER ...
Page 330: ...INSTALLATION GUIDE FOR PUNCH UNIT ...


