4
M
M
C
M
12
M
B
11
10
13
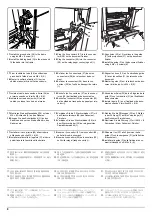
6.
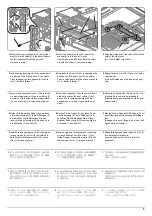
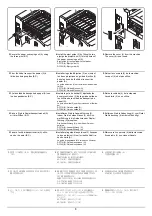
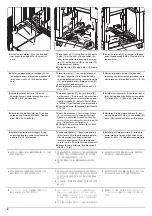
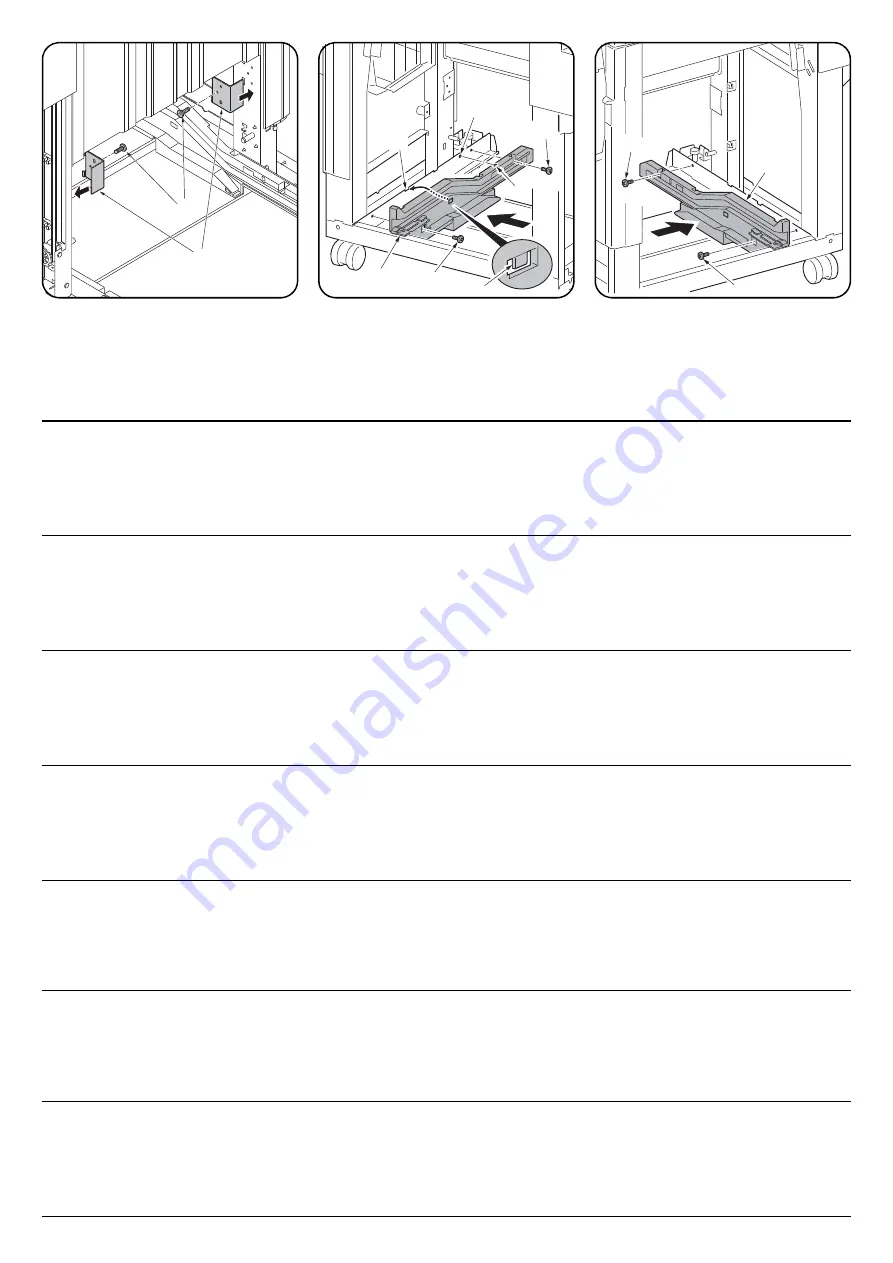
Install the lock plates (N) on the front and
rear supports using an M4 × 8 screw (K)
each.
7.
Place the hook (11) of the front rail (B) on the
notch (10) at the front of the document fin-
isher, at the same time inserting the projec-
tion (13) on the front rail (B) in the hole (12)
in the document finisher.
8.
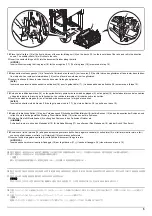
Fix the front rail (B) using 2 M4 × 12 screws
(M).
9.
Install the rear rail (C) at the rear of the doc-
ument finisher using 2 M4 × 12 screws (M) in
the same way.
6.
Monter les plaques de verrouillage (N) sur
les supports avant et arrière en procédant à
l'aide d'une vis M4 × 8 (K) dans les deux
cas.
7.
Placer le crochet (11) de la glissière avant
(B) dans l'encoche (10) à l'avant du retou-
cheur de document tout en insérant la saillie
(13) de la glisière avant (B) dans le trou (12)
du retoucheur de document.
8.
Fixer la glissière avant (B) à l'aide de 2 vis
M4 × 12 (M).
9.
Monter la glissière arrière (C) au dos du
retoucheur de document en procédant de la
même façon et à l'aide de 2 vis M4 × 12 (M).
6.
Instale las placas de cierre (N) en los
soportes frontal y posterior usando un tor-
nillo M4 × 8 (K) en cada uno.
7.
Coloque el gancho (11) del carril frontal (B)
en la muesca (10) de la parte frontal del final-
izador de documentos al mismo tiempo que
inserta el resalto (13) del carril frontal (B) en
el orificio (12) del finalizador de documentos.
8.
Fije el carril frontal (B) usando 2 tornillos M4
× 12 (M).
9.
Instale el carril posterior (C) en la parte pos-
terior del finalizador de documentos usando
2 tornillos M4 × 12 (M) de la misma forma.
6.
Montieren Sie die Sperrplatten (N) an den
vorderen und hinteren Stützen mit jeweils
einer M4 × 8 Schraube (K).
7.
Setzen Sie den Haken (11) der vorderen Schiene
(B) in die Aussparung (10) vorne am Dokument-
Finisher ein, und setzen Sie dabei auch den Vor-
sprung (13) an der vorderen Schiene (B) in die Öff-
nung (12) des Dokument-Finishers ein.
8.
Befestigen Sie die vordere Schiene (B) mit den 2
M4 × 12 Schrauben (M).
9.
Montieren Sie die hintere Schiene (C) auf
gleiche Weise mit 2 M4 × 12 Schrauben (M)
an der Rückseite des Dokument-Finishers.
6.
Installare le piastre di bloccaggio (N) sui
supporti anteriore e posteriore utilizzando
una vite M4 × 8 (K) ciascuna.
7.
Posizionare il gancio (11) della rotaia anteriore
(B) sull'incavo (10) alla parte anteriore della fini-
trice di documenti, contemporaneamente
inserire la la sporgenza (13) sulla rotaia ante-
riore (B) nel foro (12) nella finitrice di documenti.
8.
Fissare la rotaia anteriore (B) utilizzando 2
viti M4 × 12 (M).
9.
Installare la rotaia posteriore (C) alla parte
posteriore della finitrice di documenti utiliz-
zando 2 viti M4 × 12 (M) alla stessa maniera.
6.
ロックプレート (N) を前後の支柱にビス
M4×8(K) 各 1 本で取り付ける。
7.
ドキュメントフィニッシャー前の切り欠き
(10) にレール前 (B) のフック (11) を引っ
かけ、
同時にドキュメントフィニッシャーの
穴 (12) にレール前 (B) のボス (13) を入れ
る。
8.
ビス M4×12(M)2 本でレール前 (B) を固定す
る。
9.
同様に、ビス M4×12(M)2 本で、ドキュメント
フィニッシャー後にレール後 (C) を取り付
ける。
6.
使用各 1 颗 M4×8(K) 螺钉将锁定板 (N) 安装
在前后的支柱上。
7.
将前部导轨 (B) 的挂钩 (11) 嵌入装订器前部
的缺口 (10),同时将前部导轨 (B) 的卡销
(13) 插入到装订器的孔 (12) 中。
8.
使用 2 颗 M4×12(M) 螺钉来固定前部导轨
(B)。
9.
按相同方法,使用 2 颗 M4×12(M) 螺钉将后
部导轨 (C) 安装在装订器后部。
6.
잠금 플레이트 (N) 를 앞뒤 지주에 나사
M4×8(K) 각 1 개로 장착합니다 .
7.
문서 피니셔 앞의 이음부분 (10) 에 레일 앞
(B) 의 후크 (11) 를 걸고 동시에 문서 피니셔
구멍 (12) 에 레일 앞 (B) 의 보스 (13) 를 넣
습니다 .
8.
나사 M4×12(M) 2 개로 레일 앞 (B) 을 고정
합니다 .
9.
같은 방식으로 나사 M4×12(M) 2 개로 문서
피니셔 뒤에 레일 뒤 (C) 를 장착합니다 .
K
N
Summary of Contents for UTAX AK 730
Page 5: ...This page is intentionally left blank ...
Page 11: ...This page is intentionally left blank ...
Page 15: ...3NB 3ND 3N0 3NK This page is intentionally left blank ...
Page 25: ...3NB 3ND 3N0 3NK 1 1 10 This page is intentionally left blank ...
Page 43: ...3NB 3ND 3N0 3NK 1 2 18 3 Remove tape and pad Figure 1 2 23 Tape Pad ...
Page 45: ...3NB 3ND 3N0 3NK 1 2 20 This page is intentionally left blank ...
Page 81: ...3NB 3ND 3N0 3NK 1 3 36 This page is intentionally left blank ...
Page 157: ...3NB 3ND 3N0 3NK 1 4 76 This page is intentionally left blank ...
Page 169: ...3NB 3ND 3N0 3NK 1 5 12 This page is intentionally left blank ...
Page 206: ...3NB 3ND 3N0 3NK 2 2 11 This page is intentionally left blank ...
Page 246: ...1 1 INSTALLATION GUIDE INSTALLATION GUIDE FOR 4000 SHEETS FINISHER ...
Page 269: ...INSTALLATION GUIDE FOR FINISHER ATTACHMENT KIT MFP A ...
Page 283: ...INSTALLATION GUIDE FOR FINISHER ATTACHMENT KIT MFP B ...
Page 284: ...E F A H G I J B D C ...
Page 291: ...INSTALLATION GUIDE FOR FINISHER ATTACHMENT KIT PRINTER ...
Page 295: ...INSTALLATION GUIDE FOR CENTER FOLDING UNIT ...
Page 312: ...INSTALLATION GUIDE FOR MULTI TRAY ...
Page 326: ...INSTALLATION GUIDE FOR MULTI TRAY ATTACHMENT KIT PRINTER ...
Page 330: ...INSTALLATION GUIDE FOR PUNCH UNIT ...


