3PC
1-5-5
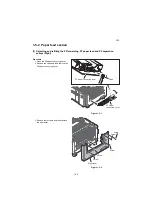
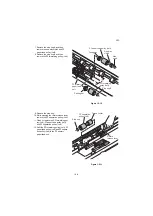
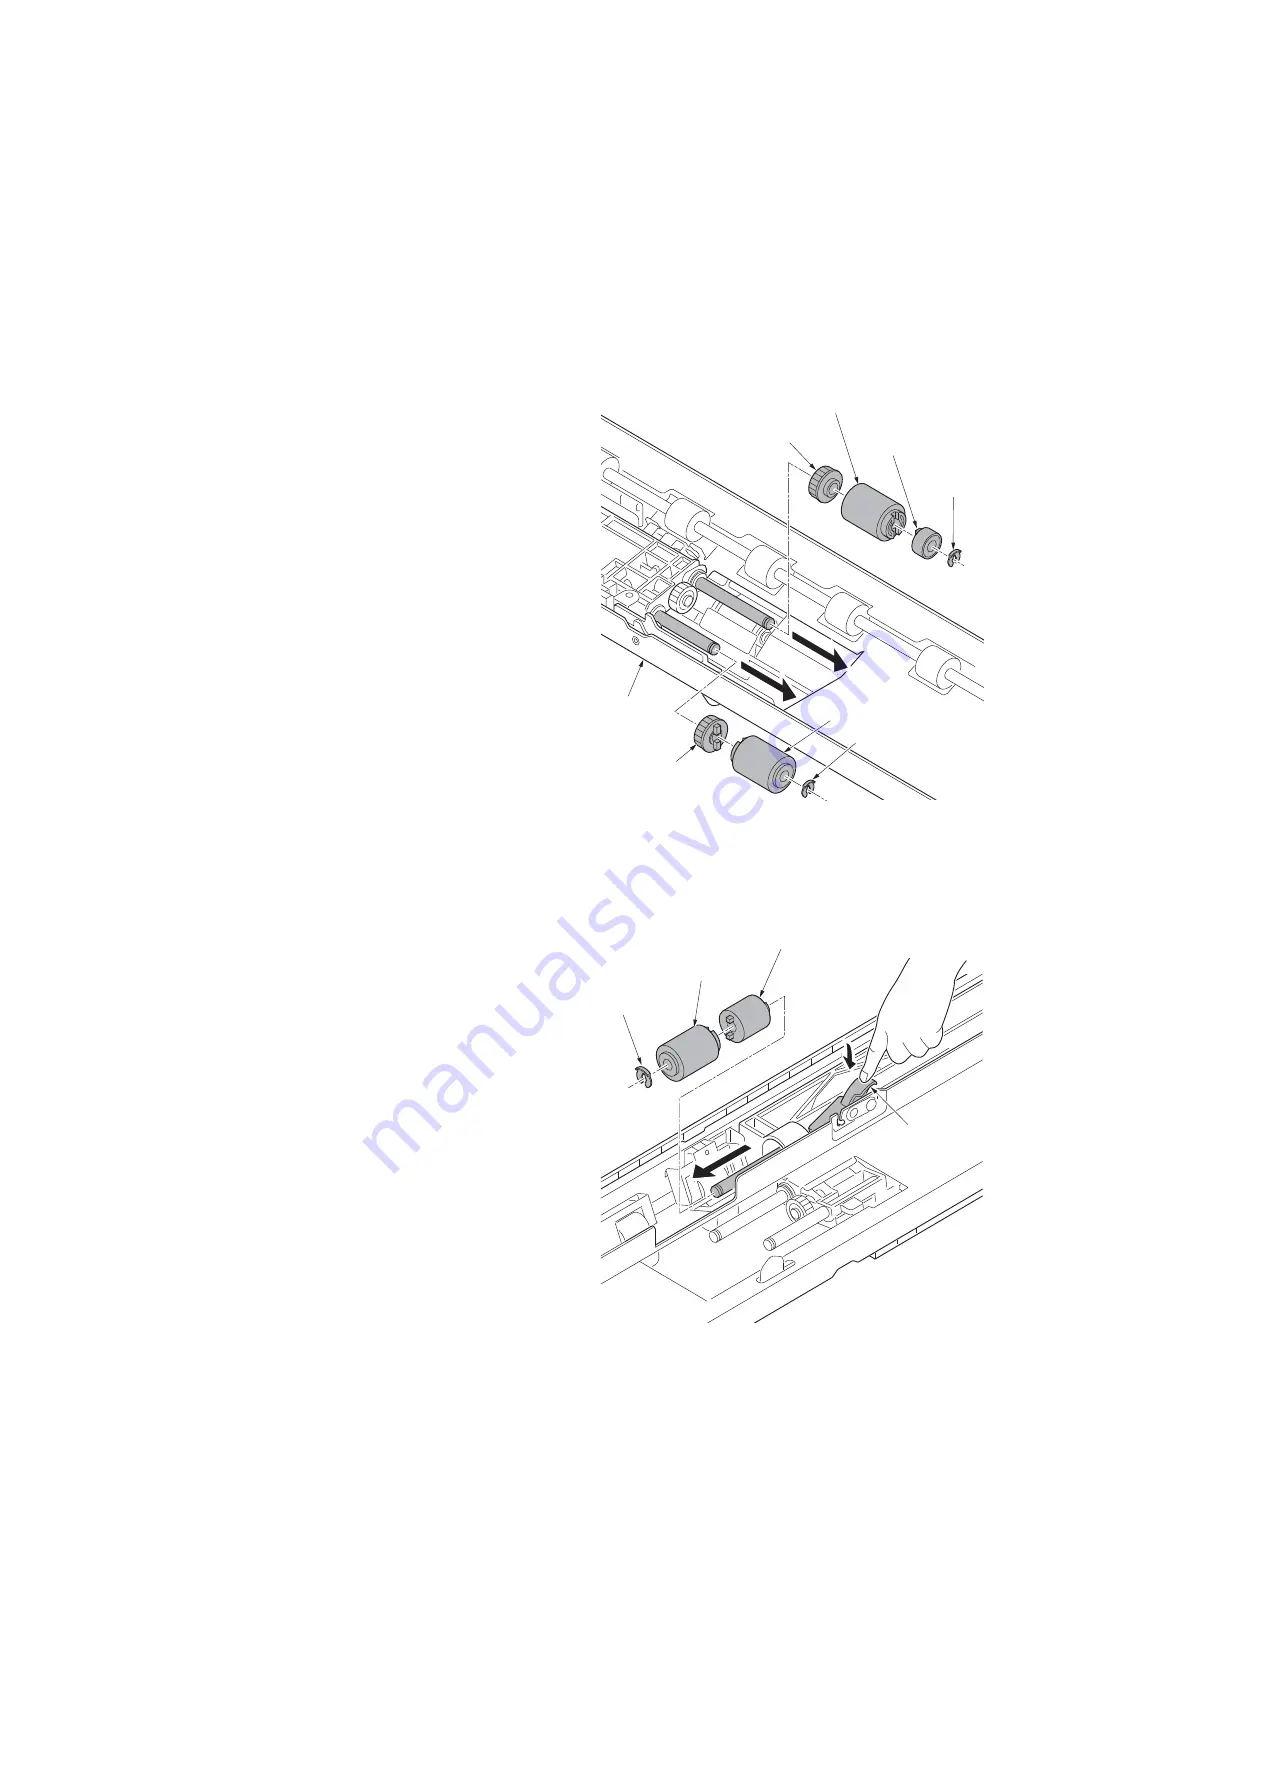
8. Remove the stop ring A and then
remove the one way clutch and PF
paper feed pulley (Right).
9. Remove the stop ring B and then
remove the PF forwarding pulley
(Right).
Figure 1-5-5
10. Remove the stop ring.
11. While pressing the retard release lever,
remove the PF separation pulley
(Right).
12. Clean or replace the PF forwarding pul-
ley (Right), PF paper feed pulley (Right)
and PF separation pulley (Right).
13. Refit the PF forwarding pulley (Right),
PF paper feed pulley (Right) and PF
separation pulley (Right) to the PF pri-
mary paper feed unit.
Figure 1-5-6
One way
clutch
Stop
ring A
PF paper feed
pulley (Right)
Feed gear
Pickup gear
PF primary
paper feed
unit
PF forwarding
pulley (Right)
Stop ring B
Retard
release lever
Stop ring
Torque limiter
PF separation
pulley (Right)
Summary of Contents for Utax PF 810
Page 1: ...Service Manual Paper Feeder PF 810 Rev 2 0 Date 28 07 2014 3PCSM062 ...
Page 2: ...Service Manual Paper Feeder PF 810 Rev 2 0 Date 28 07 2014 3PCSM062 ...
Page 5: ...This page is intentionally left blank ...
Page 11: ...This page is intentionally left blank ...
Page 16: ...3PC 1 1 3 1 1 3 Machine cross section Figure 1 1 2 Paper path ...
Page 17: ...3PC 1 1 4 This page is intentionally left blank ...
Page 27: ...3PC 1 2 10 This page is intentionally left blank ...
Page 62: ...3PC 1 5 3 4 Pull out the right cassette 5 Remove the connector Figure 1 5 3 Connector ...
Page 73: ...3PC 1 5 14 This page is intentionally left blank ...
Page 75: ...3PC 1 6 2 This page is intentionally left blank ...
Page 85: ...3PC 2 2 4 This page is intentionally left blank ...
Page 91: ...3PC 2 3 6 This page is intentionally left blank ...


