How to Ride the Motorcycle
77
Caution
Do
not
operate
the
starter
continuously for more than five
seconds as the starter motor will
overheat and the battery will become
discharged.
Wait 15 seconds between each
operation of the starter to allow for
cooling and recovery of battery power.
Do not let the engine idle for long
periods
as
this
may
lead
to
overheating which will cause damage
to the engine.
8
6
4
2 0
14
RPM
x1000
10
N
12
P
OFF
ON
4
3
2
1
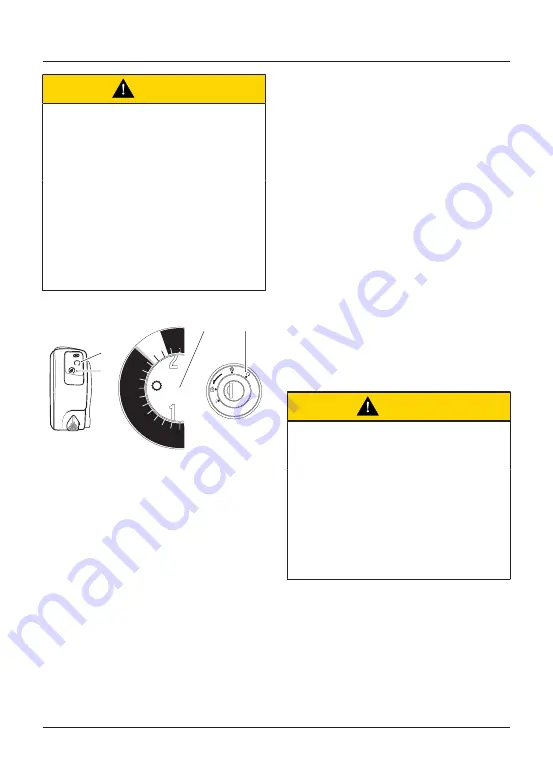
1.
RUN position on the engine start/stop
switch
2.
START position on the engine start/stop
switch
3.
Neutral indicator
4.
ON position on the ignition switch
To start the engine:
•
Check that the stop switch is in the
RUN position.
•
Make sure the transmission is in
neutral.
•
Pull the clutch lever fully into the
handlebar.
•
Turn the ignition switch to the ON
position.
Note
The instrument warning lights will
illuminate and will then go off (except
those which normally remain on until
the engine starts, see page
32.
A transponder is fitted within the key to
turn off the engine immobiliser. To make
sure the immobiliser functions correctly,
always have only one of the ignition
keys near the ignition switch. Having
two ignition keys near the switch may
interrupt the signal between the
transponder and the engine immobiliser.
In this situation the engine immobiliser
will remain active until one of the
ignition keys is removed.
•
Leaving the throttle fully closed,
push the starter button until the
engine starts.
•
Slowly release the clutch lever.
Caution
The low oil pressure warning light
should go out shortly after the engine
starts.
If the low oil pressure warning light
stays on after starting the engine,
stop the engine immediately and
investigate the cause.
Running the engine with low oil
pressure will cause severe engine
damage.
•
The motorcycle is equipped with
starter
lockout
switches.
The
switches prevent the electric starter
from operating when a gear is
engaged with the side stand down.
Summary of Contents for Daytona Moto2 765 2020
Page 6: ...Foreword 6 This page intentionally left blank ...
Page 20: ...Serial Numbers 20 This page intentionally left blank ...
Page 74: ...General Information 74 This page intentionally left blank ...
Page 88: ...How to Ride the Motorcycle 88 This page intentionally left blank ...
Page 92: ...Accessories and Loading 92 This page intentionally left blank ...
Page 159: ...Index 159 This page intentionally left blank ...


