


12
Recheck
All bolts and nuts are
tightened securely
before using the machine
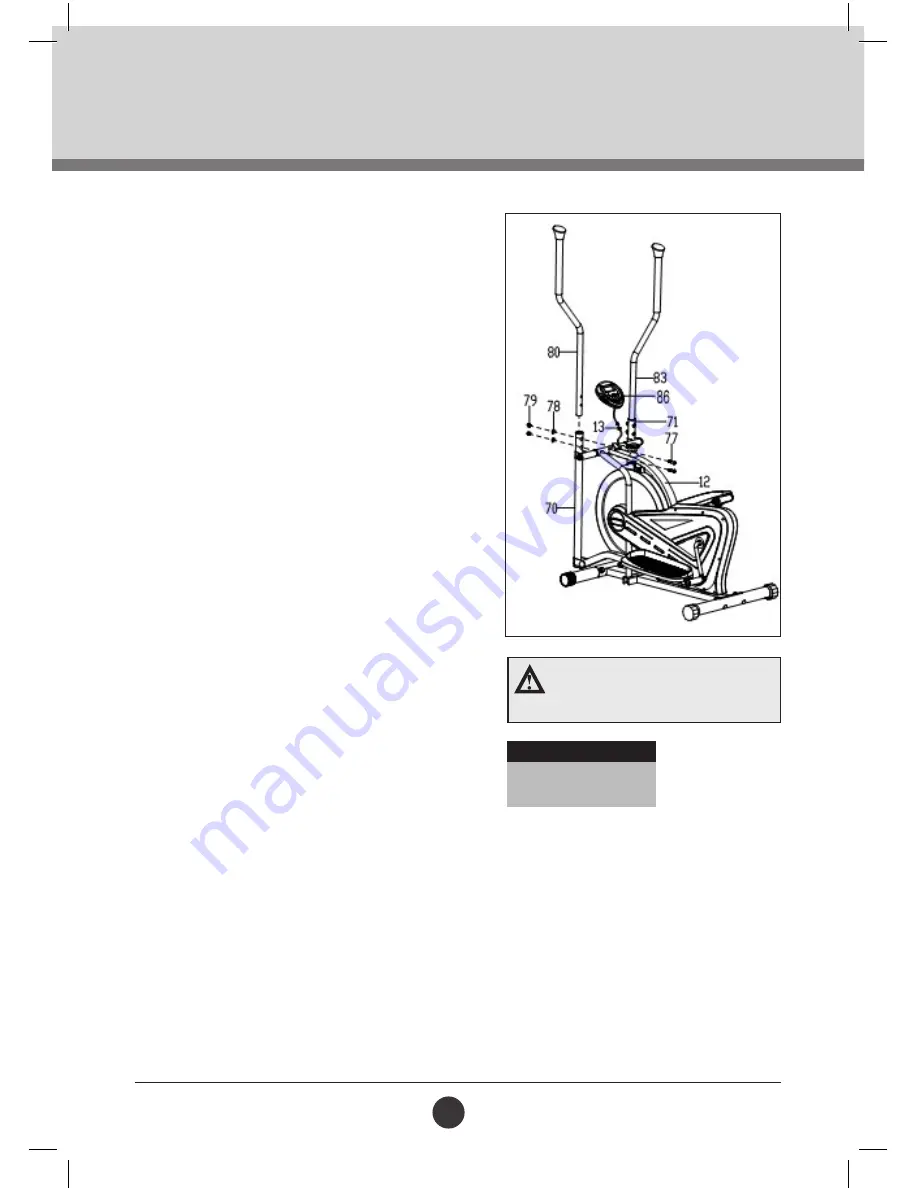
CAUTION:
Ensure that cables are not damaged
during assembly or when tightening screws.
•
Tighten bolts and nylon nuts with the provided 8
mm Allen Wrench and the Multi Hex Tool, turn anti-
clockwise to tighten.
NOTE:
Use the same procedure above to attach the
Right Foot Bar (86) onto the right Crank (22).
The Right Foot Bar (86) is attached by using
Bolt (67). To tighten, the bolt would need to be
turned clockwise.
•
Install four S16 Nut Caps (62) onto M10 x 55 Bolts
(63) and M10 x L9 Nylon Nuts (65) on both Foot
Bars (85/86).
3. RIGHT AND LEFT FOOT PEDALS
INSTALLATION
•
Attach the Left Foot Pedal (60) onto the Left Foot
Bar (85) with three M6 x 42 Bolts (59), M6 Nylon
Nuts (30) and Washer Ø6 (58).
•
Tighten nylon nuts with the provided Multi Hex Tool.
NOTE:
Use the same procedure to attach the Right Foot
Pedal (68) onto the Right Foot Bar (86).
4. RIGHT/LEFT HANDRAIL ARMS AND
COMPUTER INSTALLATION
•
Connect the Sensor Wire (13) to the wire on the
Computer (84).
•
Place the Computer (84) onto the plate on the Main
Frame (12) then slide it down to lock in position.
•
Insert the Left Handrail Arm (80) into the Handrail
Arm Plastic Bushing on the tube of the Left Handrail
(70) and secure with two Bolts (77), two Cap Nuts
(79), and two Big Curved Washers (78).
NOTE:
Use the same procedure to attach the Right
Handrail Arm (83) into the Handrail Arm Plastic
Bushing on the tube of the Right Handrail (71).


