10
SPIN100-SB
ASSEMBLY STEPS
1. PREPARATION
•
Before assembling make sure that you will have enough space around the item.
•
Use the supplied parts and hardware for the assembly.
•
Before assembling please check whether all the required parts have been supplied as per the exploded
drawing on the opposite page.
STEP 1
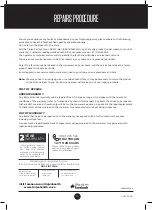
STEP 1: FRONT AND REAR STABILISERS
Attach the Front Stabiliser (15) to the Main Frame
(16) with two sets of Ø8 Arc Washer (5), M8 Domed
Nut (6) and M8 x 75 Carriage Bolt (3).
Attach the Rear Stabiliser (4) to the Main Frame (16)
with two sets of Ø8 Arc Washer (5), M8 Domed Nut
(6) and M8 x 75 Carriage Bolt (3).
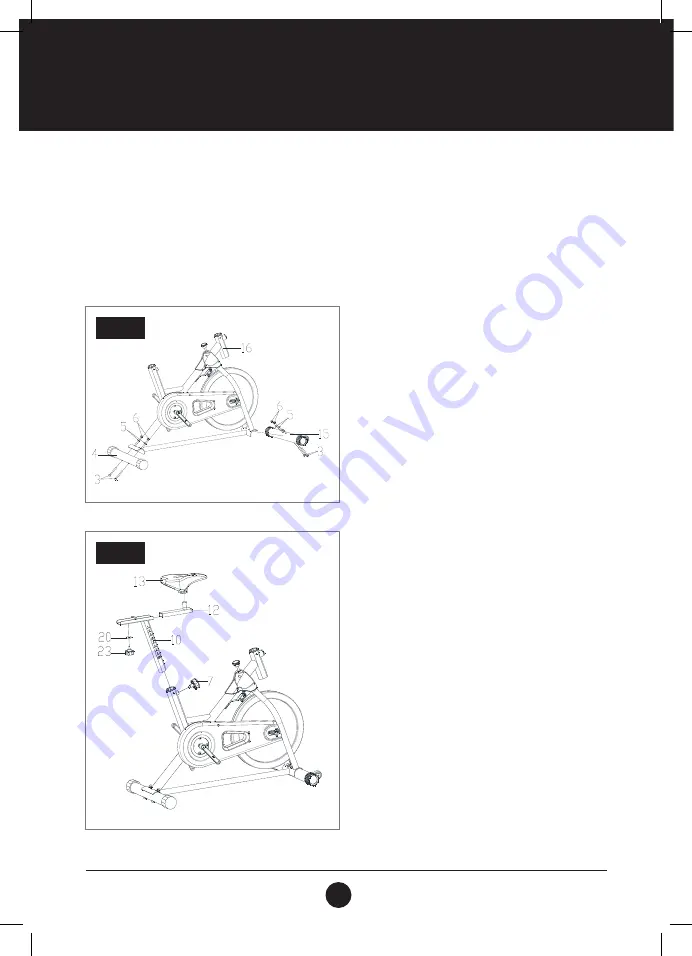
STEP 2: SEAT ASSEMBLY
Insert the Vertical Seat Post (10) into the seat post
tube of the Main Frame. You will have to slacken the
Knob (7) and pull the Knob back. Then select
the desired height. Release the Knob and retighten.
The Seat Post (12) is fixed on the Vertical Seat Post
(10) with the Knob (23) and the Flat Washer (20).
The Seat (13) is fixed on the Seat Post (12) with the
nuts of the seat.
STEP 2
Summary of Contents for SPIN 100
Page 9: ...9 SPIN100 SB EXPLODEDDRAWING...
Page 24: ...24 SPIN100 SB NOTES...


