background image

11

SPIN100-SB


ASSEMBLY STEPS

STEP 3: HANDLEBAR AND
              HANDLEBAR POST

Insert the Handlebar Post (17) into the handlebar post 
tube of the main frame. You will have to slacken the 
Knob (87) and pull the Knob back. Then select the 
desired height. Release the Knob and retighten it.

The Handlebar (18) and the Computer Holder (21) are 
fixed on the Handlebar Post (17) with four sets of the 
Bolt (9) and the Elastic Washer (57).

The Computer (82) is fixed on the Computer Holder (21).

ATTENTION: CONNECT THE COMPUTER LINE,
                       TO GAP (A1) CORRESPONDING     
                       TO THE CONVEX POINT (A2)
                       TO INSERT LINK

STEP 4: PEDAL ASSEMBLY

The Pedals (1L & R) are marked “L” and “R” - Left and 
Right. Connect them to their appropriate crank arms. 
The right crank arm is on the right- hand side of the 
cycle as you sit on it. 

Note: 

The Right pedal should be threaded on 

clockwise and the Left pedal anticlockwise.

STEP 3

STEP 4


Summary of Contents for SPIN 100

Page 1: ...IKE 10KG FLYWHEEL CARDIO USERMANUAL Visit facebook com trojanhealth www trojanhealth co za CAUTION READ ALL PRECAUTIONS AND INSTRUCTIONS IN THIS MANUAL BEFORE USING THIS EQUIPMENT KEEP THIS MANUAL FOR...

Page 2: ...______ 13 Console Functions____________________________________________ 14 Spinning Bike Set Up __________________________________________ 15 Exercise Instructions ____________________________________...

Page 3: ...d consult your physician To avoid muscular pain and strain begin each workout by stretching and warming up and end each session by cooling down and stretching INSTALLATION Trojan recommends that all e...

Page 4: ...Should your Trojan equipment appear damaged or worn do not attempt to use or repair the equipment yourself Please contact our service department on 0861 TROJAN 0861 876526 to arrange a repair Customer...

Page 5: ...ty to exercise The Trojan Spin 100 Spinning Bike provides a convenient and simple method to begin your assault on getting your body in shape and achieving a healthier lifestyle Before reading further...

Page 6: ...hardware packaging to make sure all parts are included Basic tools such as spanners will be provided for assembly 9 8 7 6 5 4 3 2 1 0 24 23 22 21 20 19 18 17 16 15 14 13 12 11 10 9 8 7 6 5 4 3 2 1 0...

Page 7: ...T 70 3 2000 M8 x 18 4 28 Fixing Nut 1 GB T 6177 2 2000 M10 x 1 25 2 29 Crank Cap 23 x 7 5 2 No Description 30 Brake Knob M10 x 175 1 31 Lock Nut GB T 889 1 2000 M8 6 32 Plastic Bushing 3 21 1 x 18 x 1...

Page 8: ...16 4 x 16 1 73 Woolly Block 113 x 25 x 5 1 74 Bolt 4 GB T 5780 2000 M5 x 30 2 75 Brake Sheet Metal 1 0 1 No Description 76 Lock Nut GB T 889 1 2000 M5 2 77 Elastic Washer 2 GB T 889 1987 5 2 78 Bolt...

Page 9: ...9 SPIN100 SB EXPLODEDDRAWING...

Page 10: ...16 with two sets of 8 Arc Washer 5 M8 Domed Nut 6 and M8 x 75 Carriage Bolt 3 Attach the Rear Stabiliser 4 to the Main Frame 16 with two sets of 8 Arc Washer 5 M8 Domed Nut 6 and M8 x 75 Carriage Bol...

Page 11: ...n the Handlebar Post 17 with four sets of the Bolt 9 and the Elastic Washer 57 The Computer 82 is fixed on the Computer Holder 21 ATTENTION CONNECT THE COMPUTER LINE TO GAP A1 CORRESPONDING TO THE CON...

Page 12: ...resistance requiring less strength to pedal turn the Emergency Brake Resistance Control Knob 30 to the left STEP 6 USING THE EMERGENCY BRAKE FUNCTION The Emergency Brake Resistance Control Knob can b...

Page 13: ...in the direction of the handlebar or backwards away from it loosen the adjusting Knob and washer and pull the Knob back Slide horizontal seat post into desired position Align holes and then retighten...

Page 14: ...splay will show the Odometer on the meter The reading of the odometer will be reset to zero after replacing the batteries SPEED Push the mode key until the arrow points to SPD to display the speed val...

Page 15: ...on and the back in the 9 o clock position If you drop a straight line down from your forward knee it should fall directly over the centre of your front foot If this does not happen you need to move th...

Page 16: ...roperly It will also reduce the risk of cramp and muscle injury It is advisable to do a few stretching exercises as shown below Each stretch should be held for approximately 30 seconds do not force or...

Page 17: ...is will put more strain on our leg muscles and may mean you cannot train for as long as you would like If you are also trying to improve your fitness you need to alter your training program You should...

Page 18: ...o not use abrasives or solvents on plastic parts Please wipe your perspiration off the Trojan Spin 100 Spinning Bike after each use Please inspect all assembly bolts and pedals on the machine for prop...

Page 19: ...ld form part of your entire exercise routine WEIGHT TRAINING Along with aerobic exercising which helps get rid of and keep off the excess fat that our bodies can store weight training is an essential...

Page 20: ...per minute A six second count is used because your heart rate will drop rapidly when you stop exercising Adjust the intensity of your exercise until your heart rate is at the proper level For more in...

Page 21: ...rd from your hips Allow your back and shoulders to relax as you reach down toward your toes as far as possible Hold for 15 counts and then relax Repeat 3 times Stretches Hamstrings back of knees and b...

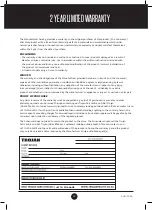
Page 22: ...ufacturer in respect of any injury loss or damage direct indirect or consequential arising out of the use of or inability to use this product and whether or not occasioned by the manufacturer s neglig...

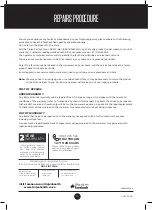
Page 23: ...r repair procedure COST OF REPAIRS UNDER WARRANTY Any items still under warranty will be repaired free of charge as long as it complies with the terms and conditions of the warranty refer to warrantie...

Page 24: ...24 SPIN100 SB NOTES...

Reviews: