


T3-OPX installation
Page | 63
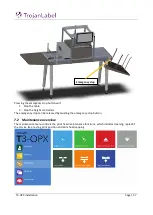
8
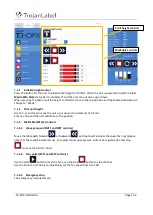
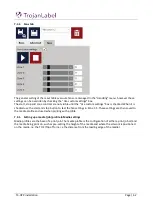
Automatically calibrating the job/media height
The T3-OPX can automatically adjust the height controllers to the media that the operator wants to print
on. The height can then be saved to media profile. Please refer to 7.1 ”Handling overview” and 7.3 ”Media
settings overview” for detailed description of the functions described below.
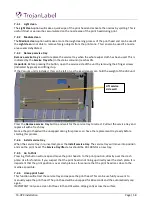
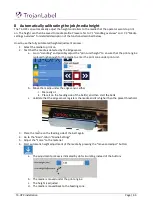
How to use the fully automated height adjustment process:
1.
Select the media to print on
2.
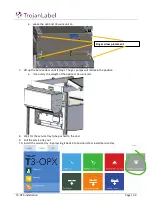
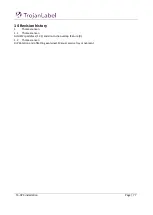
Test that the media is detected by the Edge sensor.
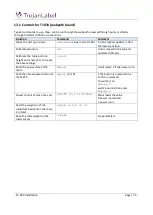
a.
Go to ”Handling” and possibly adjust the ”print unit height” to ensure that the print engine
is placed high enough for the media to enter the print zone under print unit.
b.
Move the media under the edge sensor either
i.
Manually or
ii.
Place it on the feeding side of the belt(s) and then start the belts
c.
Validate that the edge sensor registers the media and it is higher than the preset threshold.
i.
3.
Place the media on the feeding side of the belt again.
4.
Go to the ”Basic”-tab in ”Media Settings”
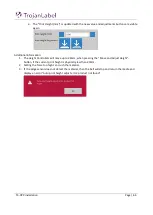
5.
Adjust the ”Force” to the material
6.
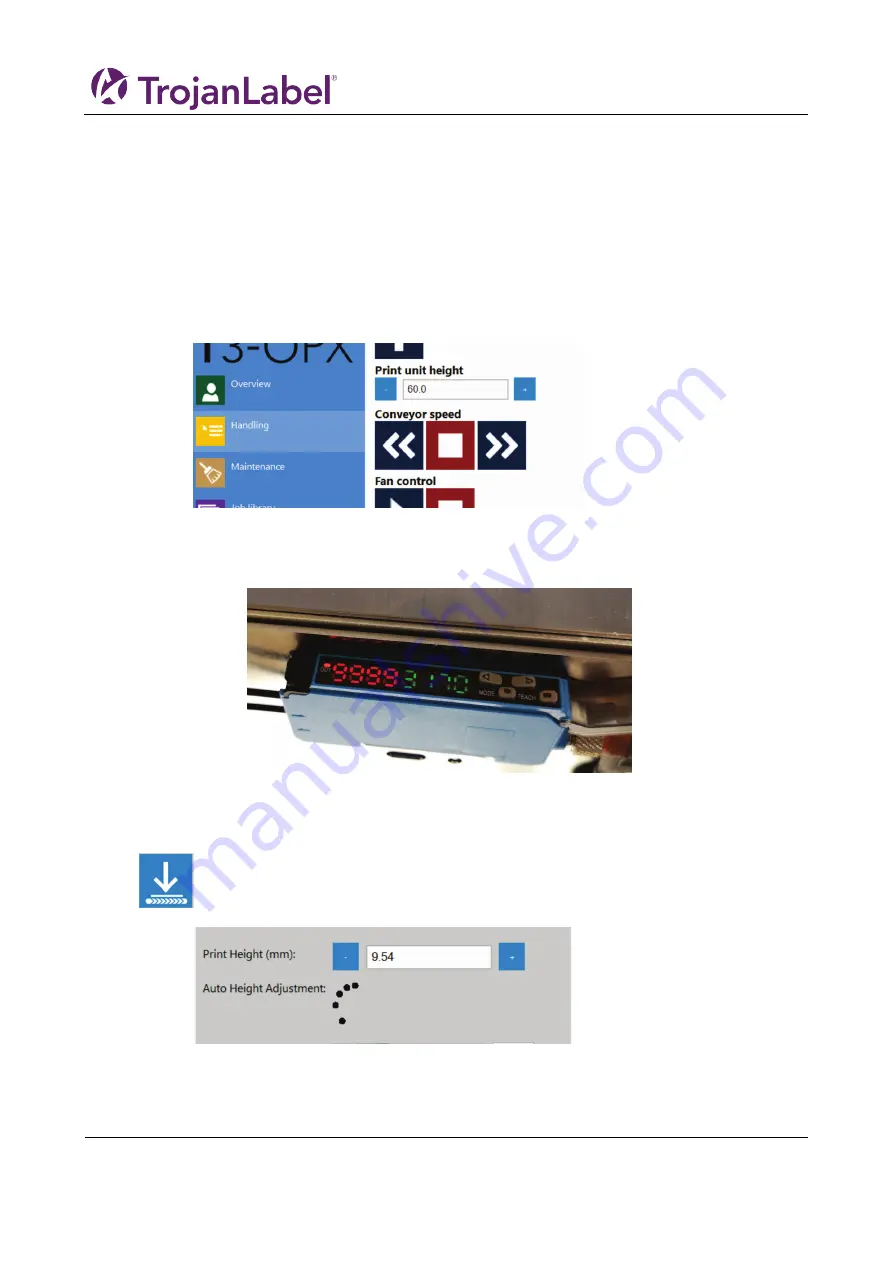
Start automatic height adjustment of the media by pressing the ”move and adjust” button:
a.
The adjustment process is indicated by dots circulating instead of the buttons
b.
The media is moved under the print engine
c.
The height is adjusted
d.
The media is moved back to the feeding zone
Summary of Contents for T3-OPX
Page 1: ...T3 OPX user guide Version 1 2...
Page 5: ...T3 OPX installation Page 4...
Page 7: ...T3 OPX installation Page 6 1 1 1 Emissions...
Page 13: ...T3 OPX installation Page 12...
Page 17: ...T3 OPX installation Page 16 2 2 Backside Height controllers 3 Inlets Ink lid Serial plate...
Page 20: ...T3 OPX installation Page 19...
Page 34: ...T3 OPX installation Page 33 i The process will use the purge height in the settings menu...


