
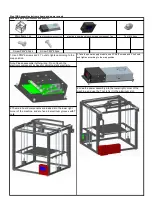


Slider plate(Right)
Slider plate(Left)
PM3*16
PM4*12
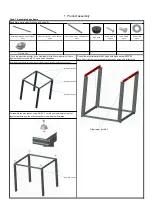
Aluminium frame
M4 T-Nut
2pcs
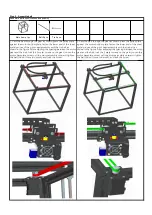
Step 3
:
Assemble printing head
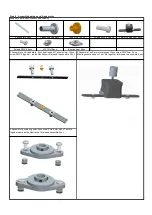
Assemble parts specifications and quantity
:
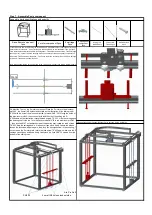
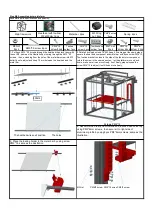
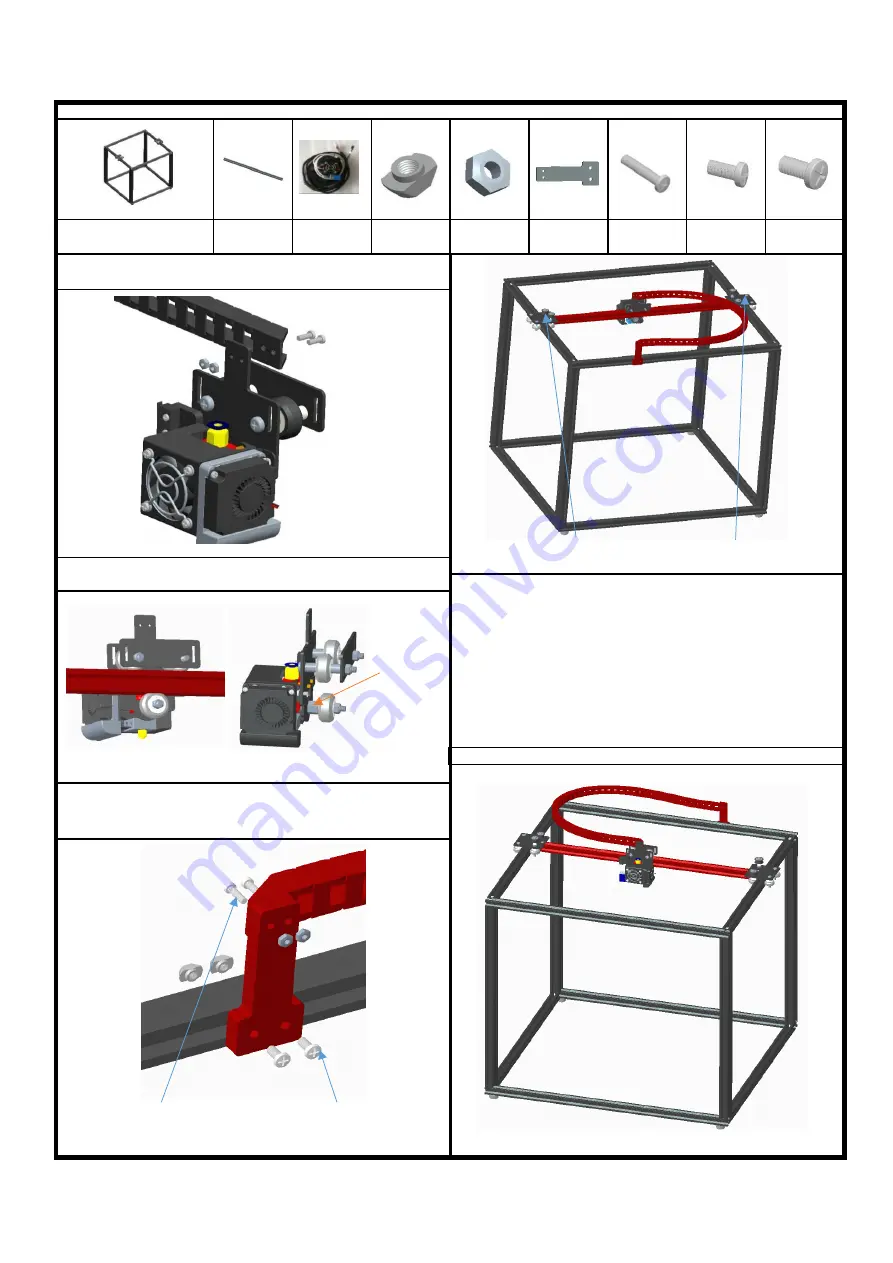
Note:The distance between the aluminum 4 and aluminum 2 is 3mm
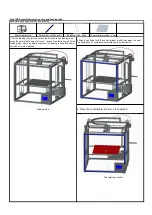
M3 Nut
4pcs
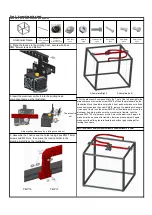
Towline holder
1pcs
PM3*16MM
2pcs
PM3*8MM
2pcs
PM4*12mm
2pcs
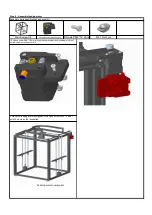
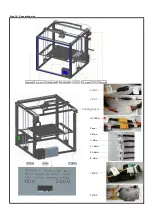
3, Assemble the Towline and the holder using 2pcs PM3*16mm
screws and M3 Nuts , then place the towline holder to the
aluminium profile as the illustration.
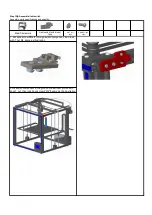
1, Place the towline to the printing heat , secure with 2pcs
PM3*8mm screws and M3 Nut
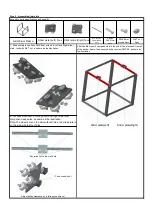
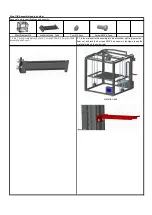
2.Insert the aluminum profile 4 into the printing head
component,same as the illustration.
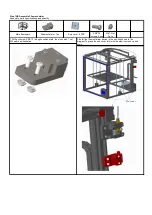
The eccentric
nut
Adjust pulley clearance by rotating eccentric nut
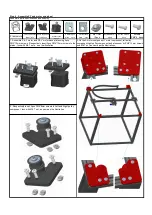
4.Put the aluminum 4 component into the T nut of the left and right slide
plate component,screw the screw PM4*8 of the slide plate,same as the
illustration. Move the aluminum profile 4 front and back,make sure it can
move freely,then lock the screw PM4*8, remove the aluminum 4,ensure
it can move freely, lock the screw PM5*25 of the aluminum 2, move the
aluminum 4 again to make sure the movement is flexible. Lock the
screws PM5 * 25 of aluminum profile 2,move the aluminum 4 again to
make sure the movement is flexible, otherwise, please adjust it again,
make sure tthe sliding table is flexible and without gap shaking after
locking the screws
Alu. Profile 4
20*20* 484mm
1pcs
Printing head
component
(with Towline) 1pcs


