R9T12FIRE
Page 5 of 16
Rev. L 08FEB19
WARNING:
The LP Gas tank or cylinder used must comply with the following requirements. Use
of other tanks or cylinders which do not meet these requirements may create an unsafe condition
which could cause injury or death to you, or damage to your personal property, including the risk of
fire or explosion.
The cylinder or tank used must be:
1. Constructed and marked in accordance with the U. S. Department of Transportation
(D.O.T.) Specifications for LP-Gas Cylinders, or the Standard for Cylinders, Spheres and
Tubes for Transportation of Dangerous Goods and Commission, CAN/CSA-B339 as
applicable;
2. Provided with a Listed overfilling prevention device; and
3. Provided with a cylinder connection device compatible with the connection for the appliance.
IMPORTANT:
The LP Gas tank must be secured in the fire pit.
For 401400RD and 401400SQ bases, place the tank in the tank retaining ring.
For 401700RCT base, slide horizontal LP gas tank along middle support until the back mounting
bracket of the tank hits the back of the slot. Line up the holes in the front mounting bracket and the
post on the front brace, then place the tank down.
For 401800SQ and 401800RCT models, place the horizontal LP gas tank so that the back
mounting bracket is in the slot and bracket hits the bumper. Line up the hole in the front mounting
bracket and the post on the front brace, then place the tank down.
DANGER
Do not use a vertical LP gas tank in place of a horizontal LP gas tank in
401700RCT,
401800SQ, and 401800RCT base models.
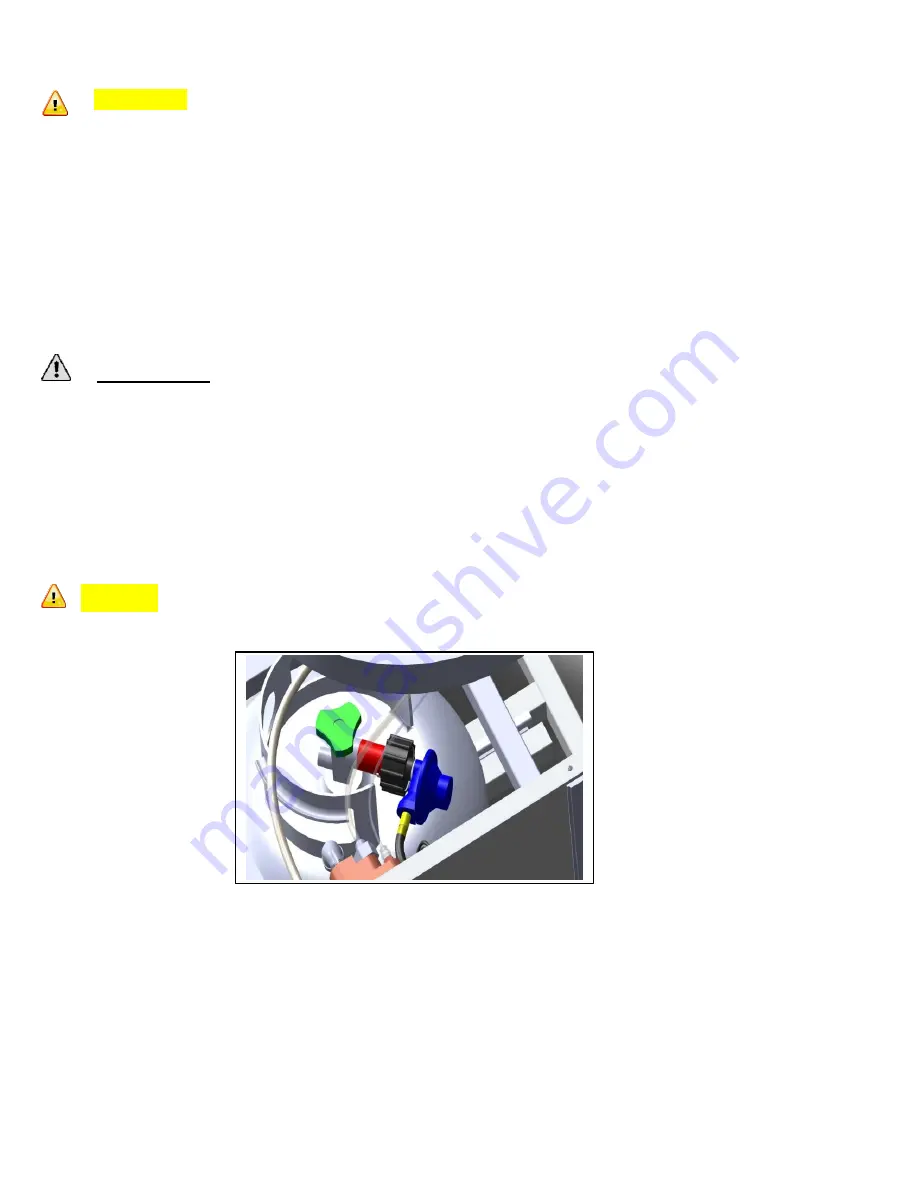
You can now connect your LP gas tank to the Fire Pit, using the standard propane gas hose with
built in regulator (shown in blue). Hand tighten the propane tank gas connector (shown in black), to
the tank valve (shown in red).
CAUTION
: Do NOT use tools to tighten this connection. Open the gas
valve on the tank by turning the gas valve knob (shown in green) counter-clockwise (to the left) until
fully open.
See diagram located at bottom of page 5.
To remove the gas tank, first turn off the gas valve by turning the knob fully clockwise (right), then
unscrew the gas connector counter-clockwise (left) and move the gas hose to a secure location to
prevent accidental damage.


