


EN
13
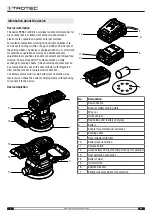
Cordless random orbital sander PESS 10-20V
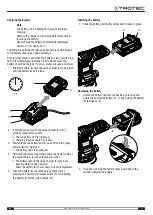
Assembling the dust collector
Warning of explosive substances
Wood dust inside the dust collector can self-ignite in
case of flying sparks. Do not use the dust extraction
system when grinding metals!
Wood dust can intermix with varnish residues or other
chemical substances.
Risk of fire and explosion!
Avoid overheating of the workpiece and the device.
Empty the dust collector or the vacuum cleaner's dust
collection bag at regular intervals.
Wear a protective mask
Wear an appropriate protective mask when working
with the device.
Note
The cover with the filter must point upwards.
Otherwise the dust collector cannot be installed.
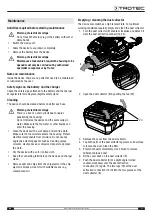
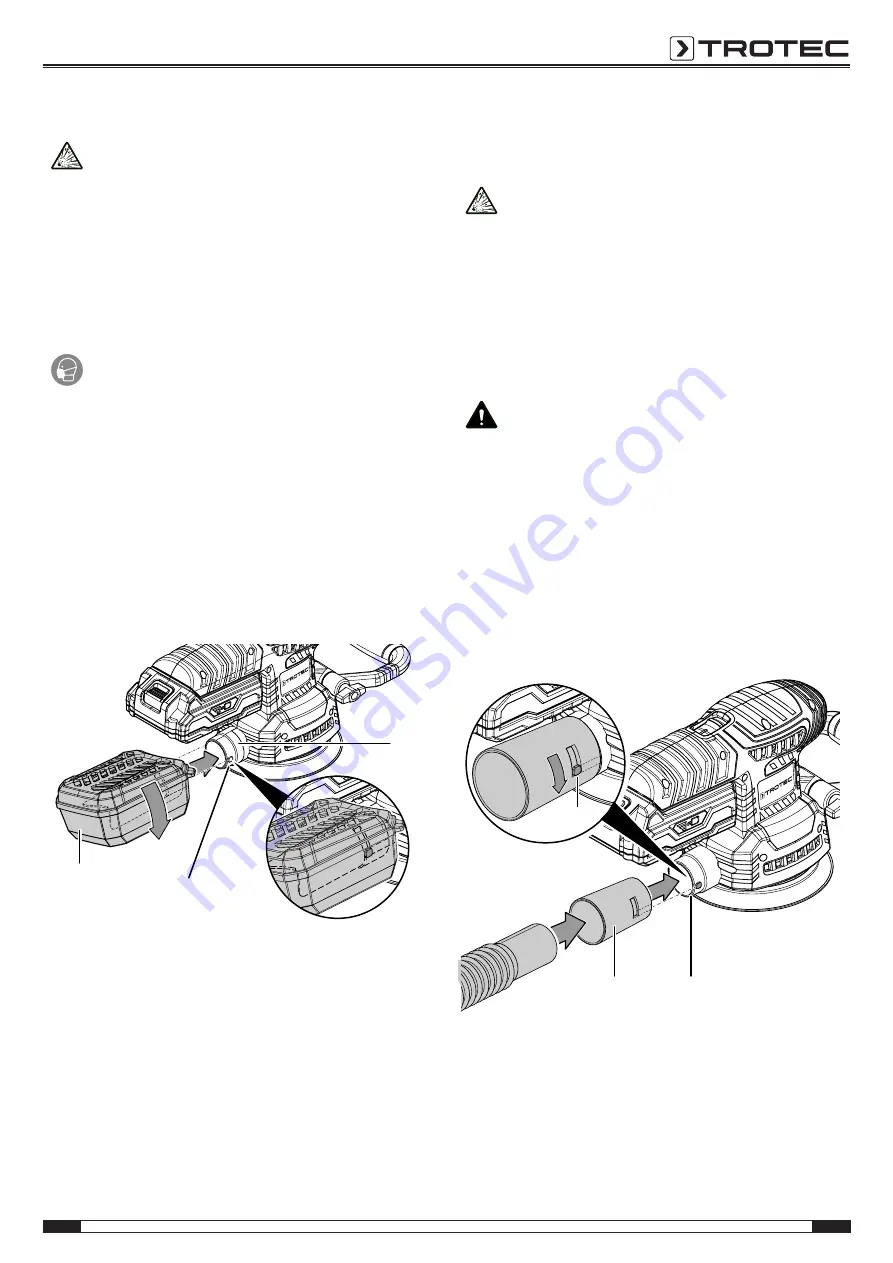
1. Push the dust collector (
9
) at a slight angle (turned
counter-clockwise) onto the dust extraction
connection (
13
). The two lugs (
19
) at the dust extraction
connection (
13
) fit into the two grooves of the dust
collector (
9
).
2. Then turn the dust collector (
9
) clockwise to lock it in
place.
9
13
19
II.
I.
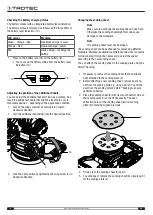
Mounting the external dust extraction system
Alternatively, you can also connect the dust extraction system to
the device.
Warning of explosive substances
Wood dust inside the dust collector can self-ignite in
case of flying sparks. Do not use the dust extraction
system when grinding metals!
Wood dust can intermix with varnish residues or other
chemical substances.
Risk of fire and explosion!
Avoid overheating of the workpiece and the device.
Empty the dust collector or the vacuum cleaner's dust
collection bag at regular intervals.
Caution
Use a special vacuum cleaner to suck off harmful or
toxic materials.
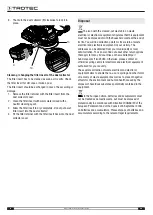
1. Push the adapter for external dust extraction (
7
) onto the
dust extraction connection (
13
). The two lugs (
19
) at the
dust extraction connection (
13
) fit into the two grooves of
the adapter for external dust extraction (
7
).
2. Then turn the adapter for external dust extraction (
7
)
clockwise to lock it in place.
3. Connect a suitable vacuum cleaner (e.g. industrial vacuum
cleaner) to the adapter (
7
). If anything is unclear or if you
have questions, please contact the manufacturer of your
vacuum cleaner.
7
13
19