B
-
11
Operating manual – Infrared camera
3.
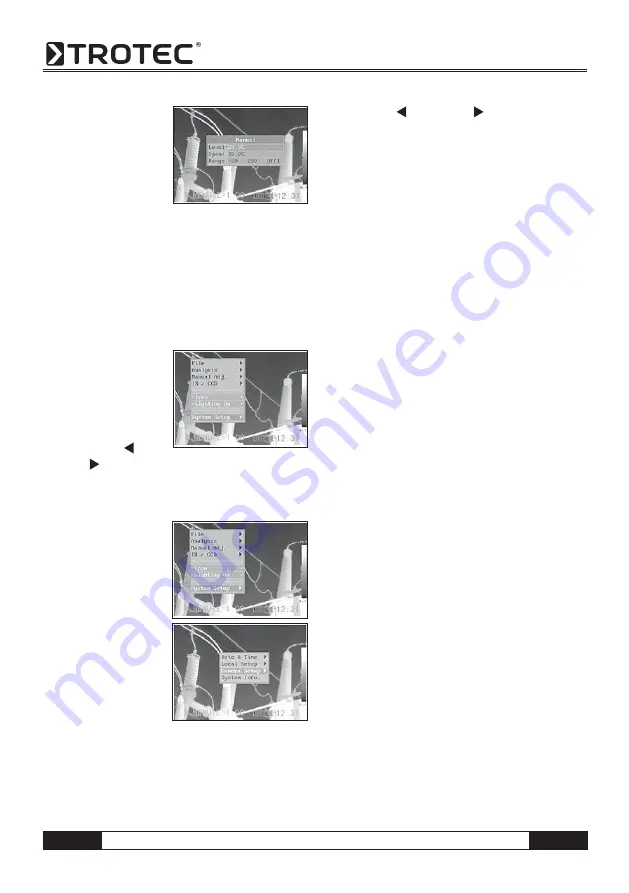
Setting Level and
Span.
• Press the Left or Right
arrow on the omni
selector to select a
fi eld to change.
• Press the Up or Down arrow on the omni selector
to set the values.
4. After this operation, press the MENU/ENTER key to
save changes, or press the C key close menu win-
dow without saving.
Image Settings
1. Press the MENU/ENTER key.
2. Press the
▲
UP or
Down
▼
arrow on the
omni selector to se-
lect the [iron]
menu, then Press
the
MENU/ENTER
key. Press the
LEFT/
RIGHT key to select the desired colour.
Further Settings
1. Press the MENU/
ENTER key and
change to the menu
item (System Se-
tup).
2. Press the
▲
“UP/
DOWN”
▼
arrow
on the omni-
selector until you
reach the menu
item
[Camera
Settings] and press
the MENU/ENTER
key.
3. Selecting image settings.
• Press the
▲
UP/DOWN
▼
arrow on the omni-
selector to reach a new box.
• Press the
RIGHT/LEFT arrow on the omni-
selector to select a new setting.
4. Having completed this step, press the MENU/ENTER
key to save the new settings or press the “C” key to
close the menu window without saving the settings.
About the Image Settings:
Auto adjust
Sets the function of A key. There are three options: Le-
vel and Span, Level, Span.
- Level und Span
The camera will automatically adjust the level (bright-
ness) and span (contrast) of the image to the optimum
setting.
- Level
The camera will automatically adjust the level
(brightness) of the image.
- Span
The camera will automatically adjust the span (contrast)
of the image.
Continuous adj
Sets whether or not the brightness and contrast of
the the image shown on the screen are adjusted au-
tomatically.
- Level and span
The brightness and contrast is adjusted automatically.
- Level
The camera will automatically adjust the level
(brightness) of the image.
- None
The brightness and contrast will not be adjusted auto-
matically.
Measurement range
The brightness can be decreased by setting the fi lter
(built-in) on or attaching an optional fi lter.
1. Press the MENU/ENTER key.


