


10
EN
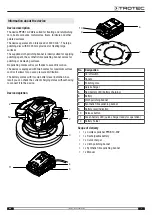
cordless polisher PPOS 10-20V
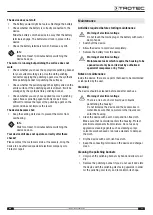
Charging the battery
Note
The battery can be damaged in case of improper
charging.
Remove the charger's mains plug before inserting or
removing the battery.
Never charge the battery at ambient temperatures
below 10 °C or above 40 °C.
The battery is partially charged upon delivery to avoid damage
to the battery caused by a deep discharge.
Prior to initial start-up and when the battery is low (only the red
LED in the battery level indication (
9
) is illuminated), the battery
should be charged. To do so, please proceed as follows:
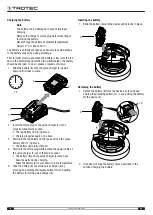
1. Slide the battery (
6
) onto the quick charger (
4
) upside
down until it locks in place.
1 h
6
4
11
5
9
2. Insert the mains plug of the quick charger (
4
) into a
properly fused mains socket.
ð
The red battery LED (
5
) lights up.
ð
Charging requires approx. one hour.
3. Wait until the red battery LED (
5
) goes off and the green
battery LED (
11
) lights up.
ð
The battery (
6
) is fully charged.
4. Hold onto the mains plug while pulling the power cable of
the quick charger (
4
) out of the mains socket.
ð
The battery (
6
) and the quick charger (
4
) may have
become warm during charging.
Allow the battery (
6
) to cool down to room temperature.
5. Take the battery (
6
) out of the quick charger (
4
) by
pressing and holding the release button (
10
) and pulling
the battery (
6
) off the quick charger (
4
).
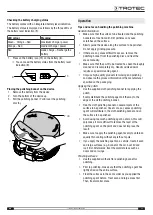
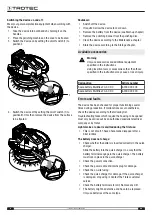
Inserting the battery
1. Slide the battery (
6
) onto the device until it locks in place.
6
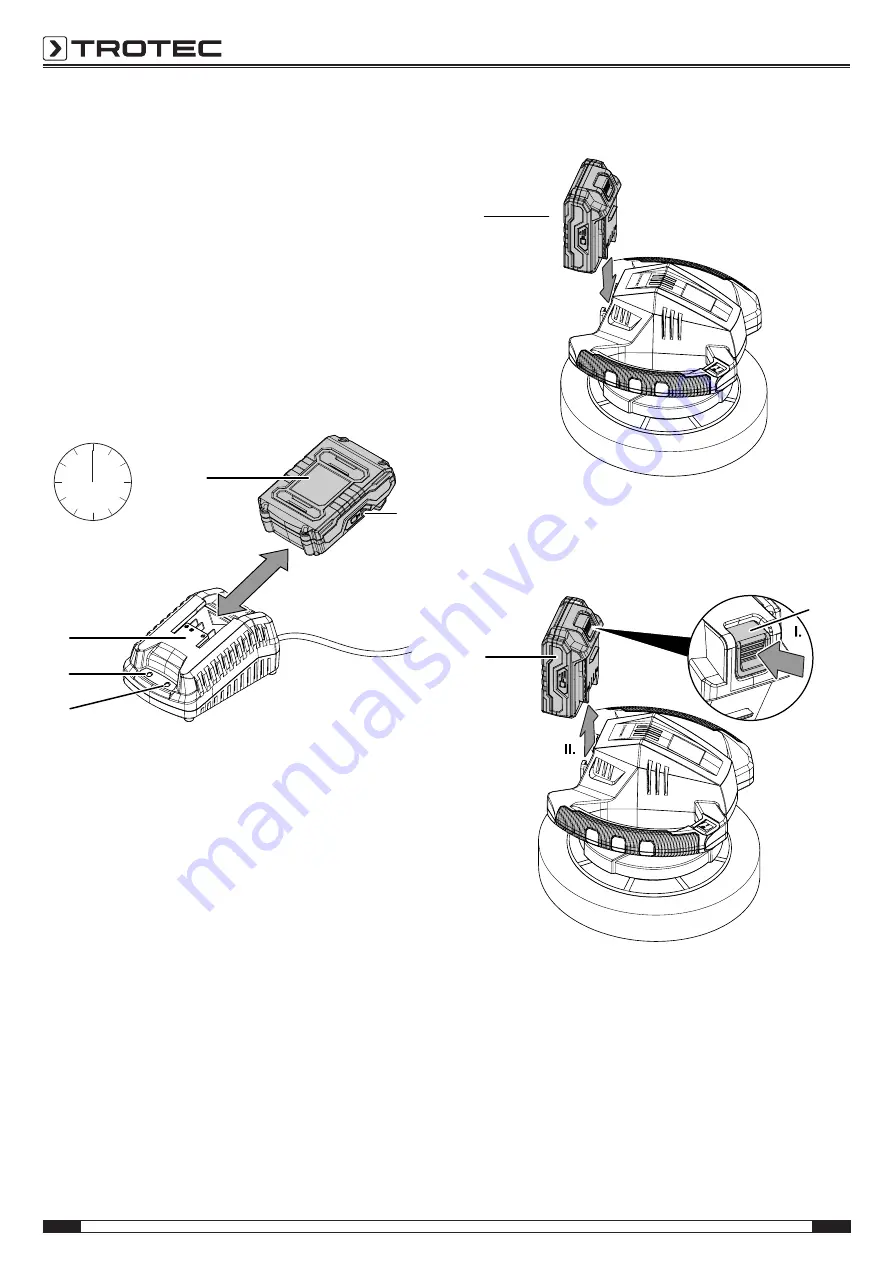
Removing the battery
1. Detach the battery (
6
) from the device by pressing and
holding the unlocking button (
10
, I.) and pulling the battery
off the device (II.).
10
6
2. If required, charge the battery (
6
) as described in the
section
Charging the battery
.


