background image

EN

11

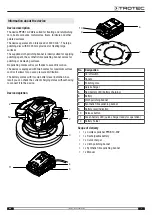
cordless polisher PPOS 10-20V

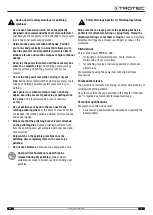
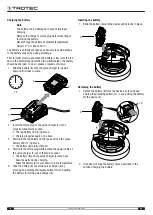
Checking the battery charging status

The battery comes with an integrated battery level indication.
The battery status is displayed as follows by the three LEDs of
the battery level indication (

9

):

LED colour

Meaning

Green – Orange – Red

maximum charge / power

Orange – Red

medium charge / power

Red

weak charge – Recharge the
battery.

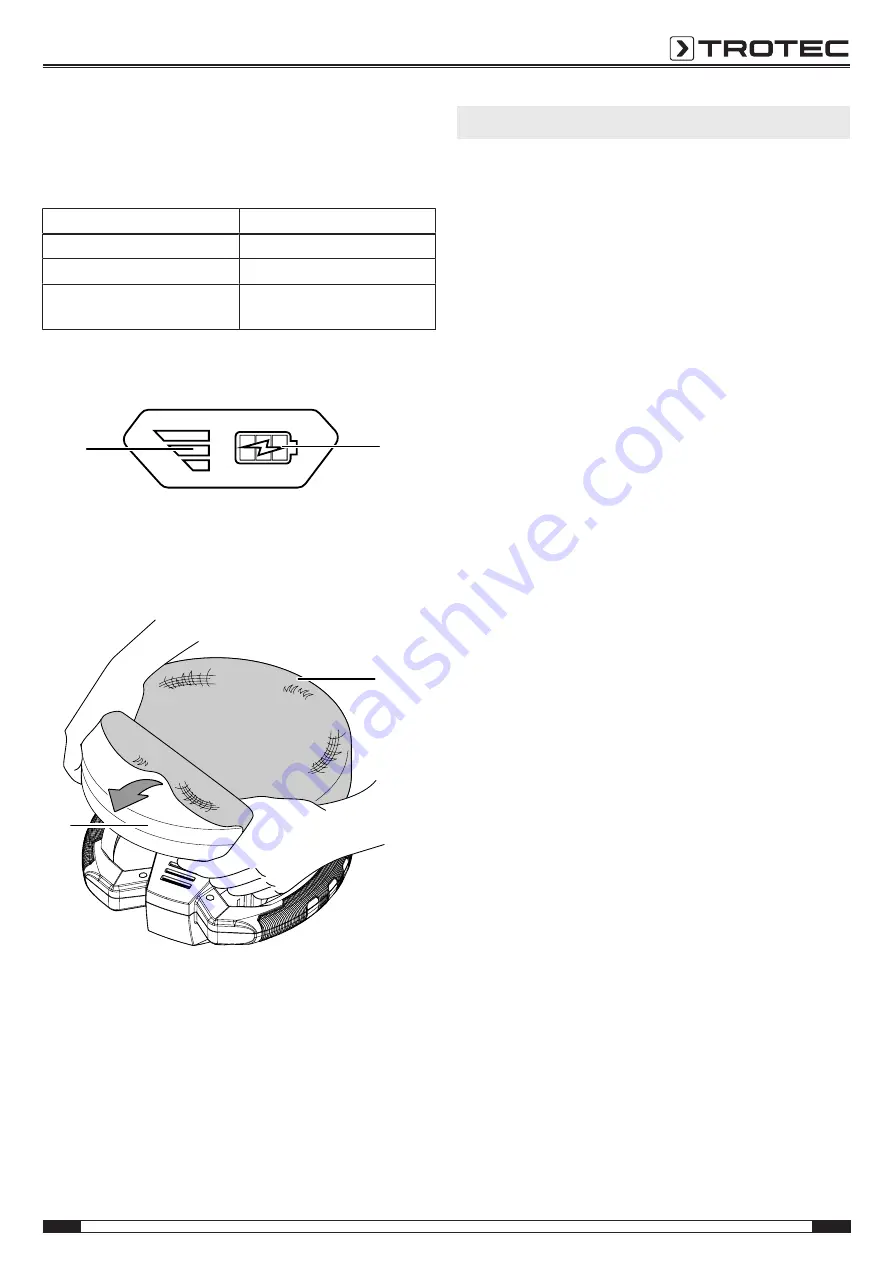
1. Press on the battery icon (

13

) on the battery (

6

).

ð

You can read the battery status from the battery level
indication (

9

).

13

9

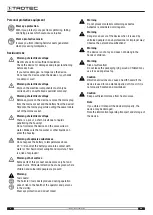
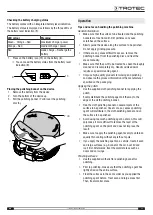
Placing the polishing bonnet on the device

1. Remove the battery from the device.
2. Turn the bottom of the device up.
3. Pull the polishing bonnet (

7

 or 

8

) over the polishing

disc (

3

).

3

7 / 8

Operation

Tips and notes on handling the polishing machine

General information:

Make sure that the surface to be treated and the polishing
bonnets are free from dirt. Dirt particles can cause
scratches on the surface.

Slowly guide the device along the surface to be polished.
Do not apply grinding pressure.

If there are any areas difficult to access, remove the
polishing bonnet from the polishing disc and treat the
areas manually.

Make sure that the paint to be treated has been thoroughly
cleaned and is completely dry. Heavily oxidised paint
requires a special cleaning agent.

Only use high-quality products for waxing and polishing
and observe the process information of the manufacturer
specified on the packaging.

Applying the polish:

Use the supplied cloth polishing bonnet for applying the
polish.

Evenly distribute the polishing agent all the way to the
edge of the cloth polishing bonnet.

Dab the cloth polishing bonnet on several spots of the
surface to be polished. Once more, any excess polishing
agent will distribute in the cloth polishing bonnet and on
the surface to be polished.

Avoid using too much polishing agent. Later on, this will
only make it more difficult to remove the layer of the
polishing agent on the paint and does not improve the
result.

Make sure to apply the polishing agent evenly to obtain an
equally thin coating without any left-out spots.

If you apply the polishing agent on a vehicle, treat all even
and large surfaces (e.g. bonnet of the car, boot lid and
roof) first. Afterwards, treat the smaller areas such as
doors and car wings.

Polishing surfaces:

Use the supplied synthetic fibre polishing bonnet for
polishing.

Prior to polishing, make sure that the polishing agent has
lightly dried on the entire surface.

Treat the surfaces in the same order as you applied the
polishing agent before. Treat even and large areas first.
Then, treat smaller areas.

Summary of Contents for PPOS 10-20V

Page 1: ...TRT BA PPOS10 20V TC2020 09 001 EN PPOS 10 20V EN ORIGINAL INSTRUCTIONS CORDLESS POLISHER...

Page 2: ...indicates that you should wear eye protection Wear a protective mask Information marked with this symbol indicates that you should wear a protective mask You can download the current version of the in...

Page 3: ...e tired or under the influence of drugs alcohol or medication A moment of inattention while operating power tools may result in serious personal injury Use personal protective equipment Always wear ey...

Page 4: ...es and grasping surfaces do not allow for safe handling and control of the tool in unexpected situations General Power Tool Safety Warnings Battery tool use and care Recharge only with charger specifi...

Page 5: ...Make sure that the polishing bonnet is well attached on the polishing disc A loose polishing bonnet can slip from the polishing disc get entangled with your hand and cause injuries Only switch on the...

Page 6: ...of explosive substances Do not expose the battery to temperatures above 45 C Do not let the battery come into contact with water or fire Avoid direct sunlight and moisture There is a risk of explosio...

Page 7: ...evice is equipped with two handles for maximum surface control It allows for an even pressure distribution The battery comes with its own battery level indication As a result you can check the current...

Page 8: ...values were measured by means of a test procedure standardized in EN 62841 and can be consulted for the comparison of one power tool with another The specified total vibration and noise emission value...

Page 9: ...ns Storage Before storing the device proceed as follows Switch off the device Hold onto the mains plug while pulling the power cable of the charger out of the mains socket Allow the device to cool dow...

Page 10: ...operly fused mains socket The red battery LED 5 lights up Charging requires approx one hour 3 Wait until the red battery LED 5 goes off and the green battery LED 11 lights up The battery 6 is fully ch...

Page 11: ...mpletely dry Heavily oxidised paint requires a special cleaning agent Only use high quality products for waxing and polishing and observe the process information of the manufacturer specified on the p...

Page 12: ...icle number Spare battery Multiflex 20 2 0 DC 6 200 000 303 Spare battery Multiflex 20 4 0 DC 6 200 000 320 Errors and faults The device has been checked for proper functioning several times during pr...

Page 13: ...ary bring the device to an authorized specialist electrical company or to Trotec for repair Maintenance Activities required before starting maintenance Warning of electrical voltage Do not touch the m...

Page 14: ...n batteries and accumulators Please dispose of batteries and accumulators according to the relevant legal requirements Declaration of conformity The text below sets out the contents of the declaration...

Page 15: ...Trotec GmbH Grebbener Str 7 D 52525 Heinsberg 49 2452 962 400 49 2452 962 200 info trotec com www trotec com...

Reviews: