State Library of Queensland Wiki
30/36
Rayjet 300 Laser Cutter
2019/08/01 08:17
Rayjet 300 Laser Cutter
- Needs sentence here about whether test is passed when chlorine is or is not present
D: Test Cut Procedure
If the material is found to be suitable for cutting, set up the material and focus the
1.
laser as per standard Edge Laser Cutter Induction procedure
In CorelDraw, create a small 20mm x 20mm square set to RED Hairline
2.
For low density materials or materials LESS than 2mm thick:
3.
In the Rayjet print preferences, set the RED CUTTING setting Power to 5% and Speed to
5% with a single pass
Select skip in the BLACK ENGRAVING option
Set ‘Move job to Laser’ in the laser print spooler
Perform this cut
Move laser to top left corner away from material
Remove material and examine cut. Mark the Power and Speed settings in the format
POWER/SPEED next to the cut. i.e. 5/5
If the cut did not penetrate the material completely, perform the procedure again from
Step 8 using an increment of 5% in Power
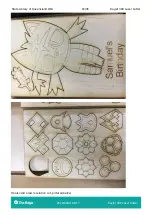
It is important to make successive cuts next to each other in an ordered pattern and note
the power/speed for each cut
Repeat the procedure increasing the power until a complete cut is made. At this point,
fine tune the settings using 1-2% increments or decrements, taking notes on the test
material for each cut
For high density materials or materials more than 2mm thick:
4.
In the Rayjet print preferences, set the RED CUTTING setting Power to 5% and Speed to
5% with TWO passes
Select skip in the BLACK ENGRAVING option
Set ‘Move job to Laser’ in the laser print spooler
Perform this cut
Remove material and examine cut. Mark the Power and Speed settings in the format
POWER/SPEED next to the cut. i.e. 5/5
If the cut did not penetrate the material completely, perform the procedure again from
Step 8 using an increment of 5% in Power
It is important to make successive cuts next to each other in an ordered pattern and note
the power/speed for each cut
Repeat the procedure increasing the power until a complete cut is made. At this point,
fine-tune the settings using 1-2% increments or decrements, taking notes on the test
material for each cut
Once successful cuts have been made, examine the cut edges. If these are smooth and
straight note down the cut settings for use. If the edges are melted or beveled / rounded,
you may need to increase the passes, in which case, perform the procedure from the 5/5
% setting start again
Once settings have been found for cutting, test for engraving as follows:
5.
In CorelDraw, create a small 20mm x 20mm square set to filled with BLACK
In the Rayjet print preferences, set the BLACK ENGRAVING setting Power to 5% and Speed
to 50%.
Select skip in the RED CUTTING option

