Solid ceiling slabs without open spaces, made of concrete or aerated concrete, gross density
≈
600 kg/m³ and
D ≥ 150 mm
1.
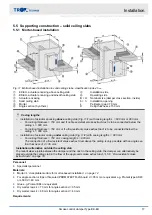
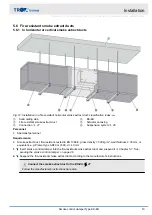
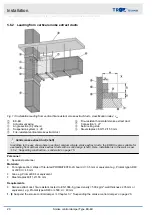
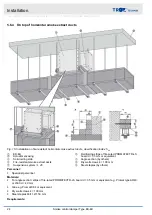
Create an installation opening according to Fig. 11.
Installation opening b x h:
b = B + 100 + 2s
h = H + 100 + 2s
s ≤ 70 mm (leave enough space for mortaring of the gap)
Example:
B x H = 1200 x 750 mm, s = 60 and 70 mm
b = 1200 + 100 + (2 x 60) = 1420 mm
h = 750 + 100 + (2 x 70) = 990 mm
2.
Push the smoke control damper into the installation opening and secure it. Make sure that the actuator
encasing rests on the face of the ceiling slab.
3.
Close off the perimeter gap »s« with mortar. The mortar bed depth must be at least 150 mm.
4.
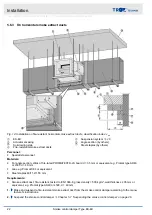
Apply glue to the joints (Fig. 11/6) between the angle sections and between the angle sections and the damper
casing, then fix the angle sections to the casing of the smoke control damper with dry wall screws (pre-drill
holes with
∅
3 mm),
≤
150 mm distance between screws.
Connect the smoke extract duct to the EK-EU,
Follow the manufacturer's instructions here also.
Installation while constructing the solid ceiling slab
1.
Position the smoke control damper and secure it. Make sure that the actuator encasing rests on the face of the
ceiling slab.
2.
Protect the inside of the damper/connecting subframe/cover grille, e.g. with plastic.
3.
Cast concrete around the smoke control damper and leave the concrete to harden.
4.
Apply glue to the joints (Fig. 11/6) between the angle sections and between the angle sections and the damper
casing, then fix the angle sections to the casing of the smoke control damper with dry wall screws (pre-drill
holes with
∅
3 mm),
≤
150 mm distance between screws.
Connect the smoke extract duct to the EK-EU,
Follow the manufacturer's instructions here also.
Installation
Supporting construction – solid ceiling slabs > Mortar-based installation
Smoke control damper Type EK-EU
18


