After installation
Clean the fire damper.
Remove transport and installation protection or the
prop, if any. In case of mortar-based installation this
protection must not be removed until the mortar has
hardened.
Test the function of the fire damper.
Connect the ductwork.
Make electrical connections.
Equipotential bonding
The flange of the fire damper can be used for equipo-
tential bonding; no holes must be drilled into the damper
casing.
In the event of a fire, loads from the equipotential
bonding must not affect the fire damper.
Thermal insulation
When using thermal insulation, especially for outside or
exhaust air, fully bonded panel insulation materials
made of elastomeric foams (synthetic rubber) of fire
rating class B - S3,D0 can be used (e.g. AF / Armaflex
or Armaflex Ultima from Armacell). Be sure to comply
with the relevant national guidelines and regulations for
combustible building materials and smoke formation
classes.
Insulation is non-hazardous in terms of fire safety if the
following requirements are met:
The insulation does not impair the function of the fire
damper.
The fire damper remains accessible.
the inspection accesses and the rating plate are
accessible and
The insulation does not penetrate walls or ceilings.
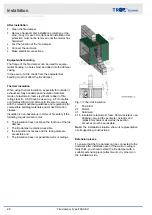
Fig. 10: Thermal insulation
1
FKA2-EU
2.1
Mortar
3.1
Solid wall
6.16 Insulation (elastomeric foam, flame-resistant, non-
dripping), around the perimeter, actuator and
release mechanism as well as inspection
accesses must be accessible
Note:
The installation situation shown is representative
of all supporting constructions.
Extension pieces
To ensure that the fire damper can be connected to the
ductwork after installation even if the wall or ceiling is
fairly thick, you should extend the fire damper with a
suitable extension piece (attachment or by others) on
the installation side.
Installation
General installation information
Fire damper Type FKA2-EU
28


