•
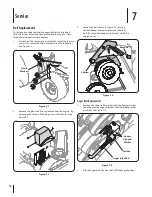
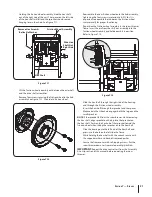
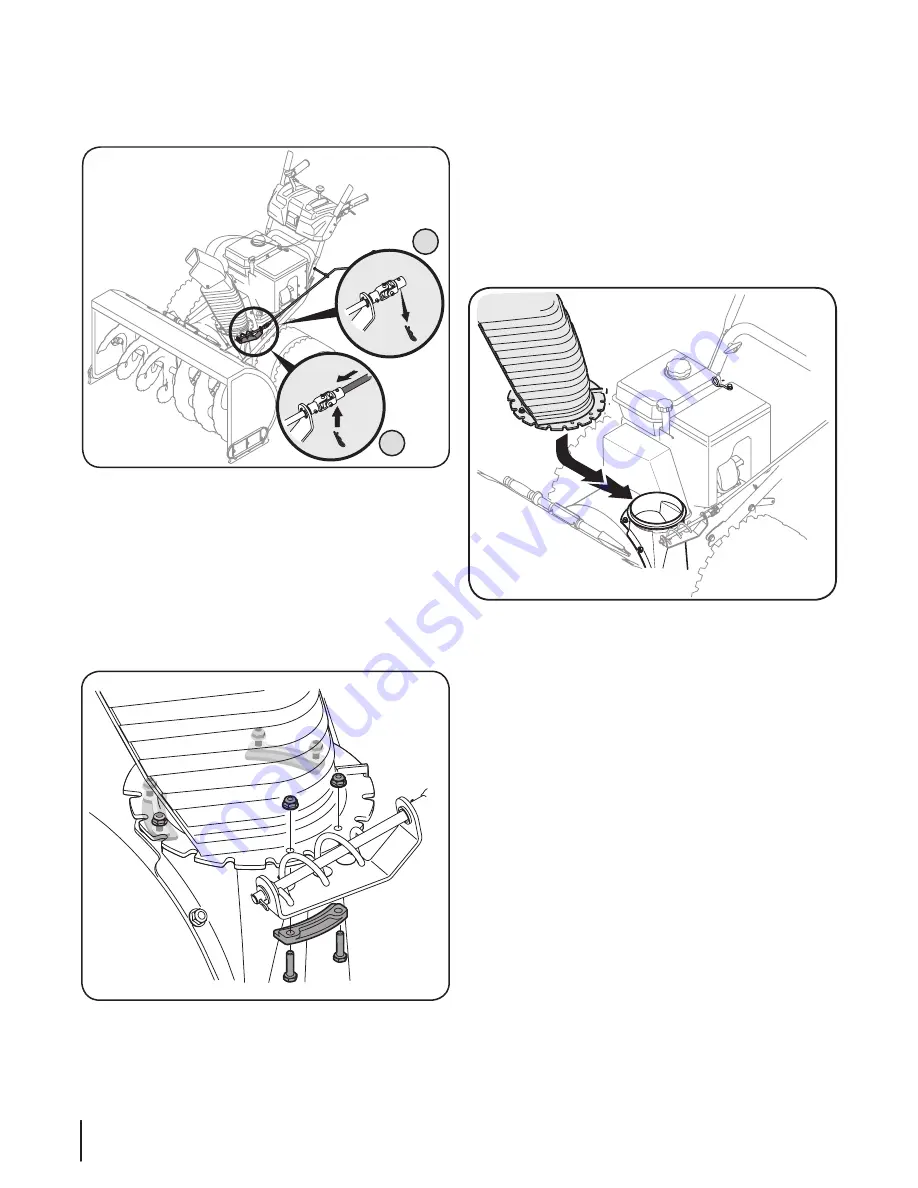
Place the chute assembly onto chute base, making sure the
flange keepers are beneath lip of chute base. The notches
should engage with the spiral end of the chute crank. See
Figure 3-6.
•
Retighten the two nuts which secure the chute bracket.
•
Secure flange keeper, locknuts and screws previously
removed. Tighten all flange keepers and hardware with
two 7/16” wrenches. Do not over tighten.
NOTE:
If necessary the chute crank support bracket can be
adjusted so the spiral on the chute crank fully engages the teeth
on the chute assembly. Refer to the Adjustment Section.
Chute Directional Control
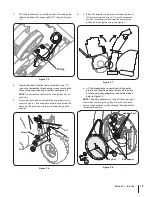
1.
Remove the hairpin clip from the lower chute crank as
shown in A of Fig. 3-4.
2.
Insert the upper chute crank into the fitting on the lower
chute crank as seen in B of Fig. 3-4.
3.
Secure with the hairpin clip previously removed.
Attaching the Chute Assembly
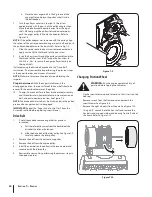
•
Remove locknuts and screws securing one of the flange
keepers to the chute assembly. See Figure 3-5.
•
Loosen but do not remove the locknuts and screws on the
other two flange keepers.
Fig. 3-5
Fig. 3-6
Fig. 3-4
A
B
8
S
ection
3— A
SSembly
& S
et
-U
p


