_____________________________________________________________
Hardware Installation
2-7
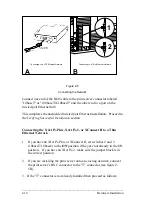
1. Turn off the printer or plotter and unplug the power cord.
2. If another I/O card (such as the serial/parallel I/O interface card) is
already installed in the I/O slot, loosen the two thumbscrews and pull
the card straight out. If no card is currently installed, remove the
faceplate by unscrewing the two retaining screws.
3. Insert the XJet IV-Plus, XJet IV-2, or XJet 100 firmly into the slot, and
tighten the two screws (see figure 2-4B).
4. TROY recommends that AUTOCONTINUE be enabled on the LaserJet
so that minor errors do not interrupt the operation of the printer. Refer
to your printer manual for instructions on enabling this parameter.
Connecting an External Print Server to a Parallel Printer
XConnect II, Pony 100, and Pony Plus Print Server
•
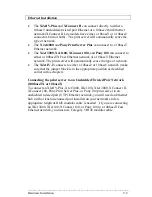
These print servers have a 36-pin male Centronics connector that is
compatible with the 36-pin female connectors found on most printers.
Therefore, the print server can be plugged directly into the printer with
no additional cable is required.
• In the event that the print server cannot be connected directly to the
printer's Centronics port, a 36-to-36 pin Centronics (male-to-female)
cable can be ordered from TROY (part Number: CABLE-CEN2).
•
For printers like the LaserJet 8000 that use the miniature Centronics
IEEE 1284C, TROY offers the CABLE-C/B adapter cable.
XConnect 100
:
•
These print servers have two 25-pin female connectors that are
compatible with the IBM PC standard 25-to-36 pin Centronics cable.
This cable is available at any computer or office supply store, or it can
be ordered from TROY (part number CABLE-CEN).
•
For printers like the LaserJet 8000 that use the miniature Centronics
IEEE 1284C, TROY offers the CABLE-C/A adapter cable.
Connecting a Print Server to a Serial Printer
XConnect II, Pony 100, XJet IV-Plus, XJet 100
The XConnect II has an RJ45 connector for connecting RS-232-compatible
serial printers. The XConnect II RJ45 connector is marked "Serial" and


