_____________________________________________________________
Hardware Installation
2-11
Note:
If you are connecting to a live network perform the following
steps as quickly as possible to minimize disruption of the network):
•
Connect one section of the thin Ethernet cable to one end of the
"T" connector.
•
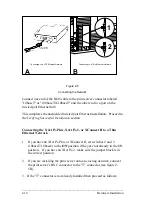
If you are connecting the print server in the middle of a thin
Ethernet segment, attach the second section of thin Ethernet cable
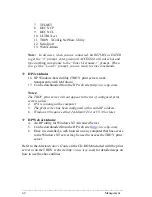
to the other end of the "T" as shown in figure 2-5B-1. If you are
connecting the print server at the end of a thin Ethernet segment,
attach a 50 ohm terminator to the other end of the "T" connector as
shown in figure 2-5B-2.
•
Connect the "T" connector to the BNC connector on the
transceiver.
You have now completed the thin Ethernet installation.
Verifying Successful Installation
You are now ready to apply power to the TROY print server. If you have
an internal print server, turn on the printer. If you have an external print
server, plug the power supply into the wall, connect it to the print server,
and then turn on the printer. The TROY print server will go through the
following startup sequence:
1. It will run through a set of power-up diagnostics for a few seconds. If
the print server is operating properly, the TEST LED will blink
momentarily and then go out. If the TEST LED blinks continuously in
a regular pattern, there is a problem. If this is the case, first verify that
you have a good Ethernet connection and then try powering the unit off
and then on again. If the problem persists, refer to the
Troubleshooting
chapter in the Administrator’s Guide on the CD-ROM included with
the print server.
2. When the test LED goes out, the other LEDs on the print server will
come on as follows:
•
The XJet IV-Plus
R
and
X
LEDs will be on solid with a valid
10baseT connection while the
L
LED will blink with either a valid
10baseT or 10base2 connection. The
T
LED should
not
stay on.
•
The XJet 100
L
LED will be on solid, and the
F
LED will also be
on if you are connected to a 100baseTX network. The
T
LED
should
not
stay on.


