


............ www.truemfg.com ............
............ www.truemfg.com ............
True Food Service Equipment, Inc.
True Food Service Equipment, Inc.
8
8
8
8
INSTALLATION / OPERATION INSTRUCTIONS
INSTALLATION / OPERATION INSTRUCTIONS
Step 4
A.
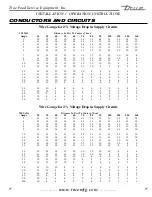
Before your new unit is connected to a power
supply, check the incoming voltage with a volt-
meter. If anything less than 100% of the rated volt-
age for operation is noted, correct immediately.
B.
All units are equipped with a 9 ft. (3m) service
cord, and must be powered at proper operating
voltage at all times. Refer to cabinet data plate for
this voltage.
True
requires that a sole use circuit be dedicated
for the unit. Failure to do so voids warranty.
WARNING
Compressor warranties are void if compressor burns
out due to low voltage.
WARNING
Power supply cord ground should not be removed!
NOTE
To reference wiring diagram - Remove front louvered
grill, wiring diagram is positioned on the inside cabinet
wall.
ELECTRICAL INSTRUCTIONS
Step 5
A.
The compressor is ready to operate. Plug in the
cooler.
B.
Temperature control set at No. 3 position gives
refrigerators an approximate temperature of 38°F.
Allow unit to function several hours, completely
cooling cabinet before changing the control setting.
C.
Excessive tampering with the control could lead
to service difficulties. Should it ever become neces-
sary to replace temperature control, be sure it is
ordered from your True dealer or recommended
service agent.
D.
Good air flow in your True unit is critical. Be
careful to load product so that it neither presses
against the back wall, nor comes within four inches
of the evaporator housing. Refrigerated air off the
coil must circulate down the back wall.
NOTE
If the unit is disconnected or shut off, wait five
minutes before starting again.
RECOMMENDATION
Before loading product we recommend you run
your True unit empty for two to three days. This
allows you to be sure electrical wiring and instal-
lation are correct and no shipping damage has
occurred. Remember, our factory warranty does
not cover product loss!
REPLACEMENT PARTS
TRUE maintains a record of the cabinet serial
number for your cooler. If at any time during the
life of your cooler, a part is needed, you may
obtain this part by furnishing the model number
and serial number to the company from whom
you purchased the cooler. Call Toll-Free: (800)-
424-TRUE (Direct to Parts Department). (800)-
325-6152 (U.S.A. & Canada only) or call: (636)-
240-2400.
STARTUP
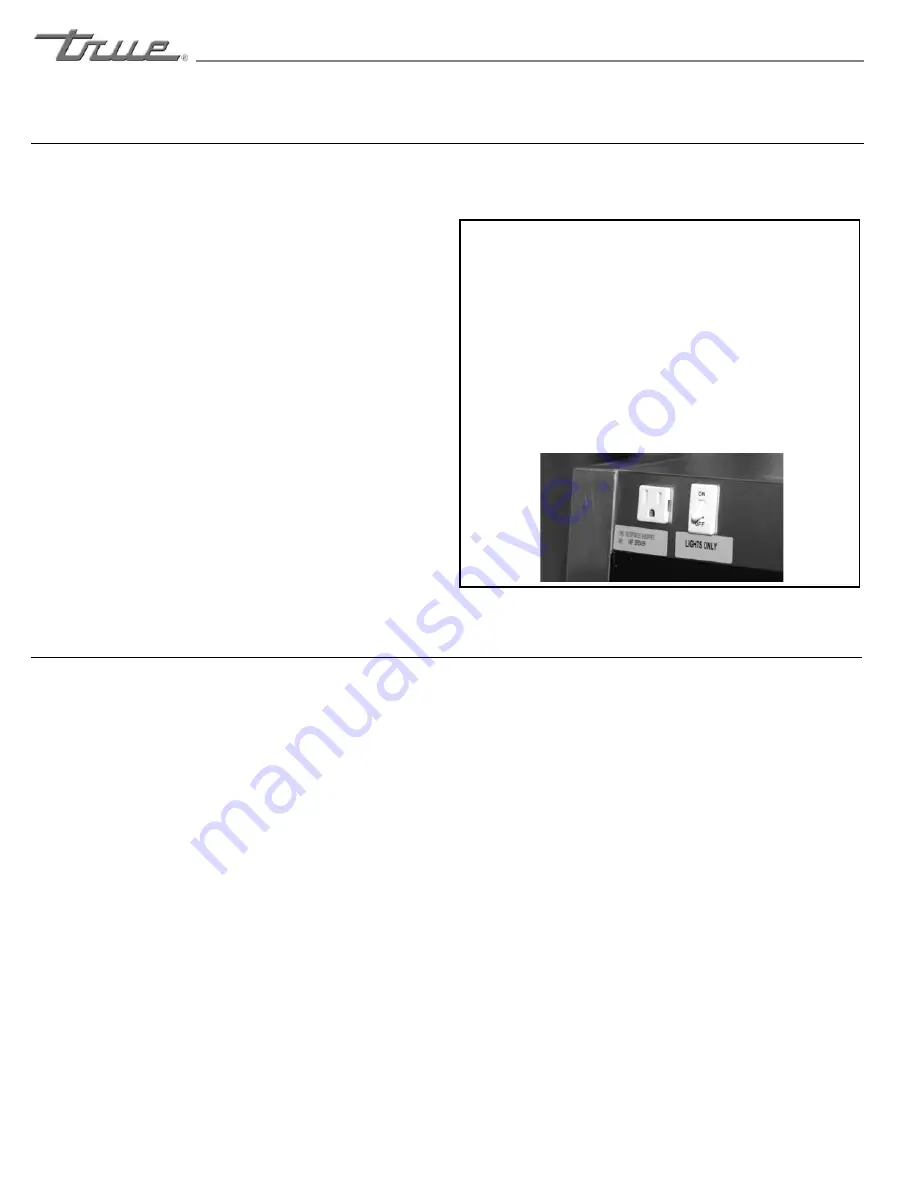
DOUBLE-DUTY DELI’S
TDBD’s are equipped with a service receptacle (found
on the upper left cabinet backside), no electrical load
greater that 4.0 amps should be connected to it. If
the electrical load is greater that 4.0 amps, it should
be wired separately or a larger lead cord should be
wired in place of the provided lead cord. Use a cord
with a 20 amp male plug (NEMA-5-20P). These units
have a light switch for the interior lighting
next to the receptacle.


