CHAPTER 2: ASSEMBLY INSTRUCTIONS
Truefitness.com / 800.426.6570 / 636.272.7100
16
BIKE ASSEMBLY STEPS (continued):
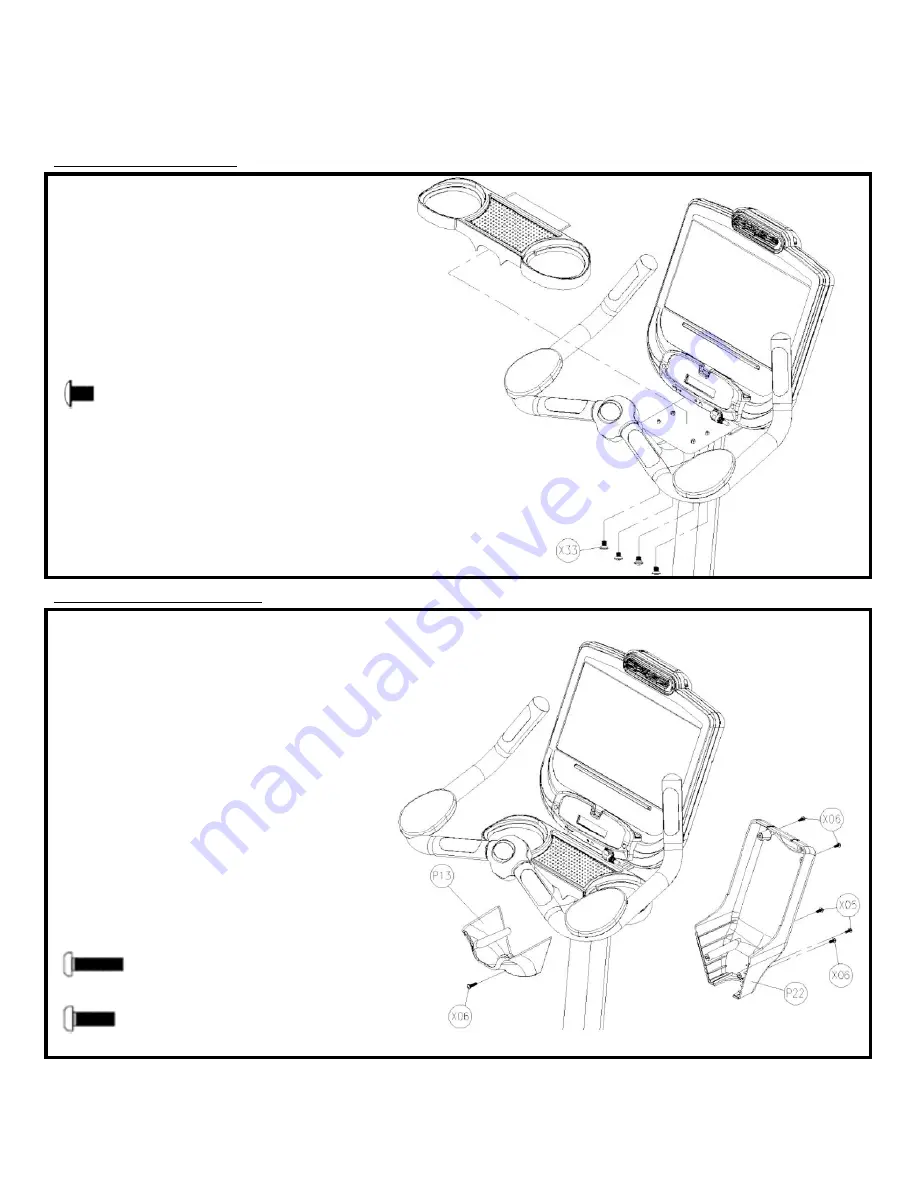
Step 11: Storage Tray:
a)
Insert the
s
torage
t
ray on top of the
f
ront
m
ast
m
ounting
p
late; pay special attention to
make sure that the plastic lip of the
s
torage
t
ray is tucked underneath the bottom of the
c
onsole
b)
Attach the
s
torage
t
ray to the
m
ounting
p
late by tightening all 4 screws with a
p
hillips
head screwdriver (not provided)
Hardware Required:
Step 12: Console Covers:
NOTE:
For all hardware, tighten using a
Phillips head screwdriver (not provided)
a)
Attach the Front Cover (P13) to the Front
Mast tube using a single (X06) screw; make
sure the Front Cover (P13) aligns with the
Storage Tray plastic around the Handlebar
b)
Attach the Back Cover (P22) to the Console
Mounting Plate using two (X06) screws; top
screw hole locations
c)
Attach the Back Cover (P22) to the Front
Cover (P13) using two (X05) screws; the longer
screws
d)
Attach the Back Cover (P22) to the Front
Mast tube using the remaining single (X06)
screw.
2 M5 x 20 Screws
4 M5 x 15 Screws
4 M5 x 8 Screws
Note: Use caution when attaching the storage tray
to the front mast mounting plate so that th
e
heart
rate board and respective cables are not damaged.


