Support: 1-855-473-7449 or 1-408-943-4100
Email:
Page 6
3.4 Mount the Unit in the Rack
Caution: This system requires two people to safely lift it for rack installation or removal.
Do not install drives
until after installing the chassis in the rack, and remove all drives before removing the chassis from the rack.
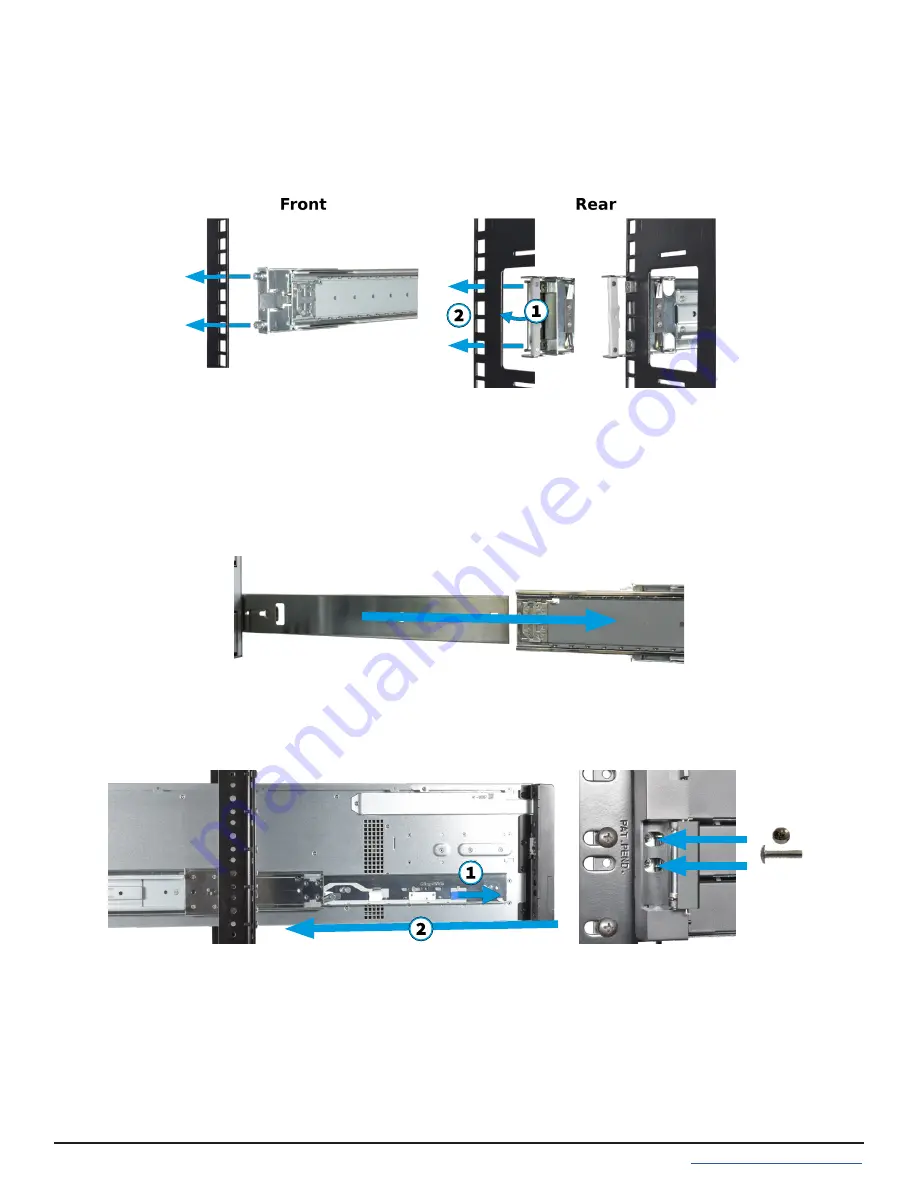
Extend both inner rack rails outwards from the rack until they lock in place. Align the cabinet rails with the inner
rack rails and slide them into the rack rails until they are fully seated.
When both cabinet rails are secured in the rack rails, gently push the chassis until it stops half way in.
Slide the blue release tabs on both cabinet rails towards the front of the system (
1
) while pushing the unit into the
rack. Push the chassis into the rack until it is flush with the front of the rack (
2
).
To anchor the unit in the rack, insert a long M5 screw through the retention port on each ear. The screw hole is
behind a small door on each ear.
Place the rail in the rack with the front end towards the front of the rack, aligning the pins with the mounting holes
in the front of the rack. Push the pins into the holes until the latch clicks.
At the rear end of the rail, align the pins with the rack holes, making sure the rail is level. Swing the gray latch handle
outwards (
1
) and pull it to extend the rail rearwards until the rail pins are fully seated in the rack holes (
2
). Release
the latch to allow it to lock in place. Repeat the process for the second rack rail.
M5 Screw


