Support: 1-855-473-7449 or 1-408-943-4100
Email:
Page 7
4 Install Drive Trays
TrueNAS appliances only support qualified hard drives and SSDs. Contact
if you need more drives
or replacements. Adding unqualified drives to the system voids the warranty. Call iXsystems Support if drives are
improperly installed in trays.
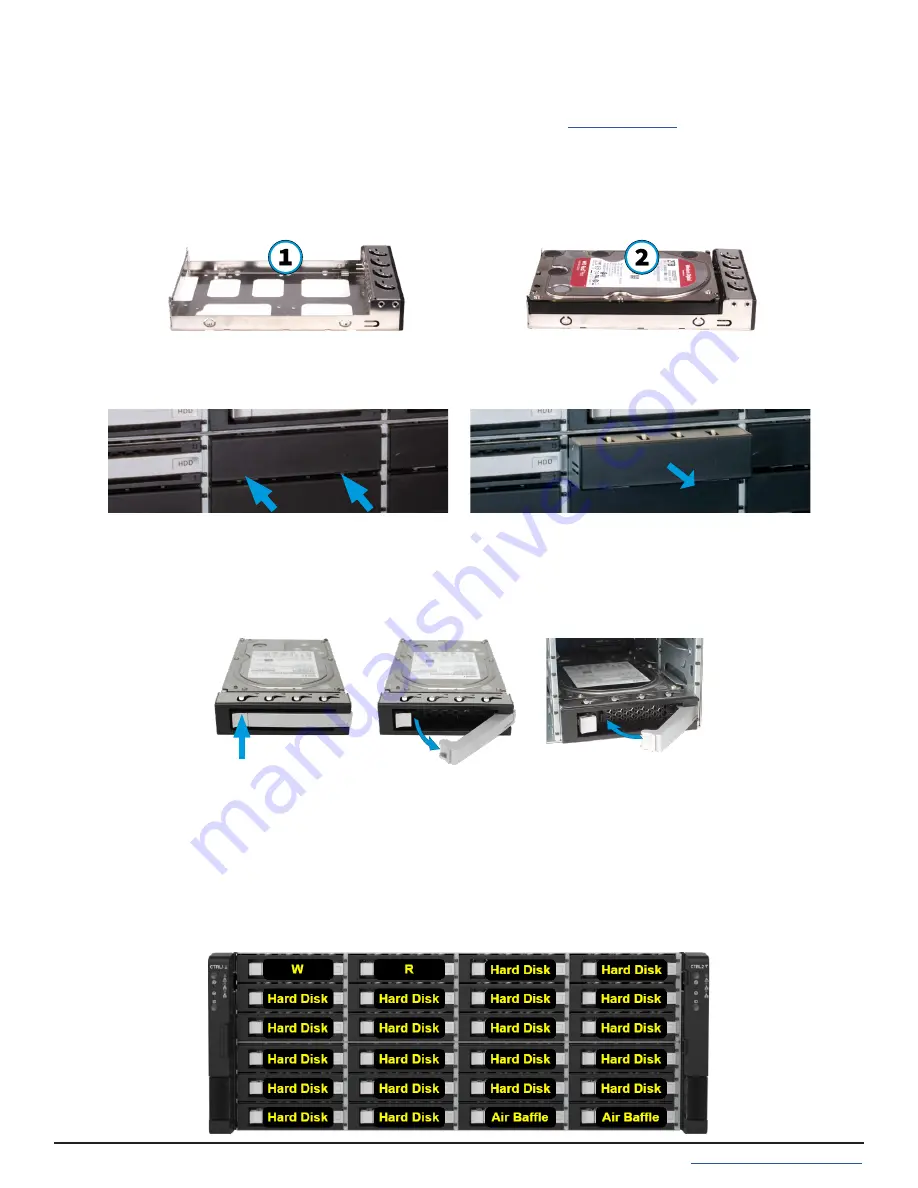
Place the tray on a flat surface (
1
). Mount the hard drive by aligning the drive connectors to the rear of the tray and
pushing the drive screw holes into place with the drive tray pegs (
2
).
To maintain proper air flow, baffles are added to systems with fewer than 24 drive trays. When installing a new
drive, insert a flathead screwdriver in the baffle groove and gently pull to remove the baffle.
Each drive bay in the chassis has two indicator lights to the right of the tray. The upper light is blue when the drive is
active or a hot spare. The lower light is solid red if a fault has occurred.
Press the silver button on the drive tray to open the latch. Carefully slide the tray into a drive bay until the right side
of the latch touches the metal front edge of the chassis, then gently swing the latch closed until it clicks into place.
We strongly recommend a standard drive tray installation order to simplify support:
• SSD drives for write cache (W), if present
• SSD drives for read cache (R), if present
• Hard drives or SSD drives for data storage
• Air baffle filler trays to fill any remaining empty bays
Install the first drive in the top left bay. Install the next drive to the right of the first. Install remaining drives to the
right across the row. After a row is filled, move down to the next row and start again with the left bay.


