24
Fitting the drive elements
The chassis must be free of rust, grease and heavy soiling.
There must be no damage in the area of the wheel suspension.
The wheels and tyres fitted on the caravan must be of the
same size and type, and must be inflated in accordance with
manufacturer’s instructions.
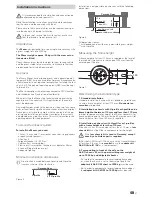
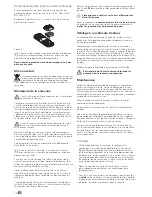
Remove all components from packing and place on the floor.
Before starting with installation, remove the cable tie and
the cardboard pieces from the fastening kit.
M
ov
er ®
SX
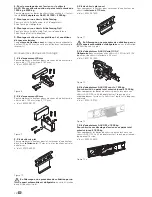
Figure 20
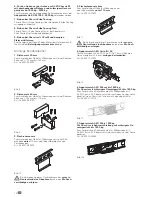
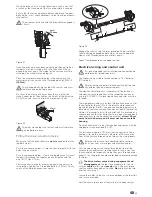
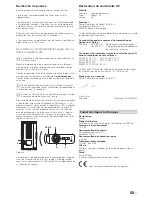
In order to guarantee the validity of the general operat-
ing permit (ABE), the type plates (f) must be present on
the support system on the right and left.
f
f
Figure 21
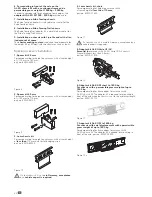
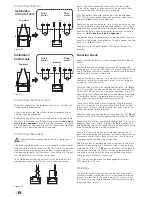
Mark connection pipe in the centre. Loosely attach the drive
units to the connection pipe.
Do not screw in the supplied threaded bolts (g) yet.
g
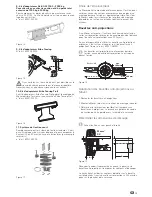
Figure 22
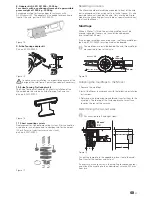
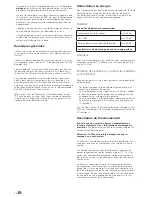
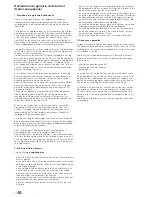
Place the drive units with the connection pipe and fastening
kit (b) on the chassis and bolt them on with the two bolts (c)
in such a way that it is just possible to move them along the
frame.
The gripper (a) must lie fully on the chassis (e) and must
be pushed as far as possible onto the vertical leg (d).
c
a
b
d
e
Figure 23
b
Figure 24
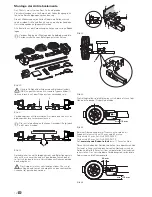
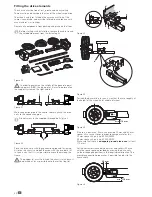
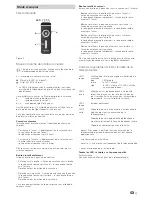
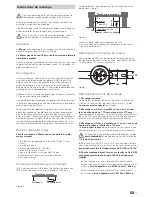
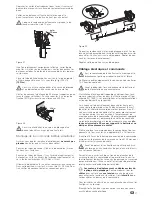
Position the drive rollers in such a way that they are roughly at
the height of the wheel hub / middle of wheel.
min. 110 mm
Mover®
SX
Figure 25
If there is a deviation, Truma can provide 30 mm and 60 mm
spacer kits as accessories in order to compensate for this.
30 mm spacer kit, part no. 60030-95000
60 mm spacer kit, part no. 60030-95100
Make sure that there is
adequate ground clearance
(at least
110 mm).
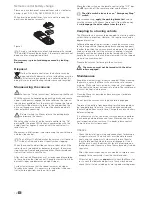
Set the correct distance between tyres and rollers (20 mm)
with the spacer gauge provided by moving the drive units
(in the disengaged position) in the longitudinal direction. The
movable connection pipe makes it possible to adjust to the
frame width.
20 mm
min. 110 mm
Mover®
SX
Figure 26

