


x10
8
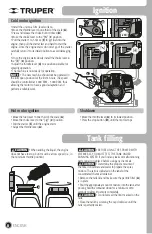
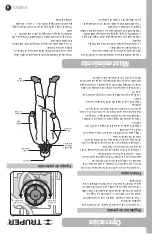
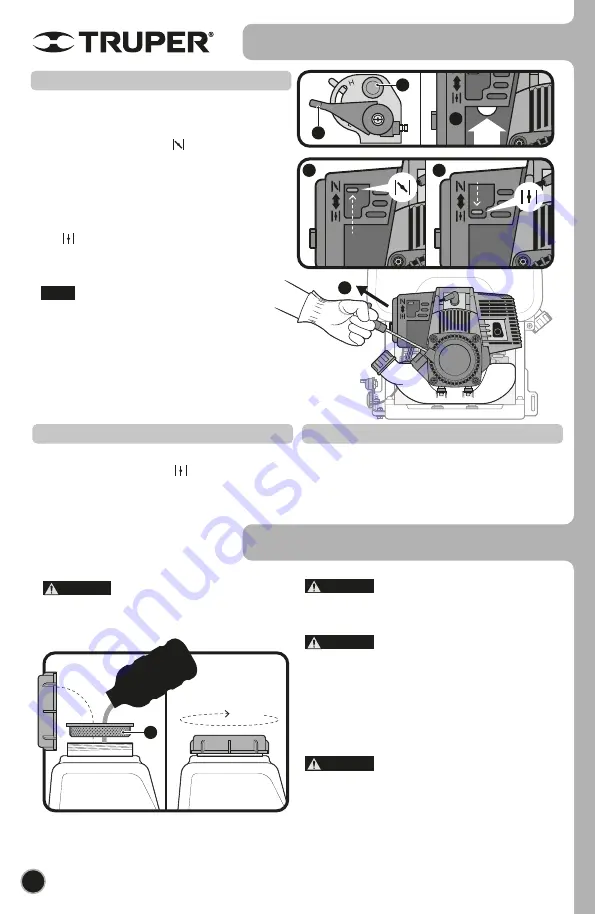
Ignition
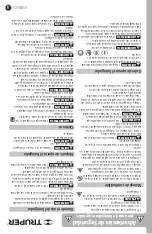
Tank filling
A
• When adding the liquid, the engine
does not have to stop, but it must be at low speed (i.e., in
the minimum throttle position).
• BEFORE USING THE SPRAYER WITH
CHEMICALS, YOU MUST TEST THE TANK UNDER
RUNNING WATER. If you find any leaks or malfunctioning
parts, repair or replace before using any chemicals.
• Determine the proper amounts of
chemical concentrate and water to prepare the spray
mixture. The ratio is indicated on the label of the
concentrated chemical container.
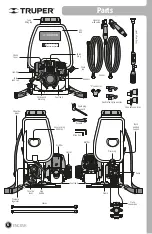
• Remove the tank lid and make sure the particle filter (
A
)
is in place.
• Pour the appropriate amount of mixture into the tank, after
pouring hold the container down for a minimum of 30
seconds to allow it to empty completely.
• Do not exceed the limit marked on the
tank.
• Close the tank by screwing the cap clockwise until the
tank is perfectly sealed.
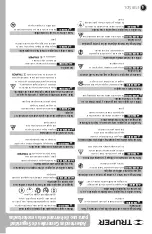
C
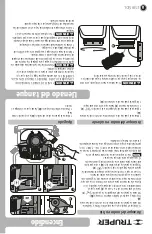
• Install the unit on a firm, level surface.
• Move the throttle lever to one third of the scale (
A
).
• Press and release the choke bulb 10 times (
B
).
• Move the choke lever to the “ ” (
1
) position.
• Pull the starter 3 to 5 times (
C
) to get fuel into the
engine, then pull the starter fast and hard to start the
engine. Once the engine starts do not let go of the starter,
carefully return it to its initial position to avoid damaging
it.
• Once the engine starts slowly install the choke lever in
the “ ” (
2
) position.
• Adjust the throttle lever (
A
) to a position suitable for
spraying operation.
• The machine is now ready for operation.
• The new machine should not be operated in
the fully open position for the first 4 hours. The speed
should be controlled at 4 000 RPM - 5 000 RPM, thus
allowing the motor to have a good adaptation and
perform a reliable work.
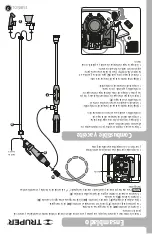
Cold motor ignition
• Move the throttle lever (
A
) to its lowest position.
• Press the stop button (
D
), until the motor stops.
Shutdown
• Move the fuel lever to one third of the scale (
A
).
• Move the choke lever to the “ ” (
2
) position.
• Pull the starter (
C
) until the engine starts.
• Adjust the throttle lever (
A
).
Hot motor ignition
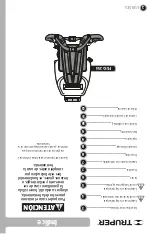
A
D
B
1
2
NOTE
ENGLISH
CAUTION
CAUTION
CAUTION
CAUTION


