

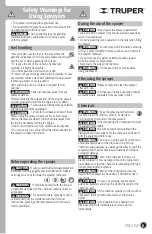
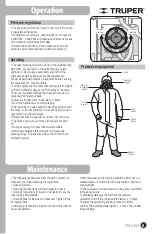

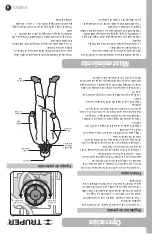
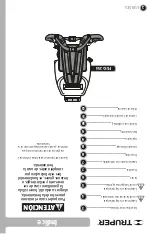
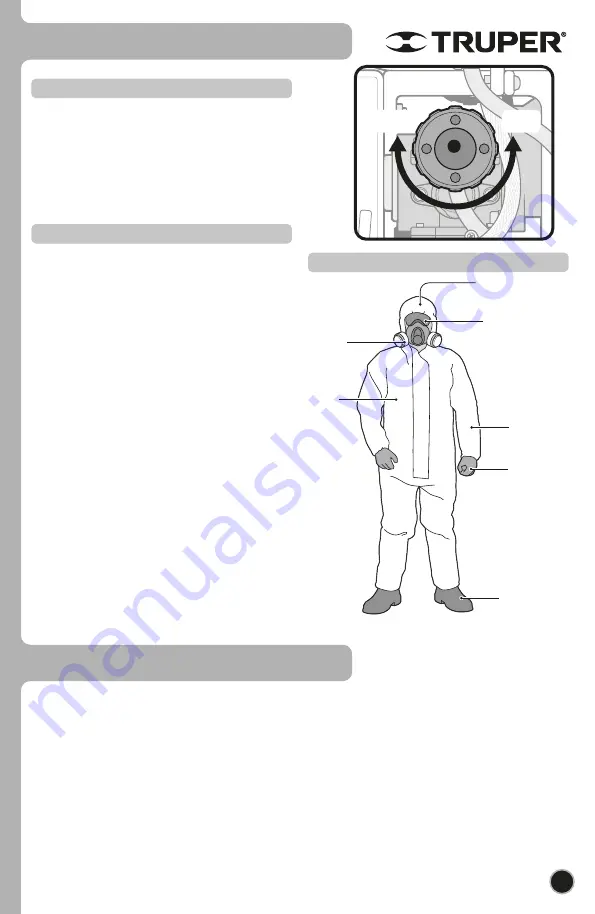
Protective
goggles
Full
coverall
Long
sleeve
Nitrile
gloves
Rubber
boots
Mask or
breathing
system
Hood
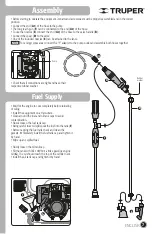
9
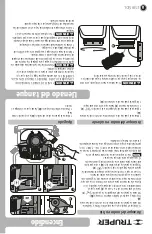
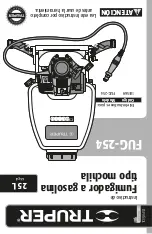
Operation
• The pressure at which the liquid comes out of the pump
is regulated at the factory.
• If adjustment is necessary, wait until the motor speed is
5 000 RPM - 6 000 RPM and make adjustments by means
of the pressure adjustment knob (
A
).
• Release the knob lock and turn clockwise to increase
pressure and counterclockwise to decrease pressure.
Pressure regulation
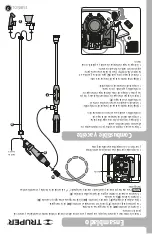
• Chemical spraying should be done in cool weather with
little wind. For example, in the early morning or late
afternoon. This reduces evaporation and drift of the
chemicals as well as improves product application.
• Wear all personal protective equipment before carrying
the equipment on your shoulders.
• Set the equipment on a table that will support its weight,
so that the shoulder straps are off the edge of the table.
• Put your shoulders through the straps and secure the
equipment behind your back.
• Adjust the throttle lever to operate the motor.
• Open the handle valve to start spraying.
• After opening the valve keep the handle moving so that
the spray is not concentrated in one spot. Failure to do so
may result in chemical damage.
• Remember that the operator must face into the wind.
• The lance or gun should form a level angle of about
15°.
• During spraying, the spray tube should oscillate
continuously between left and right to increase the
spraying range. The advanced steps should match the
oscillation speed.
Spraying
Protective equipment
Increase
pressure
Decrease
pressure
• The following maintenance tasks should be carried out
whenever you finish operating the equipment.
• Clean all surfaces.
• Clean the chemical tank with clean water and dry it.
• Check all connections for water or fuel leaks. In case of a
leak, repair it immediately.
• Check all bolts for looseness or looseness. Tighten firmly
or replace them.
• Lubricating oil should be injected into the oil inlet after 24
hours of operation.
Maintenance
• After maintenance, the machine should be left to dry in a
ventilated place. It must be far from any source of light and
avoid sunlight.
• If the equipment is to be stored for a long time, in addition
to the above points:
• Completely discharge the fuel from the tank and
carburetor. Turn off the choke, pull the starter 3 - 5 times.
• Remove the spark plug and pour some oil into the
cylinder. Then pull the starter lightly 2 - 3 times. Then install
the spark plug.
A
ENGLISH


