background image

2

TECHNICAL CHARACTERISTICS:

Voltage:


220 V~

Frequency:


60 Hz

Current:


12 A

Speed:


3 450 RPM

Motor Rated Power:


3 Hp

Maximum Motor Power:

  4 Hp

Maximum Pressure:


116 PSI

Tank Capacity:


47.5 Gal

Air Flow:


7,7 CFM - 40 PSI   


5,7 CFM - 90 PSI

Power Cord Grips Type:

 Y

All conductors are: 

1,5 mm

2

 x 3 C with 221 ºF insulating temperature

Insulation quality: 

Basic insulation.

Insulation quality:

 Class I

Thermal insulation of motor winding: 

Class B


              To avoid risk of electrical shock or serious accident, 

if power cord gets damaged it should be repaired by the manufacturer 
or by Truper® Authorized Service Center 
Power cord grips used in this product: Type”Y”.

Assembly design in this product causes insulation to be affected by 
liquid spills or splashing.

                            Before gaining access to terminals, all power 
circuits should be disconnected.

                           We do not recommend using power cord 
extensions with compressors.  Using that type of extension 
cause  power  drops  resulting  in  motor  potency  loss  and 
overheating. Instead of using an extension cord increase the 
compressor’s action scope connecting a longer hose into the 
outlet. Connect additional hose lengths as needed.

BELT DRIVE AIR COMPRESSORS.

-  Do not use compressed air to clean clothes.
-  Do not apply compressed air directly to skin.
-  Do not apply compressed air for breathing purposes unless the air 

is filtered with a filter specifically for built to that purpose.

-  Do not use open-air piping.  It could lash out and cause injuries.
-  Do not use flammable liquids to clean the compressor.
- Do not use an open fire to inspect inside the compressor or the 

pressure deposit.

-  Wear eye protection when using compressed air to clean the unit.
-  Use caution not to blow particles towards people: always use an air 

gun for cleaning.

-  Double-check all the auxiliary fixtures are functioning adequately 

and have the right capacity for the application.

-  Inspect regularly that all covers are fixed and firmly set.
-  Replace all parts, tools and accessories when unfit for a safe operation.
-    Install  a  check-valve  or  a  cut  valve  in  the  inlet  piping  in  case 

compressor shall be parallel coupled with a second compressor or 
if it will be connected to an air supply system.

-  Double-check all piping and hoses connected to the compressor have 

the right diameter, and, adequate resistance for the maximum 
pressure delivered by the compressor.

- Install the compressor making available an adequate ventilation air 

supply towards the unit. Use care not to restrict air ducts through 
the inlets in the cover and motor fan.

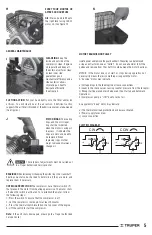
INSPECT:

Inspect the pumps’ rotation direction during the initial start up.  Verify 
any modification in the electric components’ or connections.
Turn  off  the  compressor  and  disconnect  from  the  power  outlet.  
Ventilate completely before disassembling any component or making 
any maintenance service.

INSTALLATION AND VENTILATION

To service the compressor allow adequate access and free space up 
and around the unit.  It needs adequate protection against weather.  
Good ventilation is essential.  To gain maximum efficiency admission 
air shall be as cold and clean as possible (a 37.4 ºF drop in temperature 
will increase 1% the delivered air volume). Gas impurities and particles, 
abrasive dust and corrosive gasses are especially harmful.  The exhaust 
vapors are hazardous if compressed air is used to supply breathing 
devices.
Set the compressor as far away as possible from the work areas to 
prevent from suctioning particles generated by the job 
(paint, dust, etc.)

CONNECTION TO THE MAIN POWER SUPPLY

The compressor shall be set as close as possible to the main power 
supply.  Double-check the power supply matches the voltage indicated 
in the motor nameplate.
 

                       This unit must be grounded.


                       The power cables are coded with

the following colors:

GREEN 

GROUND

BLUE                 NEUTRAL
BROWN              CURRENT

CAUTION

WARNING

WARNING

WARNING

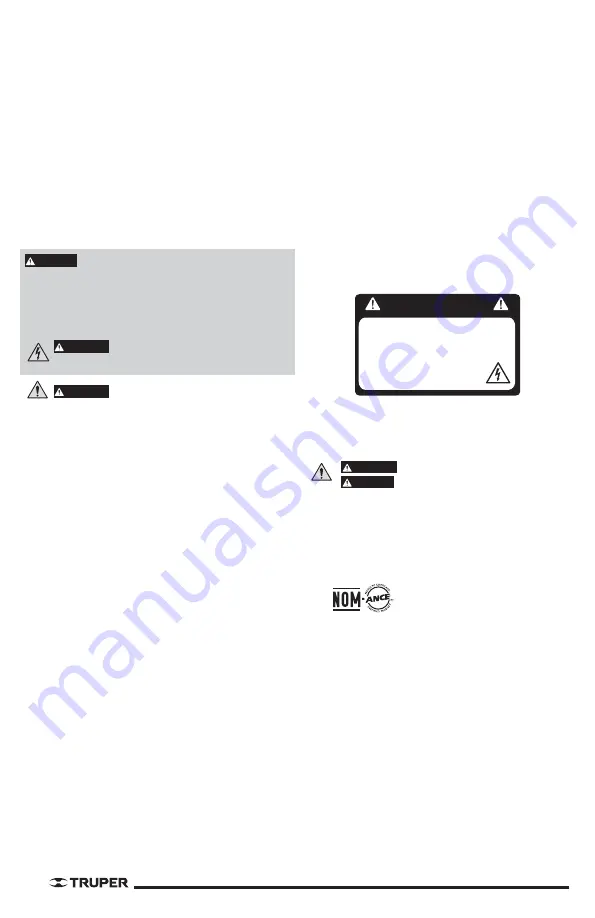
This unit SHOULD BE USED with
220 V~ to 240 V~


feeding tension. Using a different 

TENSION WILL SEVERELY 

DAMAGE the unit.

CAUTION

WARNING

This tool is in compliance with
the Official Mexican Standard
(NOM - Norma Oficial Mexicana).

Summary of Contents for 15657

Page 1: ...o 15657 NOTA IMPORTANTE Este producto no debe quedar expuesto a goteo o salpicaduras por líquidos Compresor vertical de banda Instructivo Lea este Instructivo por completo antes de usar la herramienta ATENCIÓN ESPAÑOL ENGLISH ...

Page 2: ...a o se cruce cuando esté en funcionamiento 12 No extienda su radio de acción Evite toda postura que cause cansancio Cuide de que su posición sea segura y de que conserve el equilibrio 13 Mantenga las herramientas en las mejores condiciones Mantenga las herramientas limpias para tener la mejor ejecución y seguridad Siga las instrucciones para la lubricación y cambio de accesorios Verifique los cabl...

Page 3: ...a para esta aplicación Revise regularmente que todas las cubiertas estén fijas y firmemente colocadas Reemplace todas las partes herramientas y accesorios si son inadecuados para una operación segura Instale una válvula sin retorno o de corte en la tubería de entrega si el compresor se acoplará en paralelo con otro compresor o si se conectará a un sistema de suministro de aire Asegure que toda la ...

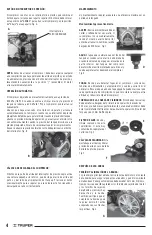
Page 4: ...E L MANÓMETRO DE TANQUE M VÁLVULA DE PURGA N VÁLVULA DE SALIDA DE 19 mm O BOTÓN DE INTERRUPTOR P PROTECTOR DE SOBRECARGA ACCESORIOS 1 Botella de aceite 2 Filtros de aire 1 Tapón del depósito de aceite ANTES DE CONECTAR EL COMPRESOR REVISE LO SIGUIENTE Que la tensión de alimentación sea igual a la indicada en la placa de especificaciones del compresor Que la lectura del manómetro de aire sea de cer...

Page 5: ...preventivo diario ACEITE Revise el nivel del aceite del cárter y rellene de ser necesario Si su compresor no se usa diariamente revise el nivel de aceite del cárter antes de arrancarlo Cambie el aceite después de 500 horas Fig C AGUA El agua que se almacena en el fondo del tanque al condensarse el aire debe drenarse usando la válvula de purga que se localiza en la parte inferior del tanque del com...

Page 6: ...a con un interruptor térmico P que evita que el motor tenga un calentamiento excesivo El motor se apaga cuando se activa el interruptor Para restablecer el motor siga los siguientes pasos 1 Presione el interruptor para asegurar que el compresor esta apagado 2 Deje enfriar el compresor al menos 5 minutos 3 Oprima el interruptor térmico ubicado en la tapa superior del motor 4 Levante el interruptor ...

Page 7: ...operado durante un periodo considerable en un lugar húmedo 1 Es necesario drenar el tanque 2 Fugas de aire en la tubería en la máquina o en el sistema externo 3 Fugas en la válvula de seguridad del tanque 1 Es posible que el volante se encuentre bloqueado 2 Fugas en la válvula de seguridad del tanque 3 Nivel de aceite demasiado bajo 4 Válvulas con fugas rotas carbonizadas o sueltas o conductos de ...

Page 8: ...o reemplazar la válvula acuda a un CSAT 1 Revise la tensión de la línea de alimentación los fusibles o corrija la sobrecarga del motor 2 Consulte a un electricista calificado 1 Cambie y use el aceite correcto 2 Agregue aceite al cárter hasta el nivel correcto 3 Se necesita dar mantenimiento con mayor frecuencia al filtro de aire 1 Revise la tensión de la línea de alimentación los fusibles o corrij...

Page 9: ... SUCURSAL GUADALAJARA AV ADOLFO B HORN 6800 COL SANTA CRUZ DEL VALLE C P 45655 TLAJOMULCO DE ZUÑIGA JAL TEL 01 33 3606 5285 AL 90 MICHOACÁN FIX FERRETERÍAS AV PASEO DE LA REPÚBLICA 3140 A COL EX HACIENDA DE LA HUERTA C P 58050 MORELIA MICH TEL 01 443 334 6858 MORELOS FIX FERRETERÍAS CAPITÁN ANZURES 95 ESQ JOSÉ PERDIZ COL CENTRO C P 62740 CUAUTLA MOR TEL 01 735 352 8931 NAYARIT HERRAMIENTAS DE TEPI...

Page 10: ...as recomendadas o no se haya operado de acuerdo al instructivo o haya sido alterado o reparado por personal no autorizado por Para hacer válida la garantía o adquirir piezas y componentes deberá presentar el producto y su comprobante de compra en Av San Isidro 110 Col Industrial San Antonio Alc Azcapotzalco C P 02760 CDMX Méx o en el establecimiento donde lo compró o en algún Centro de Servicio de...

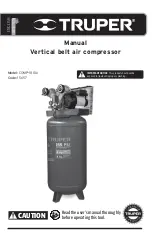
Page 11: ... Code 15657 Vertical belt air compressor Manual IMPORTANT NOTICE This product should not be exposed to liquids dripping or splashing Read the user s manual thoroughly before operating this tool CAUTION ENGLISH ESPAÑOL ...

Page 12: ...g one hand and enables to use both hands Keep proper footing and balance at all times Do not overreach over or walk across the tool when is running 12 Do not extend your range of action Avoid a standing position that makes you get tired Keep a safe position and stable balance 13 Keep tools in the best conditions Keep tools clean to get better performance Follow lubrication and appliance replacemen...

Page 13: ...ace all parts tools and accessories when unfit for a safe operation Install a check valve or a cut valve in the inlet piping in case compressor shall be parallel coupled with a second compressor or if it will be connected to an air supply system Double check all piping and hoses connected to the compressor have the right diameter and adequate resistance for the maximum pressure delivered by the co...

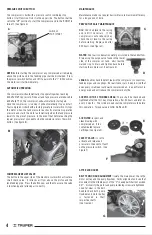
Page 14: ...ETER M PURGE VALVE N 3 4 OUTLET VALVE O SWITCH BUTTON P THERMAL OVERLOAD PROTECTOR ACCESSORIES 1 Oil Bottle 2 Air Filters 1 Oil Deposit Cap BEFORE CONNECTING THE COMPRESSOR VERIFY THE FOLLOWING Feeding voltage shall match voltage indicated in the compressor nameplate Air gauge readings shall be zero Oil level in the compressor pump casing shall reach the mark in the level indicator N A O P B C L D...

Page 15: ...um efficiency for a long period of time PREVENTIVE DAILY MAINTENANCE OIL Check oil level in the casing and refill if necessary If the compressor is not used every day check the oil level in the casing before starting Replace oil after 500 hours See figure C WATER Due to air condensation water gets stored in the tank bottom Drain using the purge valve found in the lower side of the compressor tank ...

Page 16: ...sor has a thermal switch P that prevents the motor from heating up excessive The motor shuts off when the switch is activated To re establish the motor follow the following steps 1 Press the switch to ensure that the compressor is off 2 Let the compressor cool down for at least 5 minutes 3 Press the thermal switch located on the top cover of the engine 4 Lift the switch to start the compressor Not...

Page 17: ...g in a damp place for a long period of time 1 Draining the tank is necessary 2 Air leaks in pipeline in the machine or the external system 3 Leaks in the tank security valve 1 There is a possibility the flywheel is blocked 2 Leaks in the tank safety valve 3 The oil level is too low 4 Leaky broken carbonized or loose valves or restricted air ducts 5 Wrong rotation direction SOLUTIONS 1 Clean filter...

Page 18: ... to a TASC 1 Double check feeding line voltage the fuses or correct the motor overload 2 Consult with a qualified electrician 1 Change and use the right type of oil 2 Add oil to the casing up to the right level 3 A more effective filter is needed in the air admission 1 Double check feeding line voltage the fuses or correct the motor overload 2 Consult with a qualified electrician 3 Ask for a motor...

Page 19: ... GUADALAJARA AV ADOLFO B HORN 6800 COL SANTA CRUZ DEL VALLE C P 45655 TLAJOMULCO DE ZUÑIGA JAL TEL 01 33 3606 5285 AL 90 MICHOACÁN FIX FERRETERÍAS AV PASEO DE LA REPÚBLICA 3140 A COL EX HACIENDA DE LA HUERTA C P 58050 MORELIA MICH TEL 01 443 334 6858 MORELOS FIX FERRETERÍAS CAPITÁN ANZURES 95 ESQ JOSÉ PERDIZ COL CENTRO C P 62740 CUAUTLA MOR TEL 01 735 352 8931 NAYARIT HERRAMIENTAS DE TEPIC MAZATLA...

Page 20: ...60 CDMX Mex or at the store where you bought it or at a service center listed in the attached warranty policy and or at www truper com Transportation costs resulting from compliance of this warranty will be covered by For questions or comments call 01 800 690 6990 Imported by Truper S A de C V Made in China Parque Industrial 1 Jilotepec Edo de Méx Méx C P 54240 Warranty policy In the event of any ...

Reviews: