Switch On
• Connect the plug to the power inlet.
• Press the switch exactly in the pressing position (A), without releasing it,
direct the pressure forward (B) and push down slightly, release the switch to
remain locked.
• To stop operation, press in the pressing position (A) and then release
the switch.
• Work placing the disc in the right position to prevent damage.
• Press the work piece applying pressure lower than the tool’s weight to prevent
overload damaging the motor and the disc.
• After installing a new disc allow it to run unloaded at least one minute. If
vibration occurs replace immediately.
• Avoid working on wood or soft metals like lead. These
materials saturate the disc very quickly making it useless.
7
Useful tips
ENGLISH
The angle grinder is a manual power tool used to grind and cut steel, pipes, iron angles, brick, tile, stone and / or ceramic
pieces; to remove burr on metal surfaces, to level and make smooth welding lines. If the tool accessory is changed it can be
used to remove oxide and to polish metal surfaces and other materials.
Assembly
Start Up
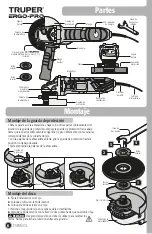
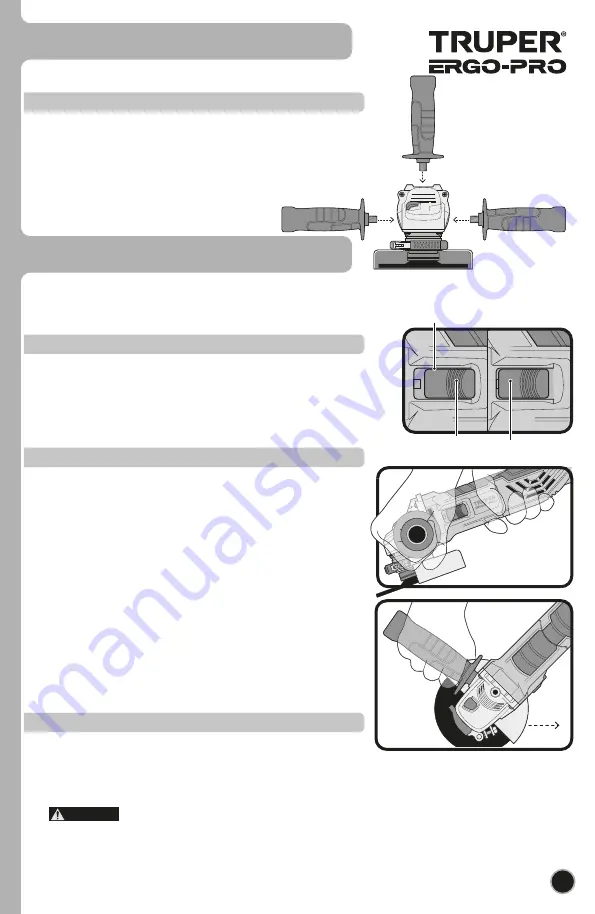
How to correctly hold the tool
Always hold the tool with both hands. Hold the
handle with one hand and the other hand hold the
auxiliary handle. Be careful not to obstruct the
ventilation slots.
• Grinding:
For better results hold the tool 15° to 30° regarding
the work piece. Move forwards to backwards applying
light pressure with a constant rhythm. This way the
work piece does not get too hot, will not discolor and
there will not be rough edges.
• Cutting:
Do not press, tilt or oscillate the tool. Work at a
moderate speed. The disc should always rotate
counterclockwise since there is a risk the tool shoots
out uncontrolled.
To cut hard stones using a diamond cutting disc is
recommended.
CAUTION
Auxiliary handle assembly
• For a safer operation use the auxiliary handle.
Fit it into any of the three mounting orifices.
Use the one that makes your job easier.
Switch
Pressure
direction (B)
Pressure
position (A)
Summary of Contents for 18156
Page 9: ...9 Notas ESPA OL...
Page 10: ...10 Notas ESPA OL...
Page 21: ...9 ENGLISH Notes...
Page 22: ...10 ENGLISH Notes...


