TRUST 740C POWERC@M ZOOM
N.B.:
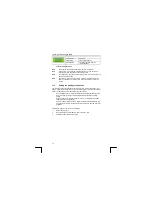
The camera will turn off automatically if it has not been used for 1 minute.
This is to save the batteries. It is not possible to alter this time.
Tip:
It is possible to take photos with this camera when there is less light than
is possible with other cameras. However, when there is very little light
more graining will be seen in the photos than normal. Use the flash or
move to a position where there is more light.
7
Viewing pictures taken
1. Switch
on
your
camera.
2.
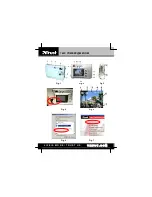
Press the ENTER button (12, Figure 2) briefly. The screen will display the last
picture taken. If no pictures have been taken this will be displayed.
3.
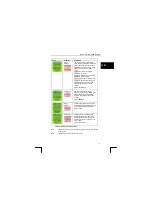
Use the keys up/down (11/13 Figure 2) to view the previous/next picture.
4.
Press the ENTER button again to return to picture taking mode.
8 Installing
the
camera
Windows 98, ME, 2000, XP
: First install the driver program. -> Section 8.1
Mac OS 9.2 or a later release:
see section 19
8.1
Installing the driver (Windows 98, Windows ME,
Windows 2000 or Windows XP)
Follow the steps given in the Quick Installation Guide
N.B.:
Make sure all other programs are closed during the installation.
N.B.:
In the example, ‘D:/’ is used to indicate the CD-ROM drive. This may be
different for your computer.
Tip:
The latest drivers can be downloaded from www.trust.com/13902. Check
whether a new driver is available and use this for the installation.
Tip:
You do not have to install the driver programmes if you are using
Windows ME, 2000 or XP and you do
not
wish to use the PC camera
mode.
8.2
Connecting the camera to the USB computer port.
N.B.:
Make sure the driver has been installed in Windows before connecting the
camera.
N.B.:
The camera must be switched on before connecting the cable.
The installation will not be carried out properly if the camera is
connected before it is switched on.
1. Switch
on
your
camera.
2.
Connect one end of the USB cable to the camera (7, Figure 1 and Figure 4).
3.
Connect the other end of the USB cable to the computer.
Windows: new hardware will be found and installed automatically.
4.
See the Quick Installation Guide for instructions on how to view your photos.
4


