Trust Easy Connect 19200 Plus
4
3. Connecting
Note:
Turn off the computer before connecting peripheral devices.
Follow the steps below to connect the scanner to your computer.
1.
Turn off the computer and all the connected peripheral devices.
2.
Remove the printer cable plug from the parallel port at the back of your computer (if present).
3.
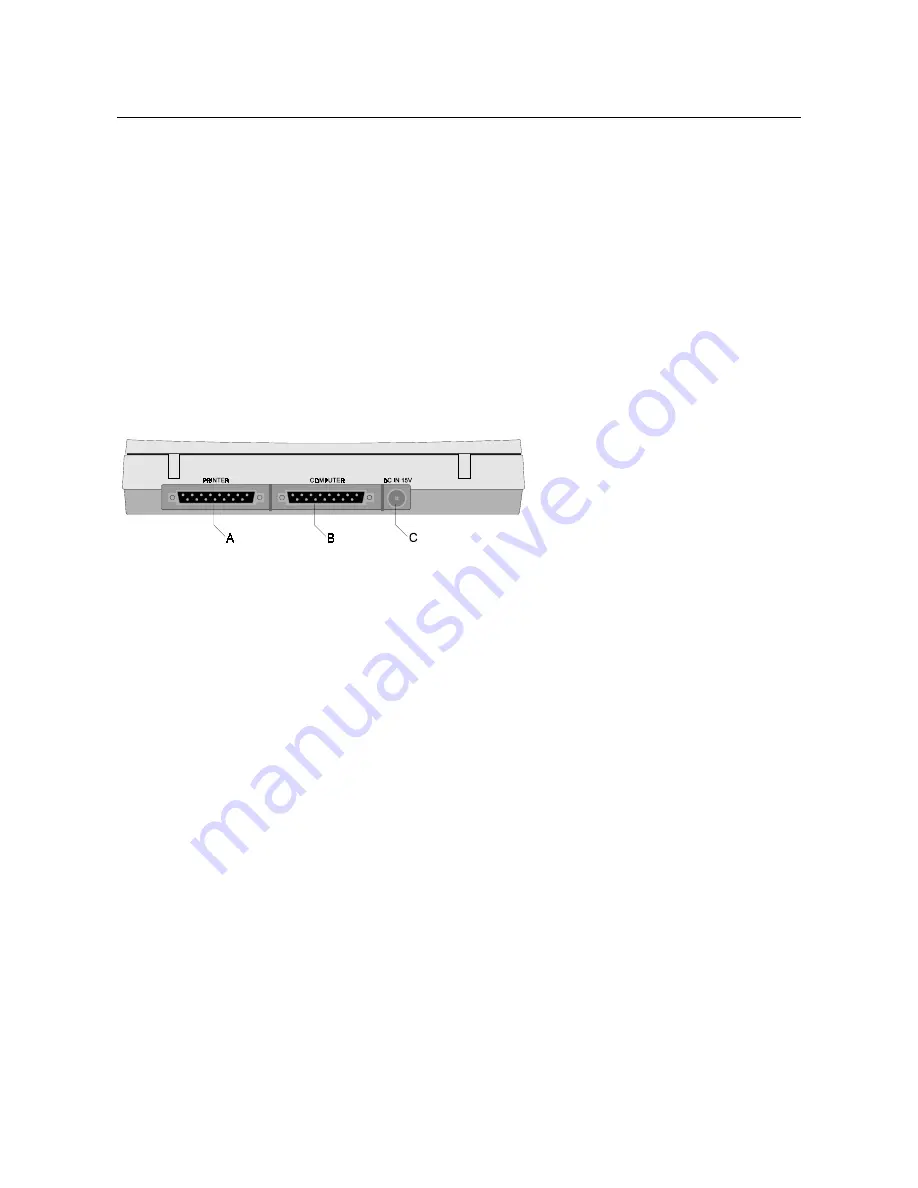
Connect the printer cable (if present) to the 'Printer' connection at the back of the scanner (connector A, Figure 1).
4.
Remove the interface cable from the packaging and connect it to your computer's parallel port.
5.
Connect the other end of the interface cable to the scanner's 'Computer' connection (connector B, Figure 1).
6.
Connect the cable from the power supply adapter to the scanner (connector C, Figure 1).
7.
Plug the power supply adapter into the wall socket.
Your scanner (and printer) is now connected. You are ready to install the driver and the applications. You may have to
re-install your printer.
Note:
The scanner will be turned on and off automatically and, therefore, does not have an on/off switch.
Figure 1: Rear of the scanner


