


2
TABLE OF CONTENTS
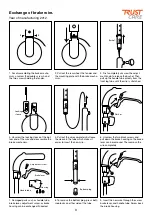
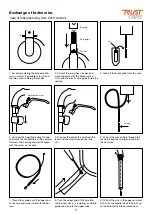
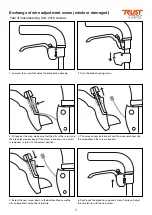
Exchange of brake wire
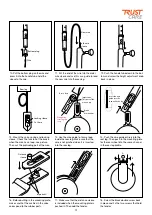
Exchange of wire adjustment screw
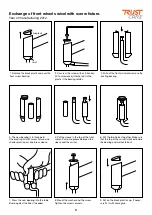
Exchange of front wheel swiwel with screw
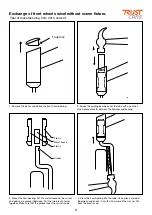
Exchange of front wheel swiwel without screw
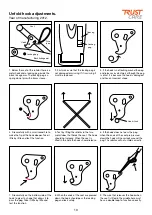
Unfold hook adjustments
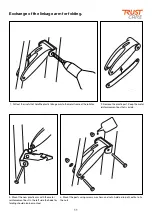
Exchange of linkage arm for folding
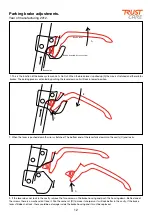
Parking brake adjustments
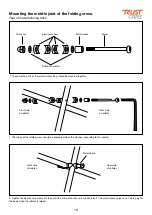
Mounting the middle joint of the folding cross
page 3
page 7
page 8
page 9
page 10
page 11
page 12
page 13


