TruVision 6MP and 12MP 360° Camera Configuration Manual
51
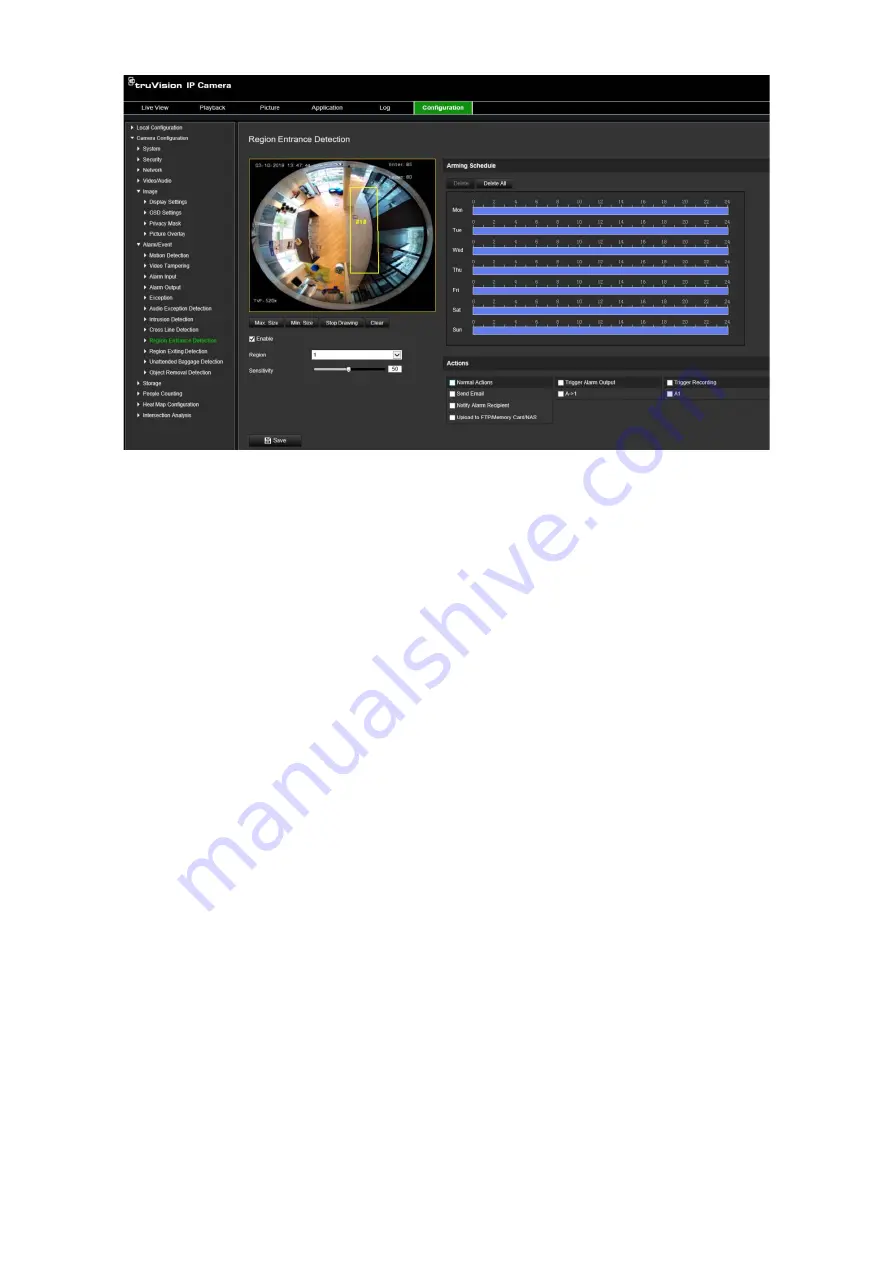
2. Select the
Enable
check box to enable the function.
3. Select the region to be configured from the drop-down list.
4. Click the
Draw Area
button and then draw a rectangle on the image as the
designated region.
When you draw the rectangle, all lines should connect end-to-end to each other. Up
to four areas are supported. Click
Clear
to clear the areas you have drawn. The
designated region parameters can be set up separately.
Note
: The area can only be quadrilateral.
5. Set the maximum and minimum sizes for valid targets. Targets smaller or larger
than the valid target size are not able to trigger detection.
Max. Size
: The maximum size of a valid target. Targets larger than this will not
trigger detection.
Min. Size
: The minimum size of a valid target. Targets smaller than this will not
trigger detection.
6. Click
Stop Drawing
when finish drawing.
7. Drag the slider to set the sensitivity value.
Sensitivity
: Range [1-100]. Sensitivity stands for the percentage of the body part of
an acceptable target that enters the pre-defined region.
Sensitivity = 100 – S1/ST*100
Where S1 stands for the target body part that enters the pre-defined region and ST
stands for the complete target body.
Example
: If you set the value as 60, the action can only be counted as a region
entrance action when at least 40% of the body part enters the region.
8. Repeat the above steps to configure other regions. Up to four regions can be set.
You can click the
Clear
button to clear all pre-defined regions.


