3. SET UP
3.1 Setting Up the Printer
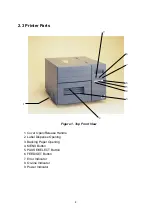
1. Place the printer on a flat, secure surface.
2. Make sure the power switch is off.
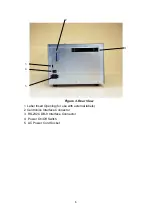
3. Connect the printer to the computer mainframe with the provided Centronics
cable.
4. Plug the power cord into the AC power cord socket at the rear of the printer,
and then plug the power cord into a properly grounded receptable.
3.2 Loading Label Stock
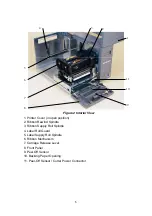
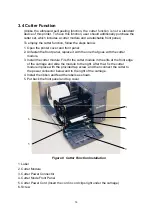
1. Open the printer cover
2. Disengage the printer carriage by pulling the printer carriage release lever
located to the left side of the platen.
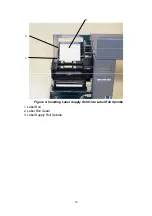
3. Lower the label roll guard to the horizontal position, slide the label stock into
label roll spindle, and then flip back the label roll guard.
4. Feed the label under the carriage and over the platen.
5. Adjust the label guide to fit the width of the media.
6. Engage the printer carriage.
7. Wind the label roll until it becomes adequately stretched for the intended
purpose.
8. Close the printer cover and press the
FEED
button three or four times until the
green
ON-LINE
indicator illuminates.
9. When the printer is out of ribbon or media, the
ON-LINE
LED will not illuminate
and the
ERROR
LED will flash. Reload the ribbon or media without turning off
the printer power. Press the
FEED
button three or four times until the
ON-
LINE
LED illuminates. The printing job will be resumed without data loss.
9

