34
saue
Series 90
Inspections and Adjustments
8
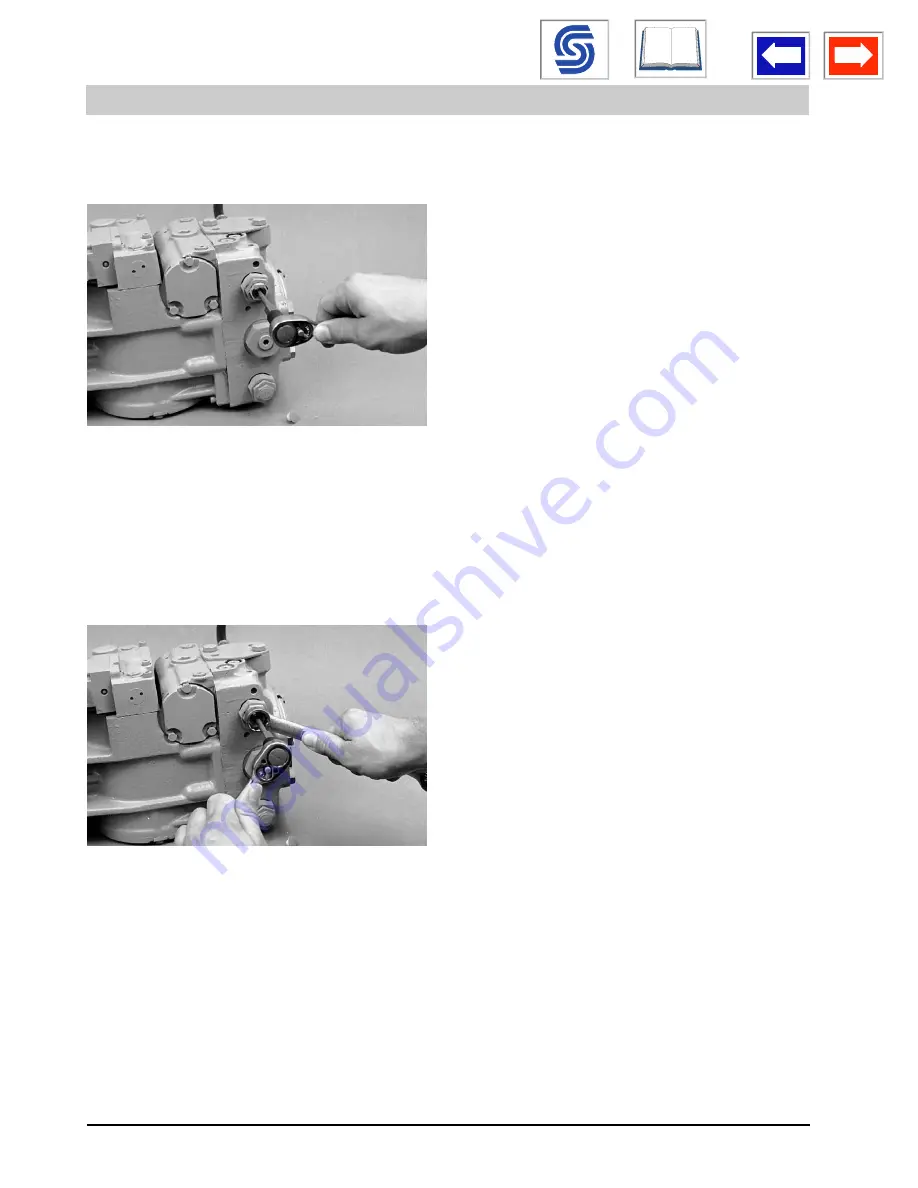
6. Return the pump to its “neutral” (zero flow) posi-
tion and adjust the pressure limiter setting by
rotating the pressure adjusting screw with the
internal hex wrench.
Clockwise rotation of the pressure adjustment
screw will increase the pressure setting, and
counterclockwise rotation will decrease the pres-
sure setting. Each complete rotation of the pres-
sure adjusting screw changes the pressure set-
ting by approximately 83 bar (1200 psi) on earlier
042 through 100 units, or by approximately 93 bar
(1350 psi) on 030 and later 042 through 100 units.
7. To verify the actual pressure setting, actuate or
move the control input so that the pump again
develops pressure in the high pressure circuit to
the newly adjusted pressure limiter pressure set-
ting, and read the high pressure gauge. Then
allow the pump to return to its “neutral” position.
The pressure in the high pressure circuit should
return to the charge pressure setting.
8. While holding the pressure adjusting screw sta-
tionary, tighten the pressure adjusting screw lock
nut to 3 Nm (26 in•lbf) on early production units, or
16 Nm (12 ft•lbf) on late production units. Do not
over-torque.
9. Shut down the prime mover, remove the gauges
and install the gauge port plugs. Replace the
plastic dust plugs (if used).
The same procedure is used for setting the pressure
limit of the other multi-function valve, but the control
input signal must be activated or moved in the oppo-
site direction so that high pressure develops in the
opposite side of the closed circuit.
Rotate Pressure Adjusting Screw
90000260
Tighten Lock Nut
90000260
CONTENTS
Summary of Contents for PTV100/72
Page 11: ......
Page 12: ......
Page 28: ......
Page 29: ......
Page 30: ......
Page 31: ......
Page 32: ......
Page 33: ......
Page 34: ......
Page 35: ......
Page 36: ......
Page 37: ......
Page 38: ......
Page 39: ......
Page 40: ......
Page 41: ......
Page 42: ......
Page 44: ......
Page 54: ...Contents iv 032015 PN 4 ...
Page 175: ...Troubleshooting 70 35 032015 PN 133 ...
Page 187: ...Troubleshooting 70 47 032015 PN 145 ...
Page 205: ...Warranty DX EMISSIONS EPA 19 12DEC12 2 2 TS1721 UN 15JUL13 90 6 032015 PN 163 ...
Page 213: ...Warranty DX EMISSIONS CARB 19 01AUG14 8 8 RG26036 UN 24JUN14 90 14 032015 PN 171 ...
Page 214: ...Warranty 90 15 032015 PN 172 ...
Page 220: ...Engine Registration IBC 2 032015 PN 178 ...
Page 223: ...Engine Registration IBC 5 032015 PN 181 ...
Page 224: ...Engine Registration IBC 6 032015 PN 182 ...
Page 225: ...SERVICE MANUAL ...
Page 262: ...saue Axial Piston Pumps and Motors Service Manual Series 90 CONTENTS ...
Page 348: ...saue 87 Series 90 Exploded View Parts Drawings 10 Notes CONTENTS ...
Page 350: ......
Page 351: ......
Page 352: ......
Page 353: ......
Page 354: ......
Page 355: ......
Page 356: ......
Page 357: ......
Page 358: ......
Page 359: ......
Page 360: ......
Page 361: ......
Page 362: ......
Page 363: ......
Page 364: ......
Page 365: ......
Page 366: ......
Page 367: ......
Page 368: ......
Page 369: ......
Page 370: ......
Page 371: ......
Page 372: ......
Page 373: ......
Page 374: ......
Page 375: ......
Page 376: ......
Page 377: ......
Page 378: ......
Page 379: ......
Page 380: ......
Page 381: ......
Page 382: ......
Page 383: ......
Page 384: ......
Page 385: ......
Page 386: ......
Page 387: ......
Page 388: ......
Page 389: ......
Page 390: ......
Page 391: ......
Page 392: ......
Page 393: ......
Page 394: ......
Page 395: ......
Page 396: ......
Page 397: ......
Page 438: ......
Page 439: ......
Page 440: ......
Page 441: ......


