


10
Chapter 3
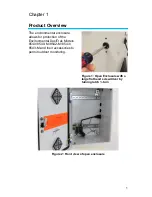
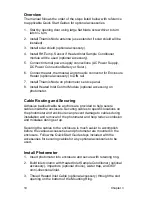
Overview
The manual follows the order of the steps listed below with reference
to applicable Quick Start Guides for optional accessories.
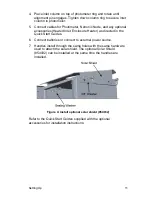
1. Start by opening door using large flat blade screw driver to turn
latch ¼ turn.
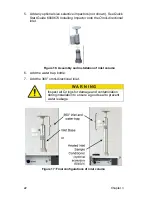
2. Install Thiamis Node antenna (use extender if solar shield will be
installed).
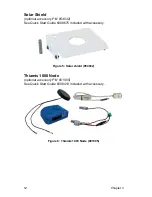
3. Install solar shield (optional accessory).
4. Install RH/Temp. Sensor if Heated Inlet Sample Conditioner
module will be used (optional accessory).
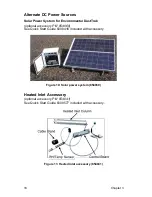
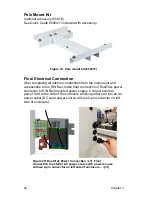
5. Connect internal power supply connections (AC Power Supply,
DC Power Connection Battery or Solar).
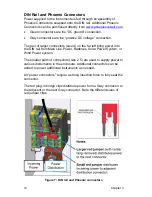
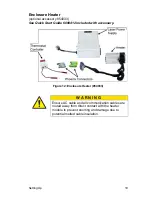
6. Connect heater, thermostat, and phoenix connector for Enclosure
Heater (optional accessory) to DIN rail.
7. Install Thiamis Node on photometer service panel.
8. Install Heated Inlet Control Module (optional accessory) on
photometer.
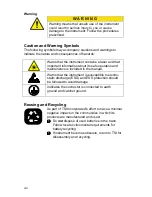
Cable Routing and Securing
Adhesive backed cable tie anchors are provided to help secure
cables inside the enclosure. Securing cables to specific locations on
the photometer and enclosure can prevent damage to cables during
installation and removal of the photometer and help reduce confusion
and mistakes during set up.
Securing the cables to the enclosure is much easier to accomplish
before the various accessories and photometer are mounted in the
enclosure. Follow the Quick Start Guide steps included with the
accessories for securing cables for any optional accessories to be
used.
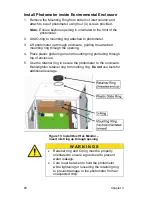
Install Photometer
1. Insert photometer into enclosure and secure with retaining ring.
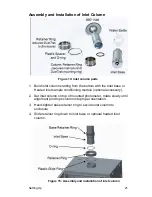
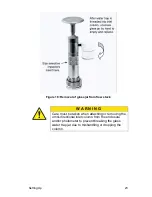
2. Build inlet column with Heated Inlet Sample Conditioner (optional
accessory), impactors (optional choice), water trap, and 360°
omni-directional inlet.
3. Thread Heated Inlet Cable (optional accessory) through the slot
opening on the bottom of the Mounting Ring.
Summary of Contents for DUSTTRAK 854030
Page 2: ......
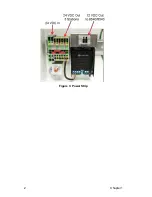
Page 12: ...2 Chapter 1 Figure 3 Power Strip ...
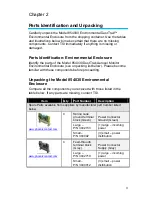
Page 18: ...8 Chapter 2 This page intentionally left blank ...
Page 36: ...26 Chapter 3 This page intentionally left blank ...
Page 48: ...38 Chapter 4 This page intentionally left blank ...
Page 52: ...42 Chapter 5 This page intentionally left blank ...
Page 54: ...44 Chapter 6 This page intentionally left blank ...
Page 58: ......


